Multiple Brands
The Multiple Brands feature allows you to manage multiple brand identities within a single account, giving candidates a seamless branded experience across job boards, candidate flows, and forms. This feature is ideal for organizations with multiple brands or subsidiaries and can help each brand maintain its unique presence under a unified system.
Multiple brands can be enabled for organizations on the Plus and Enterprise plans. Plus plan organizations can have a maximum of five brands:
Foundations | Legacy Plus | Plus | Enterprise |
|---|---|---|---|
❌ | ❌ | ✅ | ✅ |
For details on setting up each branded job board with an existing careers website, check out Can we post our jobs to our existing careers page?
Overview
The Multiple Brands feature is built to support organizations with more than one brand or business line under a single data ownership structure, like a parent company with subsidiaries. With this feature, you can:
- Create branded job boards, job posts, and candidate touch points for each brand.
- Create brand-specific referral and custom tracking links for source tracking.
- Manage and configure external integrations, like LinkedIn, individually for each brand.
Is my team’s use case suitable for Multiple Brands?
This feature is best for companies with shared data ownership among brands, like subsidiaries under a parent company.
Use Case | Recommended? | Notes |
|---|---|---|
Parent Company with Subsidiaries | Yes | Multiple brands recommended. A parent company with several subsidiaries can set up each subsidiary as a brand while maintaining centralized data ownership. |
Firms with Portfolio Companies | Maybe | If the firm maintains data ownership for each portfolio company, the Multiple Brands feature may be used. For independent data ownership, create separate organizations for each company. |
Companies that require independent data ownership | No | Multiple brands not currently recommended in this case. Separate organizations are recommended to maintain privacy compliance. |
Key Features
Branded Job Boards and Candidate Flows
- Distinct Job Boards: Create unique job boards for each brand with specific URLs, logos, colors, and custom branding options.
- Branded Candidate Flows: Ensure candidates experience branded elements such as:
- Booking links
- Availability requests
- Surveys (including EEOC)
- Branded custom tracking and referral links
The brand experience is determined by the brand assigned to the job on the Settings tab.
Configuring Multiple Brands
Create and configure your first additional brand and the brand's job board settings
- Navigate to Admin > Job Board > Theme (Job Board)
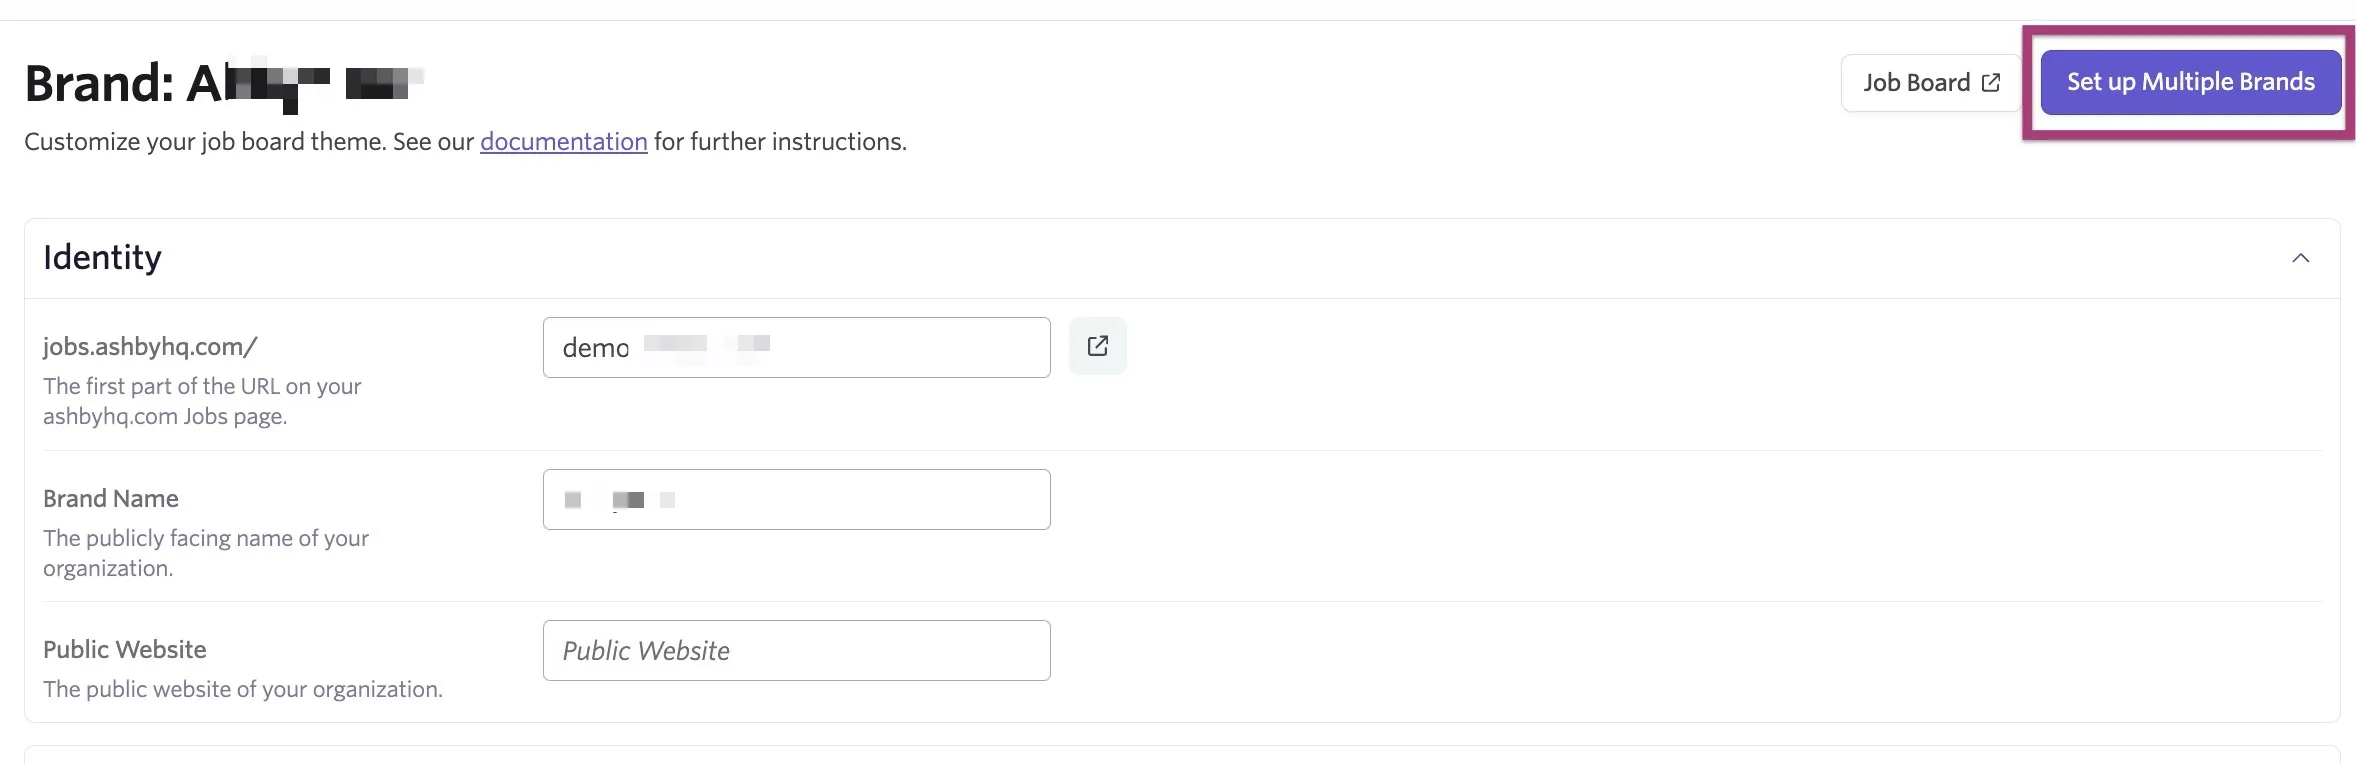
- This will open up the Brands page. Your default brand will be shown here at first. To create an additional brand, click Set up Multiple Brands, then Continue
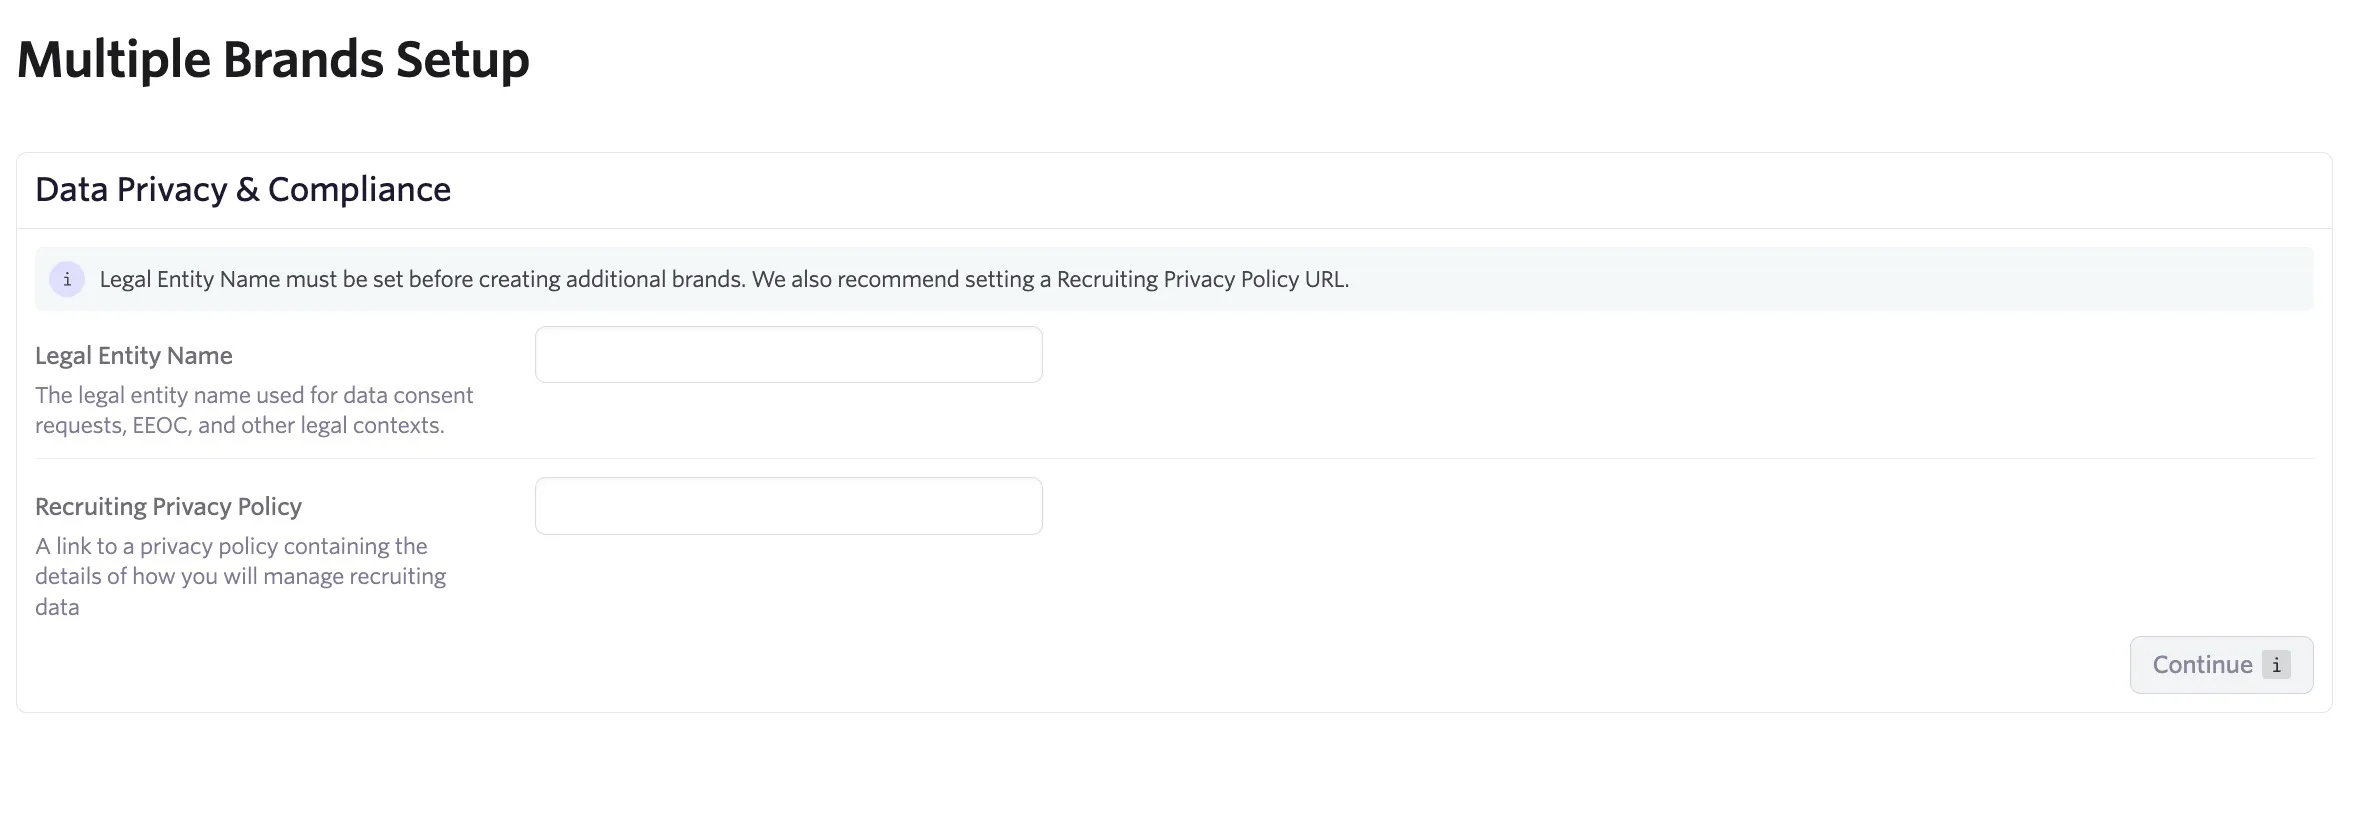
- On the following page, add in the legal entity name. The legal entity name added here should be the name used for data consent requests, EEOC and other legal contexts. We also recommend adding in a recruiting privacy policy URL.
- Click Continue
- You will then be prompted to enter a display name and email address for your default shared alias.
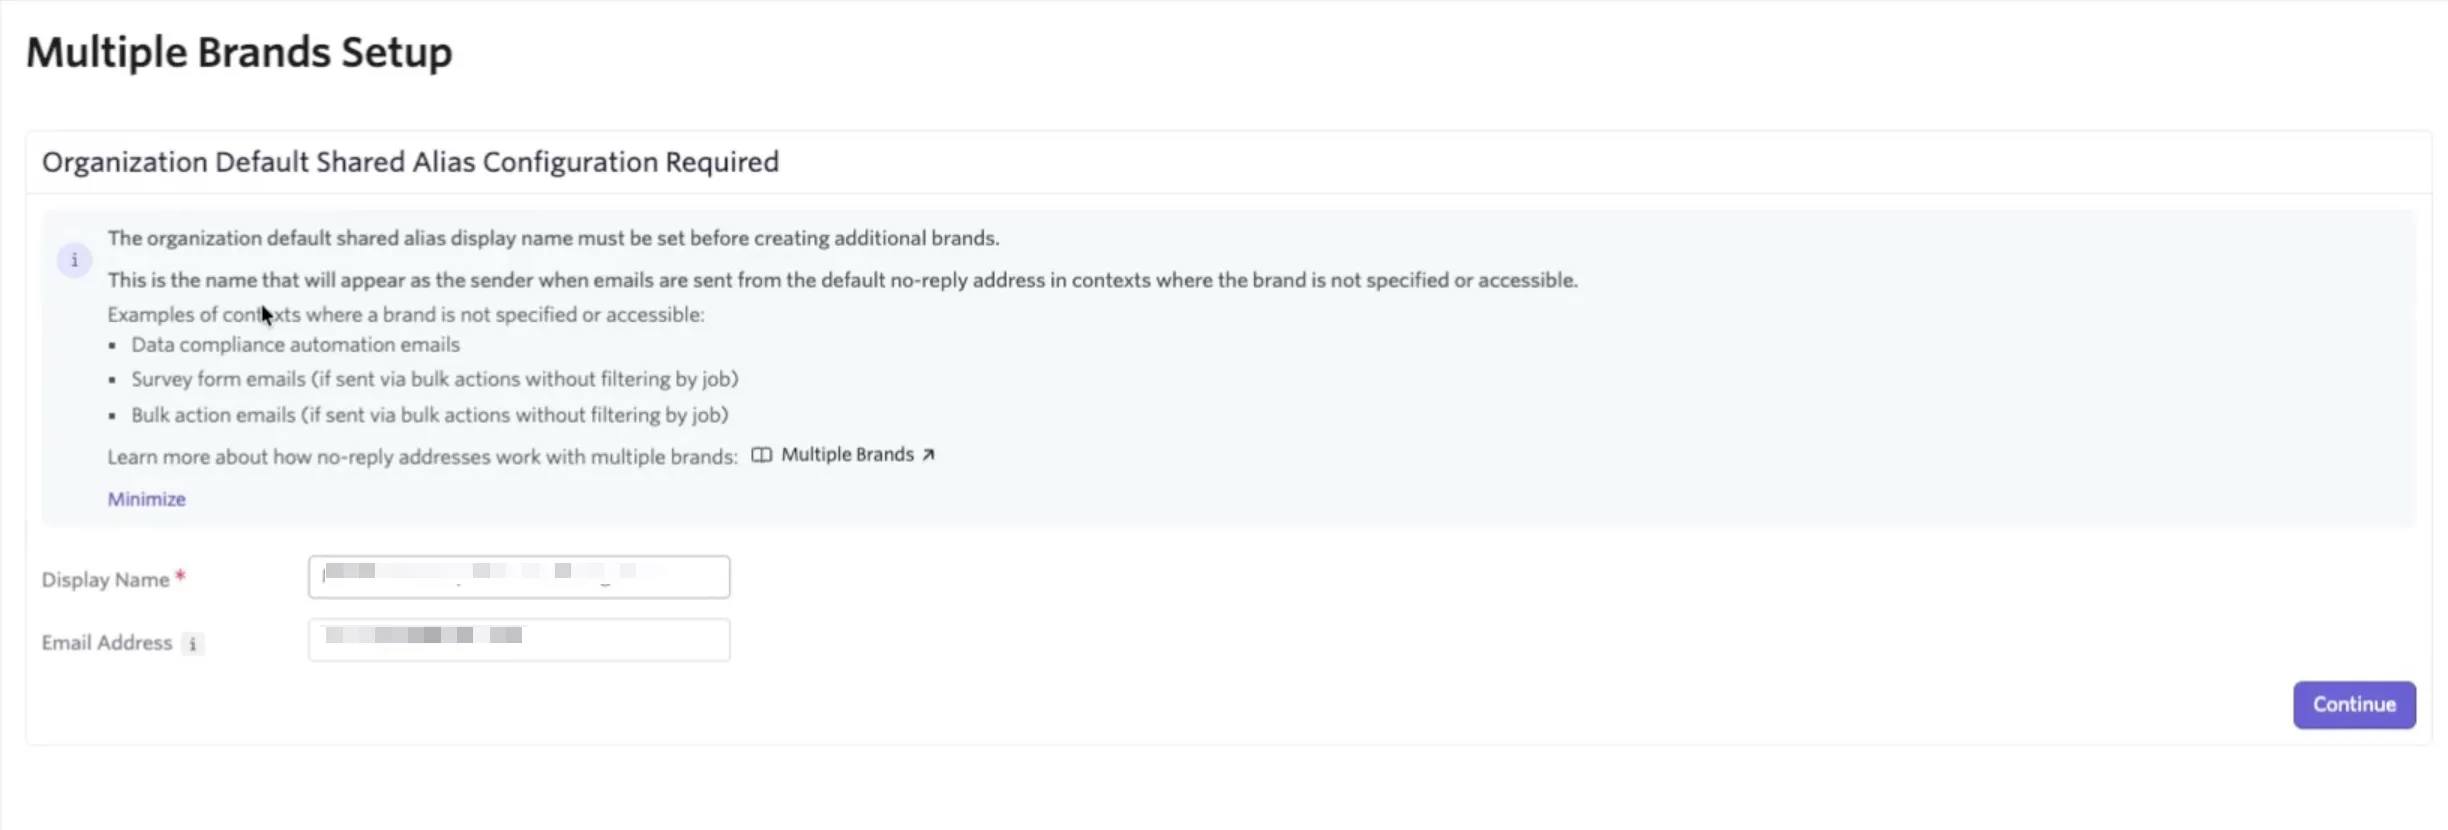
This will be used as the sender when emails are sent from the default no-reply address in cases where the brand is not specified or accessible. These examples include:
- Data compliance automation emails
- Survey form emails (if sent via bulk actions without filtering by job)
- Bulk action emails (if sent via bulk actions without filtering by job)
- Click Continue to confirm
- Add your brand name and job board slug for your new brand.
At this point, we recommend ensuring that your email templates do not unintentionally reference brand names in them. The Organization Name substitution token can be used in email templates as this will adapt to the brand associated with the job.
We also recommend checking surveys and other forms do not reference specific brand names in questions, especially when using NPS fields. We recommend using 'us' and 'our company' instead.
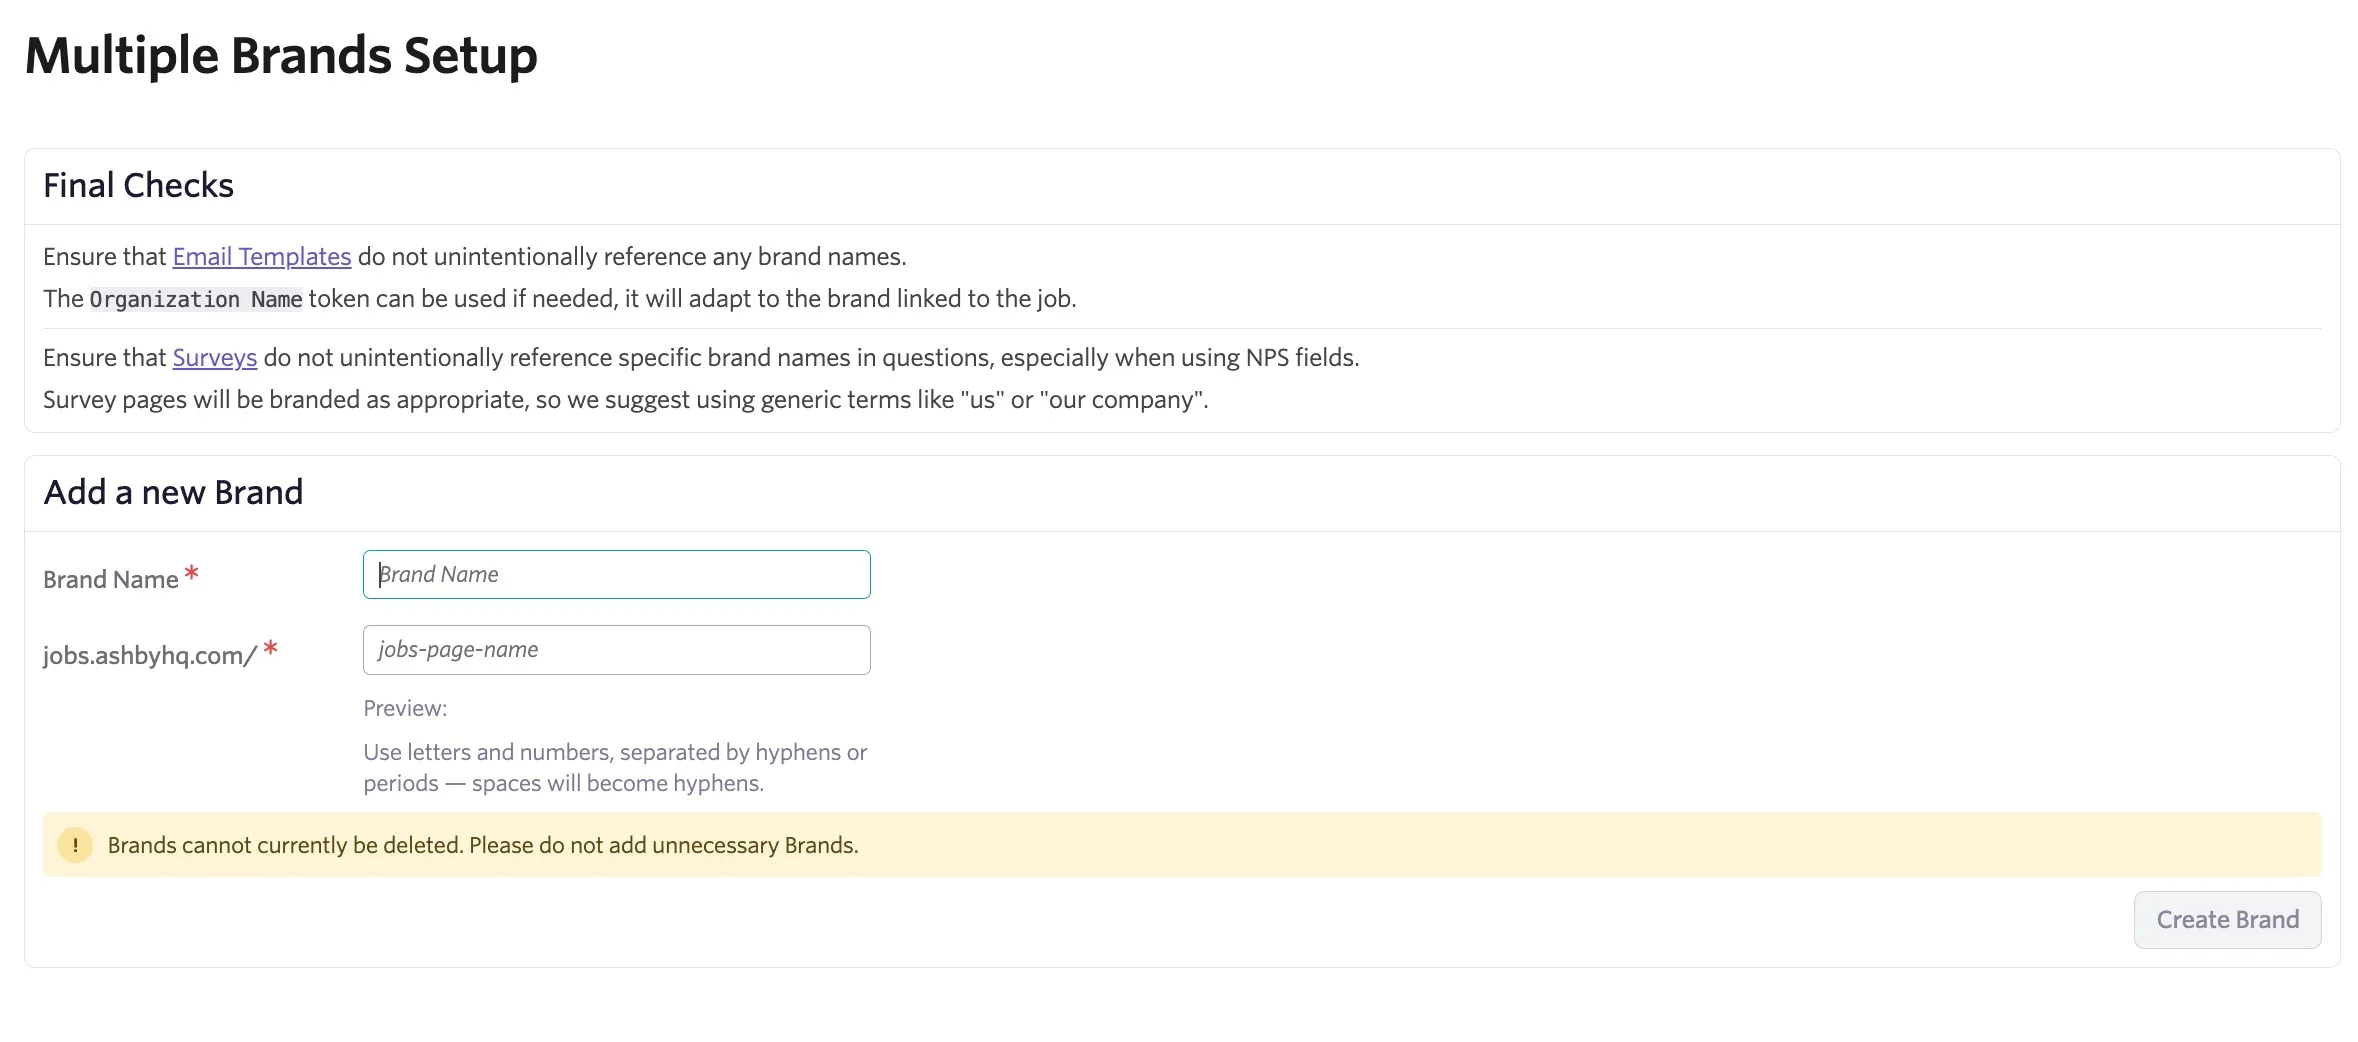
- Click Create Brand to confirm and create your new brand. You will then be taken to set you new brand's job board settings.
- Configure the new brand’s job board settings, including:
- Job board URL: the first part of the URL on your brand's Ashby job board
- Brand name: The publicly facing name of the brand
- Logo and color scheme for branded candidate experience
Visit Job Board: Configuring Your Setup for full details on brand job board configuration options
Moving forward, when you navigate to Admin > Job Board > Theme (Job Board), you will be able to select a brand before making adjustments to that brand's job board.
Adding Additional Brands
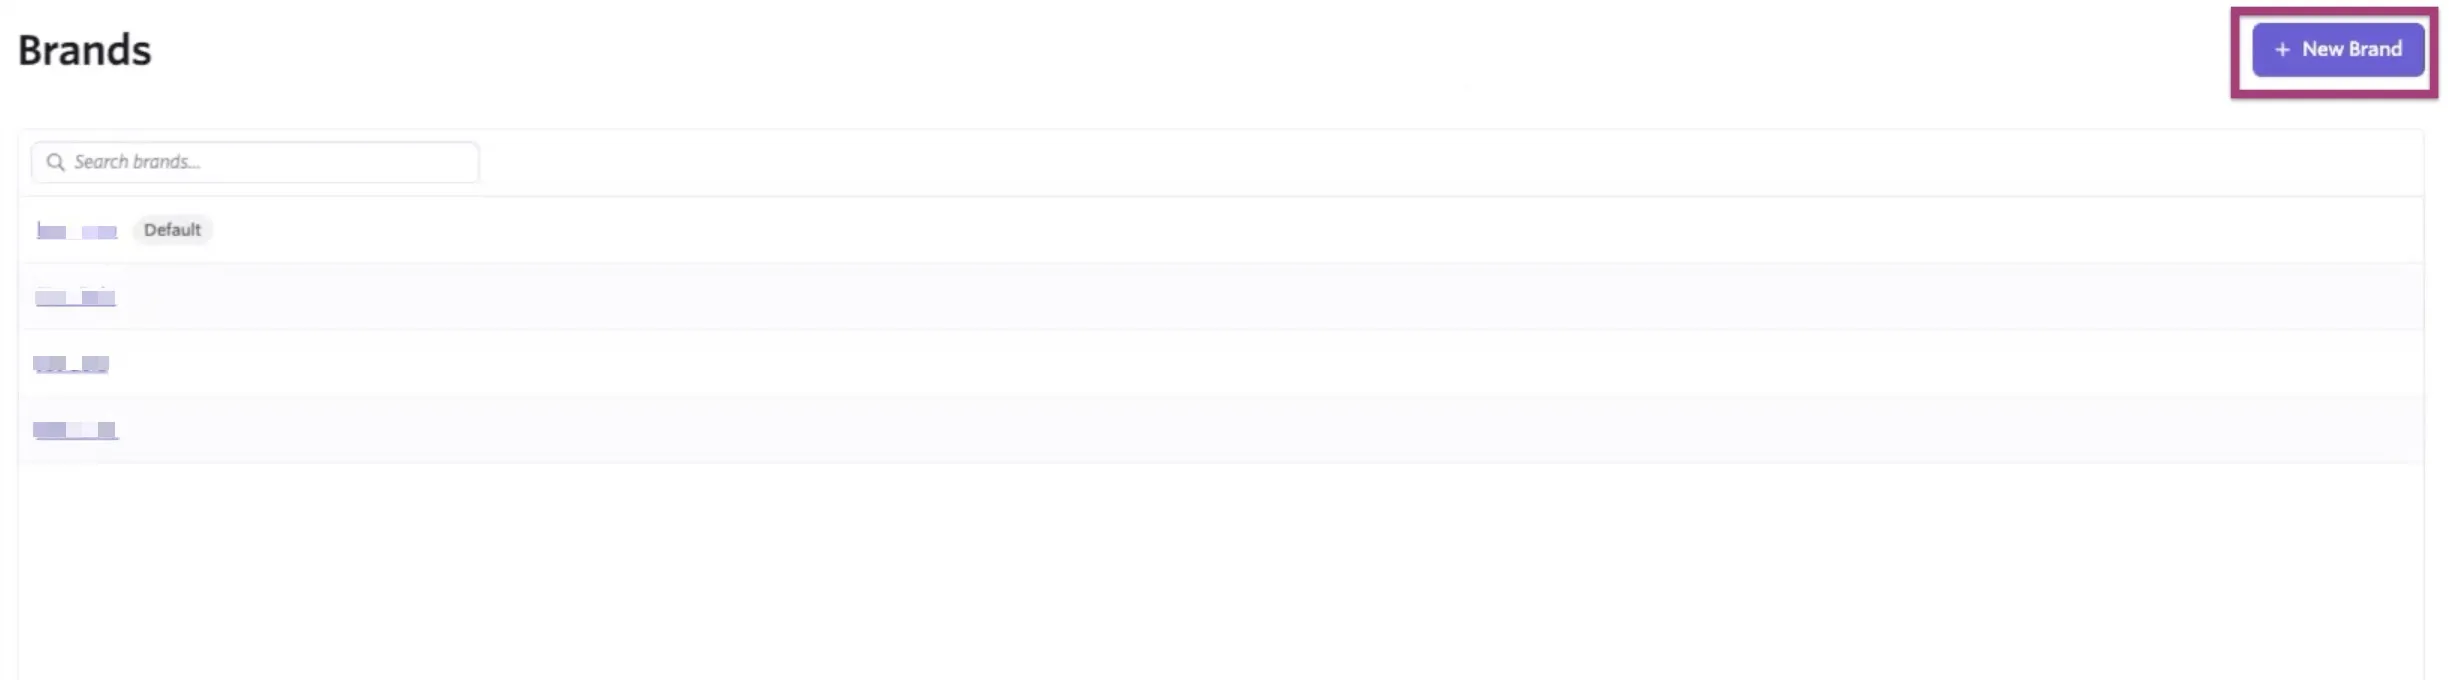
Once you've configured Multiple Brands, you can add a new brand by heading to Admin > Job Board > Theme (Job Board) and clicking + New Brand. You'll then be able to add in additional brand details like theb public facing name and website.
Associating jobs with an alternative brand
- Navigate Jobs > Jobs to view your job list
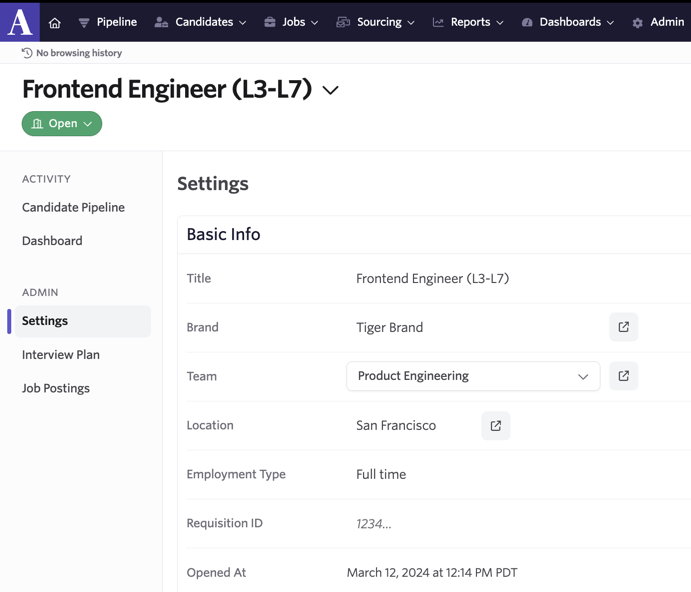
- When in a job, head to the Settings tab, then select the brand in the Brand dropdown.
- This assignment controls how each job appears on postings on branded job boards and in candidate communications. Each job’s brand controls the branding visible on job boards and other candidate-facing communications.
Jobs can only be connected to one brand. It's not possible to link a job to multiple brands
Integration Support for External Job Platforms
Each brand can be configured with its own integration settings for all job board integrations.
To configure job board integration settings for each of your brands:
- Navigate to Admin > Integrations > Integrations Marketplace
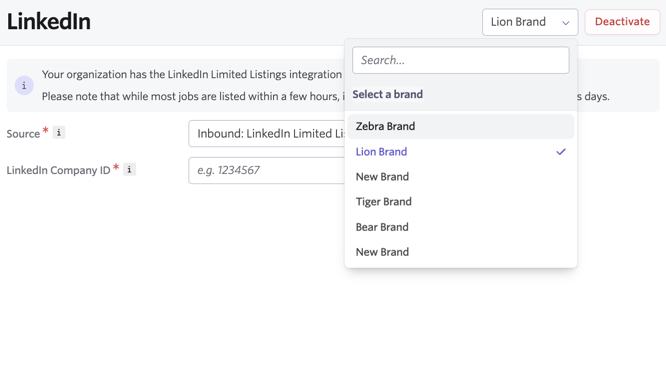
- Select the integration in question and open the dropdown menu to the top right to navigate between brand configuration pages.
- Configure each to your team’s specifications (it’s not required to setup the integration for each brand).
Jobs that are associated with the selected brands will then be pushed to the third-party job board you've set up the integration with.
Multiple brands: candidate texting (optional)
Multiple brands candidate texting allows you to assign different phone numbers to different brands for texting candidates. If you do not opt to enable this option, then text messages across all brands will be sent via the organization's default phone number.
Prerequisites:
- You will need to have candidate texting configured on your account prior to configuring phone numbers of each brand. Read more on setting up candidate texting at Candidate Texting Onboarding and Candidate Texting.
- You will also need to have at least one additional brand configured to have the option to enable multiple brands texting.
Enabling multiple brands candidate texting
To enable candidate texting for multiple brands:
- Navigate to Admin > Organization Setup > Candidate Texting
- On the General tab, switch on Enable Multiple Brands Texting
Once this is enabled, brands will no longer be able to use the organization's default phone number and will need to have a phone number assigned to them. Any brands that do not have a phone number assigned to them will not be able to send texts.
Add a phone number and assign it to a brand
Once you have candidate texting and multiple brands configured on your account, you can assign a phone number to each brand. To do this:
- Navigate to Admin > Organization Setup > Candidate Texting
- Click on the SMS tab
- Any brands that are not associated with a phone number will be highlighted as not having a phone number assigned in a yellow alert above the table of phone number and linked brands.
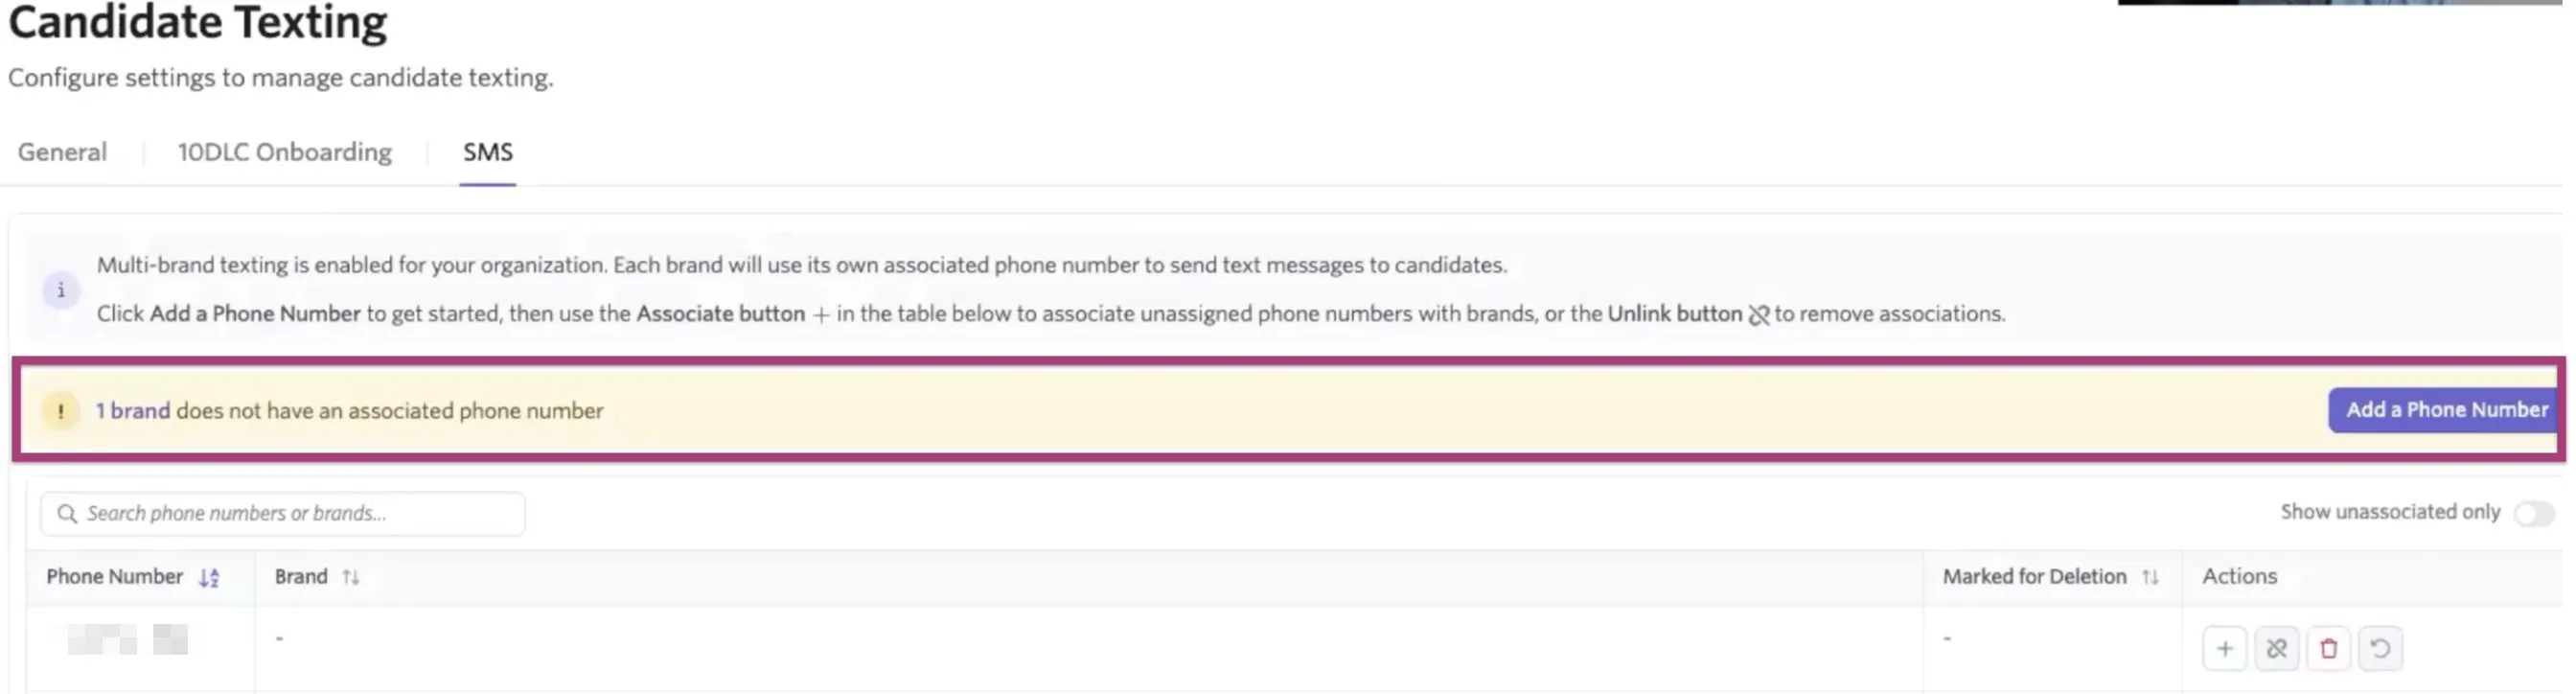
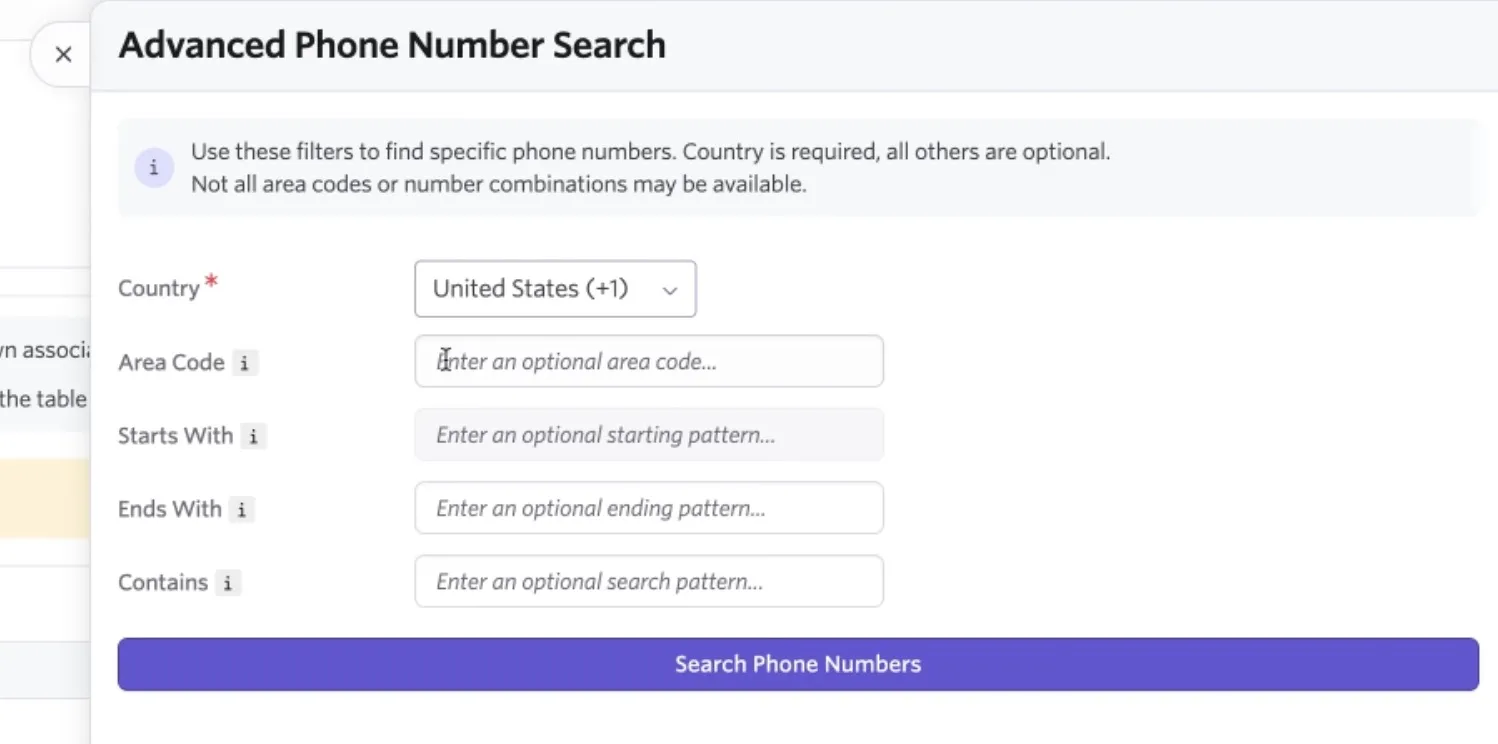
- Click Add a Phone Number on this alert to add a new phone number. You'll have options to filter by the country code, the area code, starting pattern, ending pattern and search pattern when finding and adding a new phone number.
- Click Search Phone Numbers to view a list of phone numbers matching your criteria and select a number from the results by clicking Add next to the phone number you'd like to use moving forward.
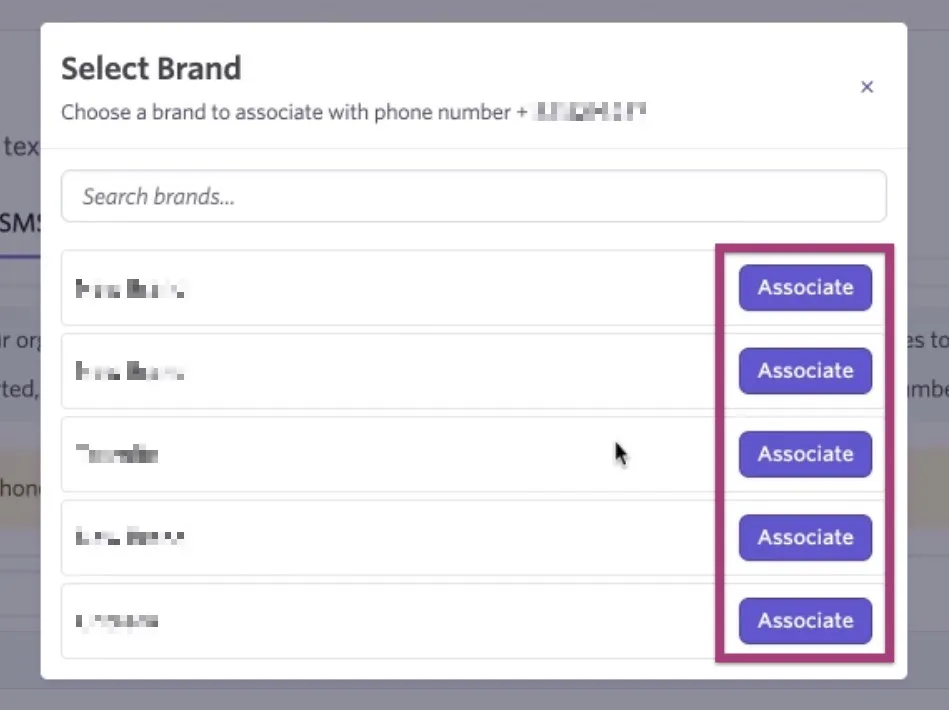
- Find the newly added phone number and click the + icon in the Actions section of the table to associate it with a brand. Select the brand from the list pop up and click Associate beside the brand in question to confirm the association.
If you would like to filter the table to only view phone numbers that haven't been associated with a brand, toggle on the Show unassociated only option above the Actions column of the table.

Removing brand association from phone numbers
Want to remove brand association from a phone number? Click the crossed out link icon within the Actions column of the table. Click Remove to confirm. The phone number will still be listed as available to link to other brands or re-link to the brand it was associated with before.

Deleting and restoring phone numbers from your account
If you'd like to remove a phone number completely, click the trash can icon in the Actions column of the table.

Click Delete to confirm the request to delete the phone number from your account. The phone number will be held for 30 days to allow incoming messages to be resolved, then will be removed. A deletion date with show in the Marked for Deletion column for your reference.
If within those 30 days you decide you'd like to keep that phone number moving forward, click the circular arrow icon in the Actions column, then Restore to restore the number and make it active again.

Deleted phone numbers cannot be restored after the date shown in the Marked for Deletion column.
Disable multiple brands texting
To disable candidate texting for multiple brands:
- Navigate to Admin > Organization Setup > Candidate Texting
- On the General tab, switch off Enable Multiple Brands Texting
- Click Disable to confirm
When multiple brands is disabled, all brands will be assigned your organization's default phone number.
All mappings set up when enabling multiple brands texting will be preserved in case you opt to re-enable multiple brands texting.
Multiple brands: brands and texts on the candidate profile
This section will cover the areas of the Texts tab on the candidate profile that help you to identify texts from brands and sending a candidate text as a specific brand. For more on candidate texting in general, check out Candidate Texting.
Filter texts on the candidate feed by brand
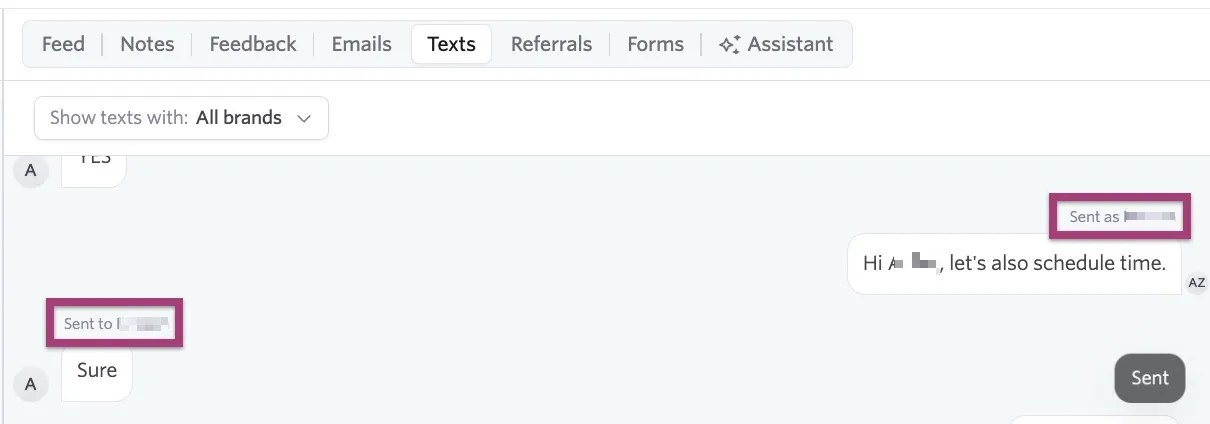
Above each text message listed on the text feed you will see the name of the brand that send the message. You can hover over the brand here to view the receiver's number, the hiring team member who sent the text and a timestamp of when the message was sent. Above each candidate's response, you will see the name of the brand their response has been sent to.
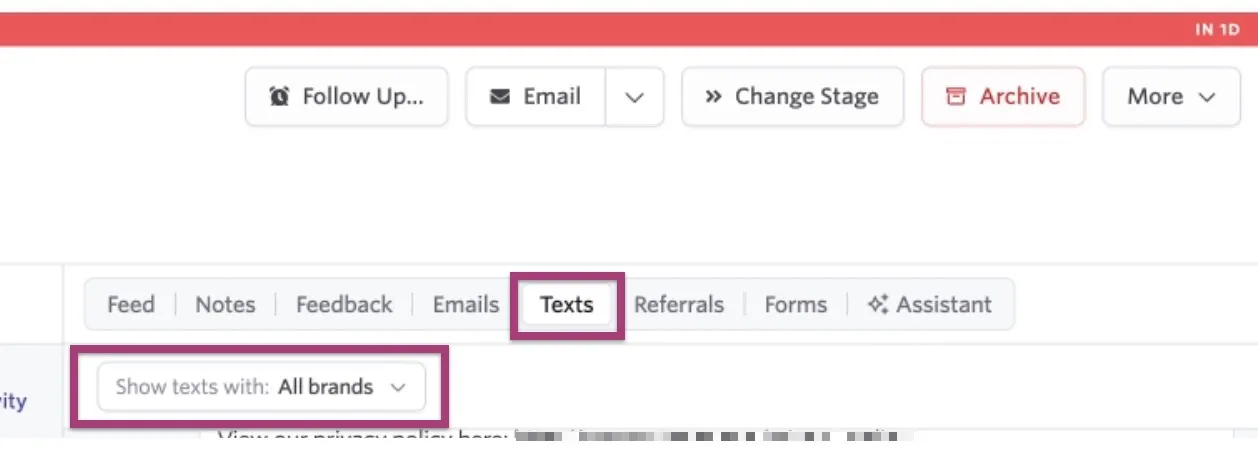
If you'd like to only see the texts sent from a specific brand on the Text tab of the candidate profile, use the Show texts with: dropdown to filter texts as needed.
Sending a text from a brand
Once you have multiple brands with associated phone numbers, you can select the brand from the From dropdown to determine who should send the text to the candidate

If the candidate has yet to opt in or opt out of receiving text messages, a message asking them to message START to consent to receiving texts or STOP to opt-out of future messaging will be sent on behalf of the organization using the legal entity name provided. If the candidate consents, this consent applies to all brands within your organization, so individual brands within your account don't need to reach out each time.