Set up Departments & Locations
This article covers how to configure departments and locations. Both are required for jobs and job postings and can be used for reporting and filtering candidates, jobs and job considerations.
Permissions & prerequisites:
- You must have Organization Admin access to configure departments and locations.
Permissions and access
Locations and departments can be configured on Foundations, Legacy Plus, Plus and Enterprise plans:
Foundations | Legacy Plus | Plus | Enterprise |
|---|---|---|---|
✅ | ✅ | ✅ | ✅ |
Department setup
Watching the video is optional. Follow the steps below to set up a department.
To set up a department:
- Navigate to Admin > Organization Setup > Departments & Teams.
- Click + New Department, then enter the department or team name.
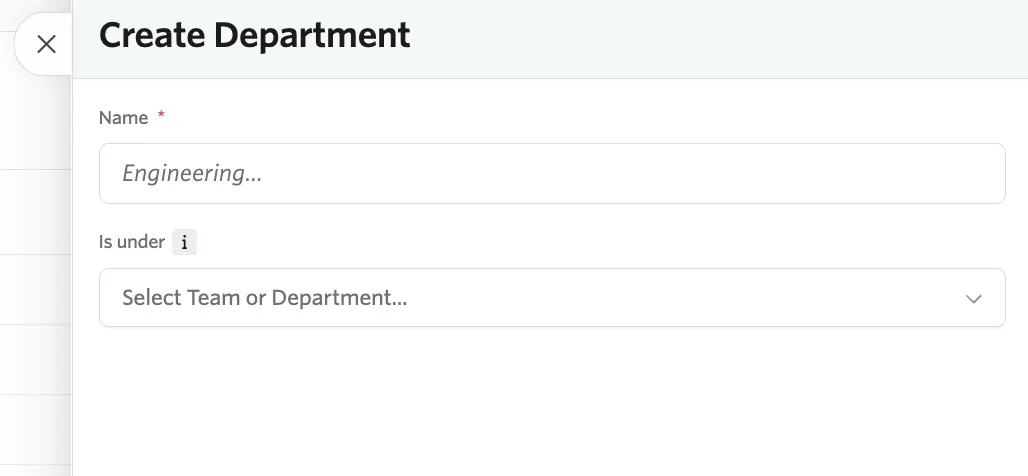
- You can also specify the department the new team/department is a part of. If it is a sub-team to be grouped under a department, select the parent department. If it is a top-level department, leave the Is under field blank.
- Click Create.
You can adjust the department a sub-team is under or remove parent teams after creating the department.
Editing a department
To edit a department:
- Navigate to Admin > Organization Setup > Departments & Teams.
- Click on the department or region you would like to edit.
- When editing, you also have the option to set a candidate-facing name for your department. If you set one, it is displayed on the job posting listed on your Ashby job board if you opt to list your posting.
- Make adjustments to the team name or assigned region. Changes are auto-saved.
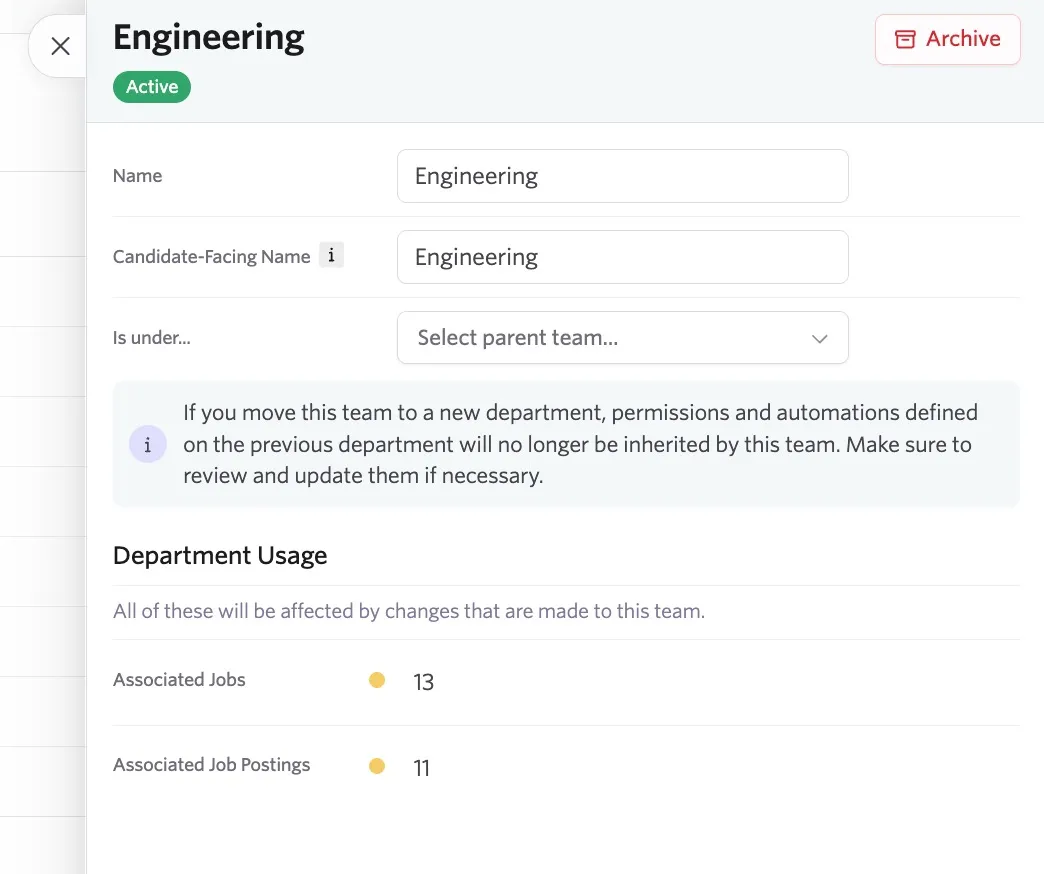
The Department Usage section shows all jobs and job postings associated with the department that are impacted by updates.
Archiving and restoring a department
To archive a department:
- Navigate to Admin > Organization Setup > Departments & Teams.
- Click on the department or region in question.
- Click Archive.
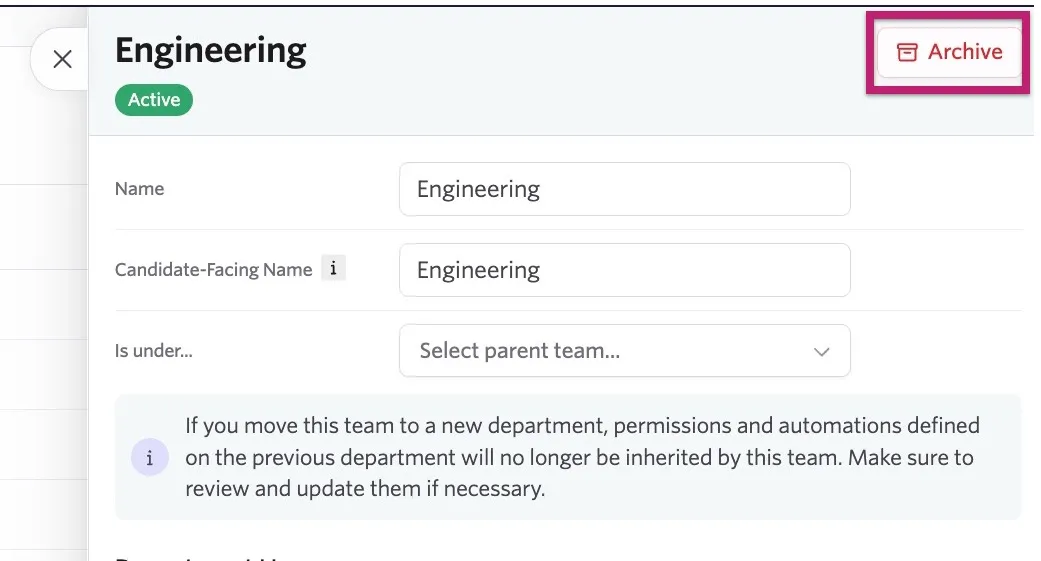
- If the department is linked to jobs, job postings, or has sub-teams, you are prompted to reassign jobs and review the impacted sub-teams. Edit the sub-teams separately and adjust or remove the team they are under before archiving a parent department if you do not want the teams to be archived along with the parent department.
- Click Start to confirm your changes and archive the department. You can review the changes once complete.
To restore a department:
- Navigate to Admin > Organization Setup > Departments & Teams.
- Click the Active dropdown and change it to All.

- Click on the department or region in question.
- Click Restore, then Restore on the following pop-up to confirm.
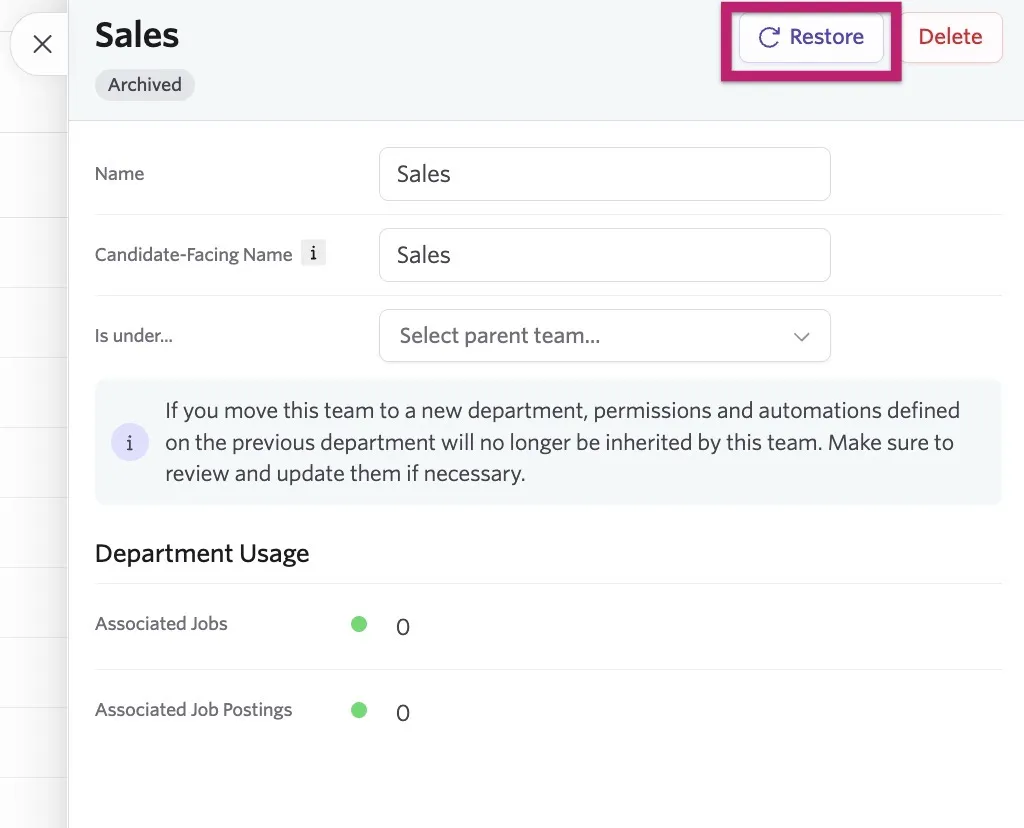
If you archive a department, you also have the option to delete it when opening the department's details. Deleted departments cannot be restored.
Location setup
Watching the video is optional. Follow the steps below to set up a location.
To set up a location:
- Navigate to Admin > Organization Setup > Locations.
- Click + New Location to create a new location, or click + New Region to create a region to group locations by.
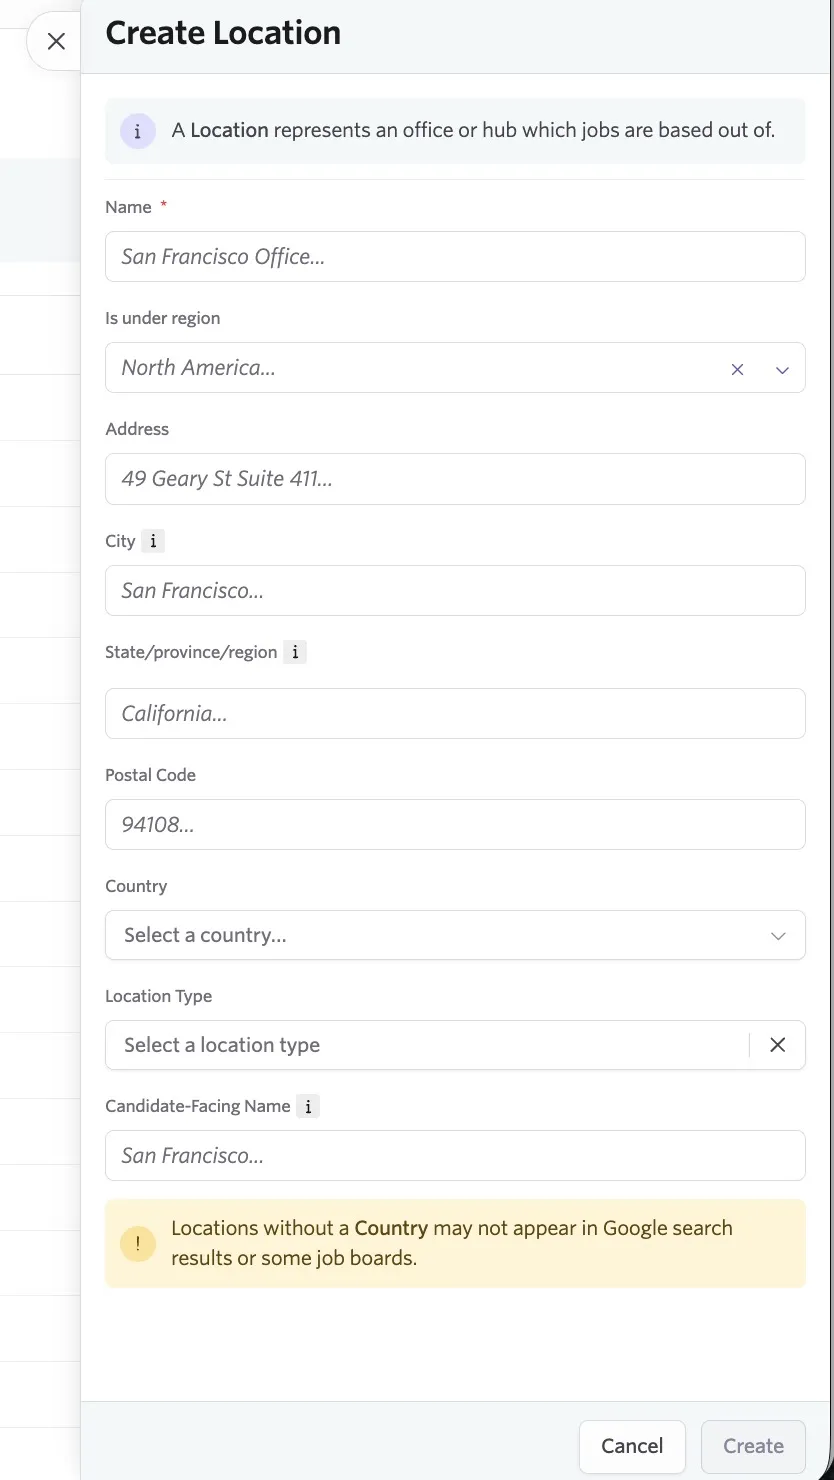
- When setting up locations, add location details if you want those jobs to appear on external job boards like LinkedIn and Indeed. Location details include the following:
- Name: The name of the location. This is both internal and candidate-facing if you don't set a candidate-facing name. This is required.
- Is under region: Determine the region the location is under.
- Address: Enter a street address.
- City: Add the city name.
- State/province/region: Add further region details.
- Postal Code: Enter the postal code.
- Country: Determine the country here.
- Location Type: Specify the type of location (for example, Remote or Hybrid) from the Location Type dropdown.
- Candidate-Facing Name: If you want a different name listed on your job board and for job postings that have this location set, enter it here.
Region setup
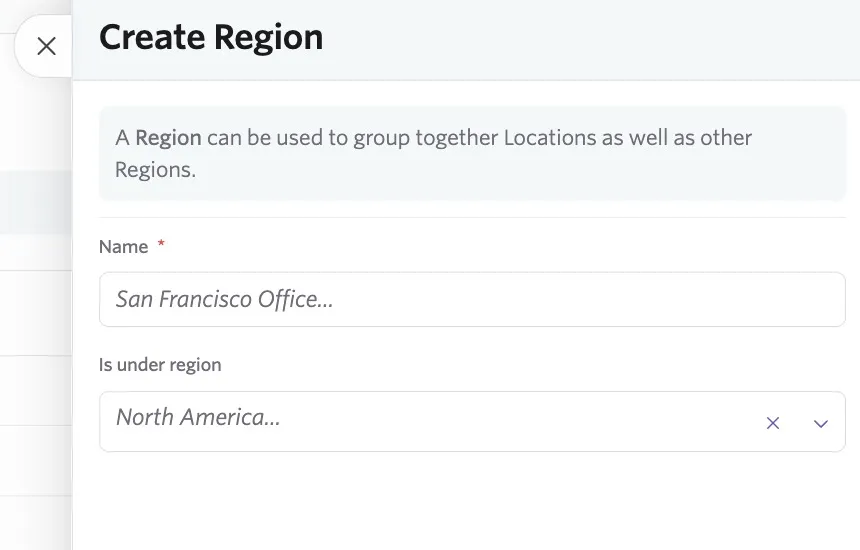
Regions are used to group together locations and other regions. To configure a region:
- Navigate to Admin > Organization Setup > Locations.
- Click + New Region.
- Add the region name and set whether it is underneath another region.
Addresses can only be assigned to locations, you cannot assign a location to a region.
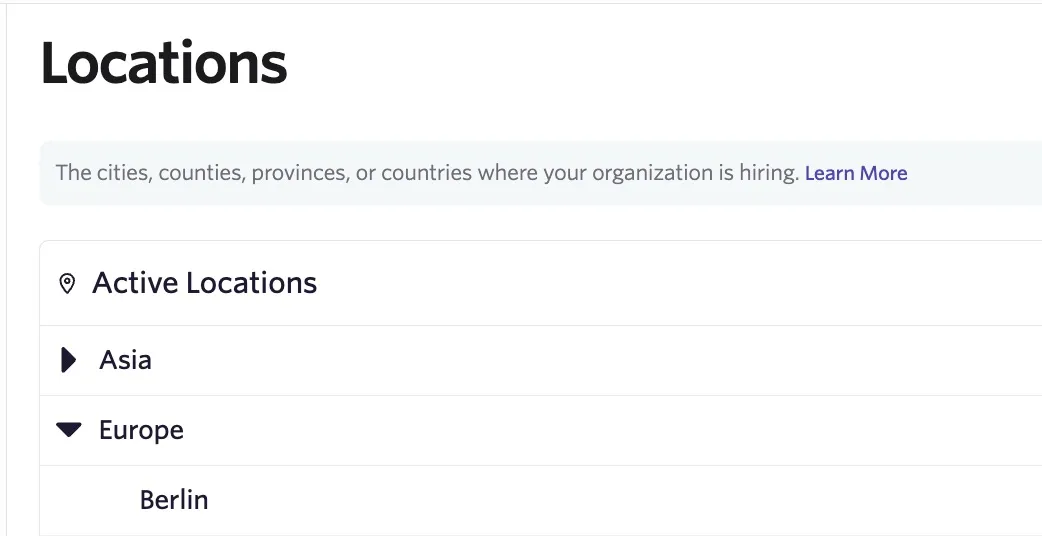
Regions will then show in your location list with drop-down arrows. You can click the arrow to open up the list of locations and sub-regions within that region.
Editing a location
To edit a location:
- Navigate to Admin > Organization Setup > Locations.
- Click on the location in question.
- Make adjustments to the location name, address, and type as needed. Changes are auto-saved.
- Review the Location Usage section to see how many jobs and job postings your location is linked to.
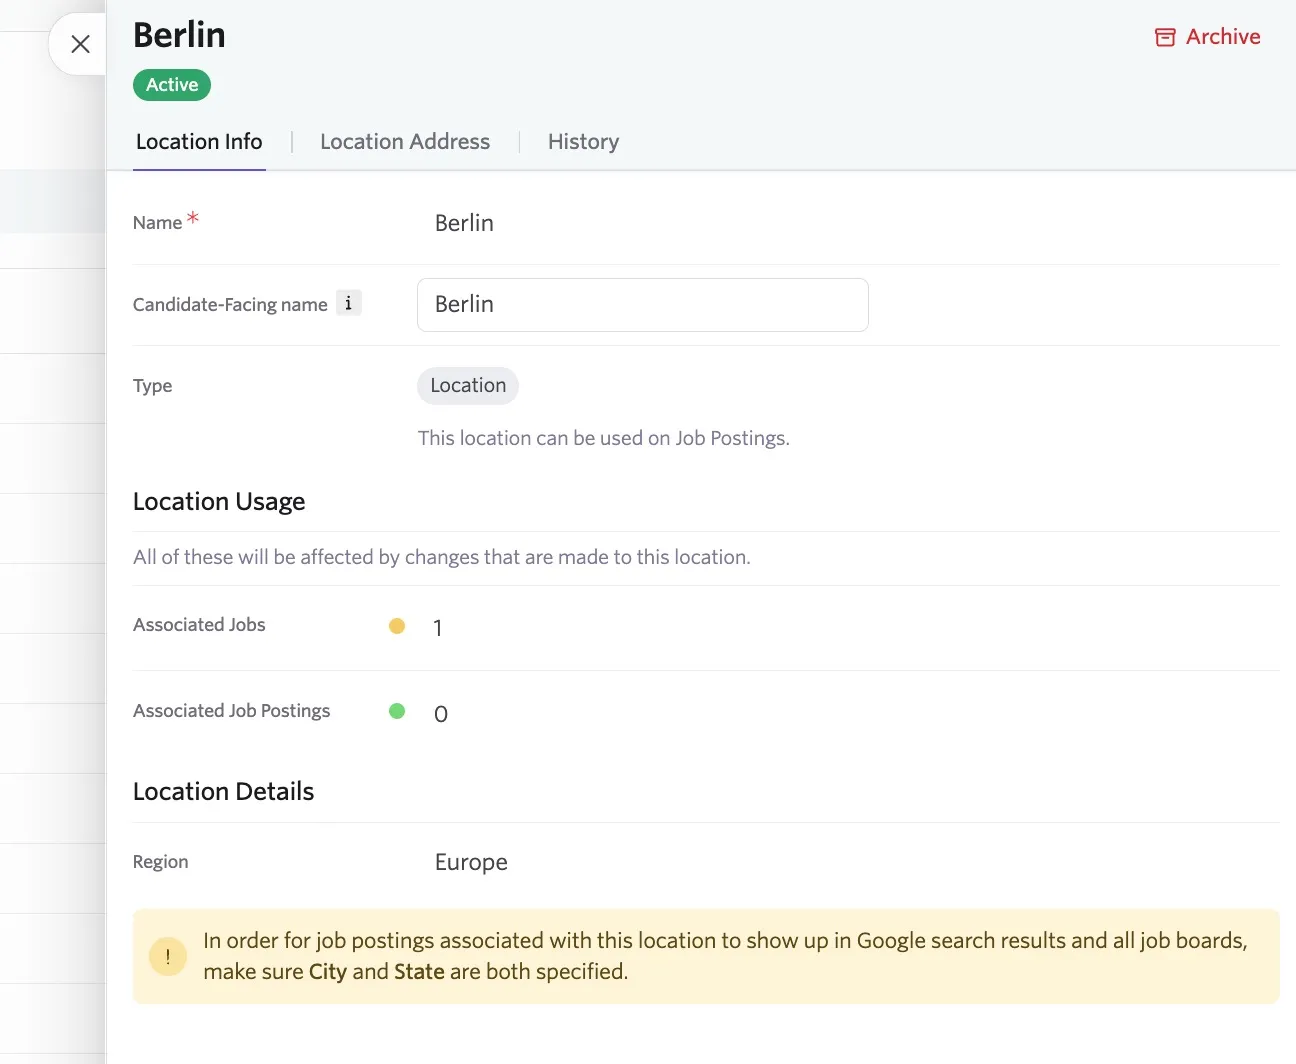
You can view the history of changes made to the location on the History tab.
Archiving and restoring a location
To archive a location:
- Navigate to Admin > Organization Setup > Locations.
- Click on the location in question.
- Click Archive and confirm by clicking Archive on the following pop-up.
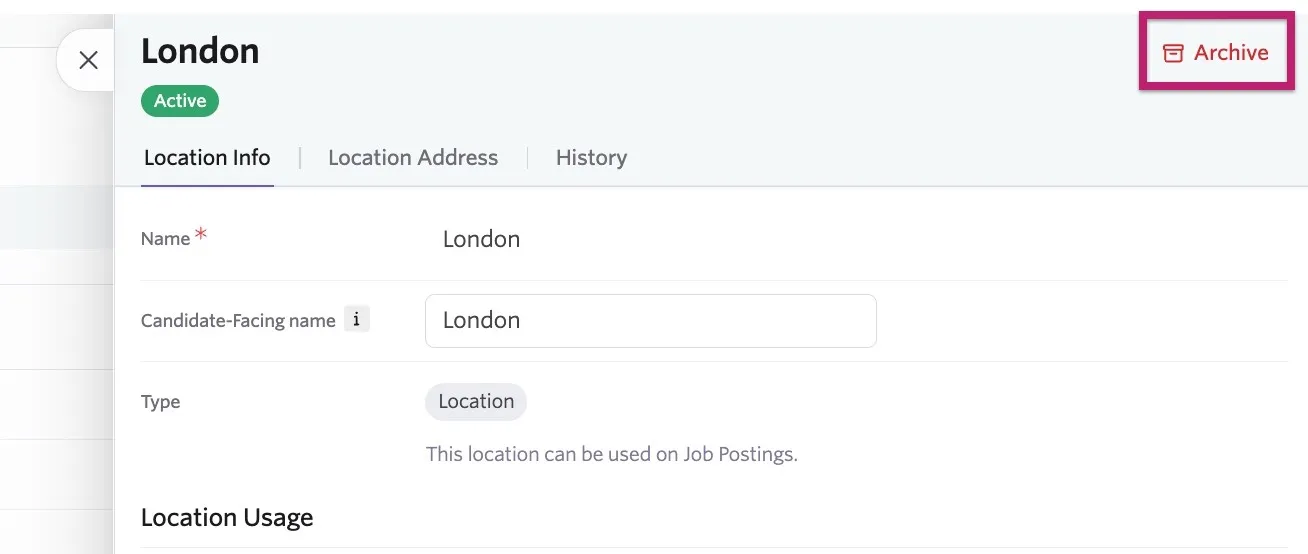
If you archive a location, you can no longer link it to jobs, but existing assignments are preserved. An archived location can be unarchived at any point in time.
To restore a location:
- Navigate to Admin > Organization Setup > Locations.
- Change the Active dropdown to All to view all locations, including archived ones.

- Click on the location in question.
- Click Restore and Restore on the following pop-up to confirm.
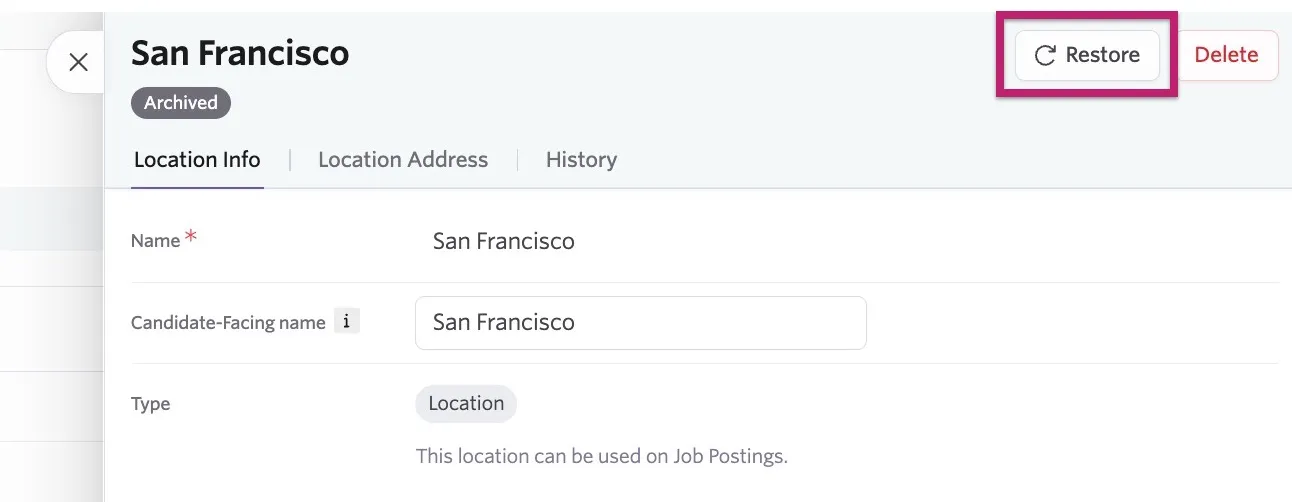
If you archive a location, you also have the option to delete it when opening the location's details. Deleted locations cannot be restored.
FAQs
When editing a location or department, I can see yellow dots in certain areas. What do these mean?
When amending a location, you see a Location Usage section. When editing a department, you see a Department Usage section.
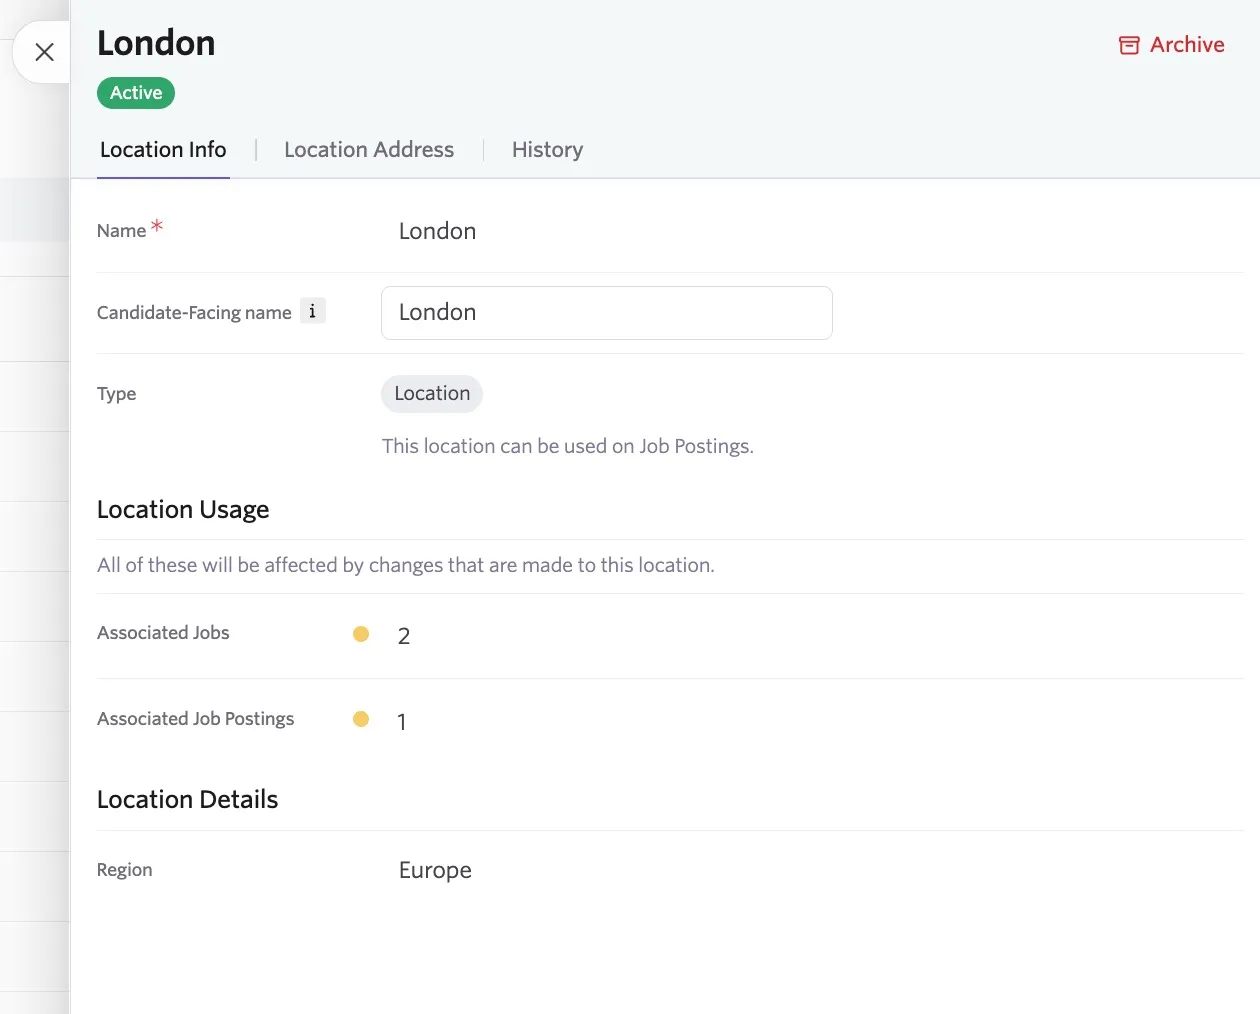
In these sections, you see the number of jobs and job postings linked to this location or department. If the dot beside a value is green, it means no jobs or job postings are currently using the location or department. If the marker beside a value is yellow, there are jobs or job postings linked to this location or department that are updated if you make changes.
Can I pull my interview locations from my job locations list?
No, interview locations are different from job locations. Interview locations are set within the Communications tab of your interview activity and can either be a custom location, a phone number, or video conferencing (Google Meet, Microsoft Teams, or Zoom). For more on setting a default interview location, check out Setting Scheduling DefaultsSetting Scheduling Defaults.
How do I give a user access to jobs within a specific department?
User permissions can be configured within Admin > Organization Setup > Employees. For more on providing users access to specific departments, check out User PermissionsUser Permissions.
Can I show the location's street address in my job postings?
You can set street addresses to be displayed on your job postings. To display the location address across all job postings on your job board, navigate to Admin > Job Boards > Theme (Job Board) and check the Show Location Address? checkbox within the Job Board Options section.

If an address has not been assigned to some of your locations, only the location name (or candidate-facing location name) is displayed on job postings assigned that location.