Greenhouse → Ashby Recruiting API Migration
This guide covers how to configure the API migration from Greenhouse to Ashby. The migration only retrieves data, and does not create, update, or delete anything in your Greenhouse account.
Prerequisites
- You must be an Organization Admin in Ashby to configure the migration settings.
- You must have Can manage ALL organization's API Credentials access in Greenhouse to configure the required API credentials.
Step one: Generate API credentials
To create your API credentials (also referred to as a Client ID and Client Secret pair) for the Greenhouse migration:
- In Greenhouse, click the Configure icon > Dev Center > API Credential Management.
- Click Create new API credentials.
- Fill in the fields:
- API type: Harvest V3 (OAuth)
- Description: Something identifiable, e.g., "Data Sync Integration" (do not include "Ashby" in the description).
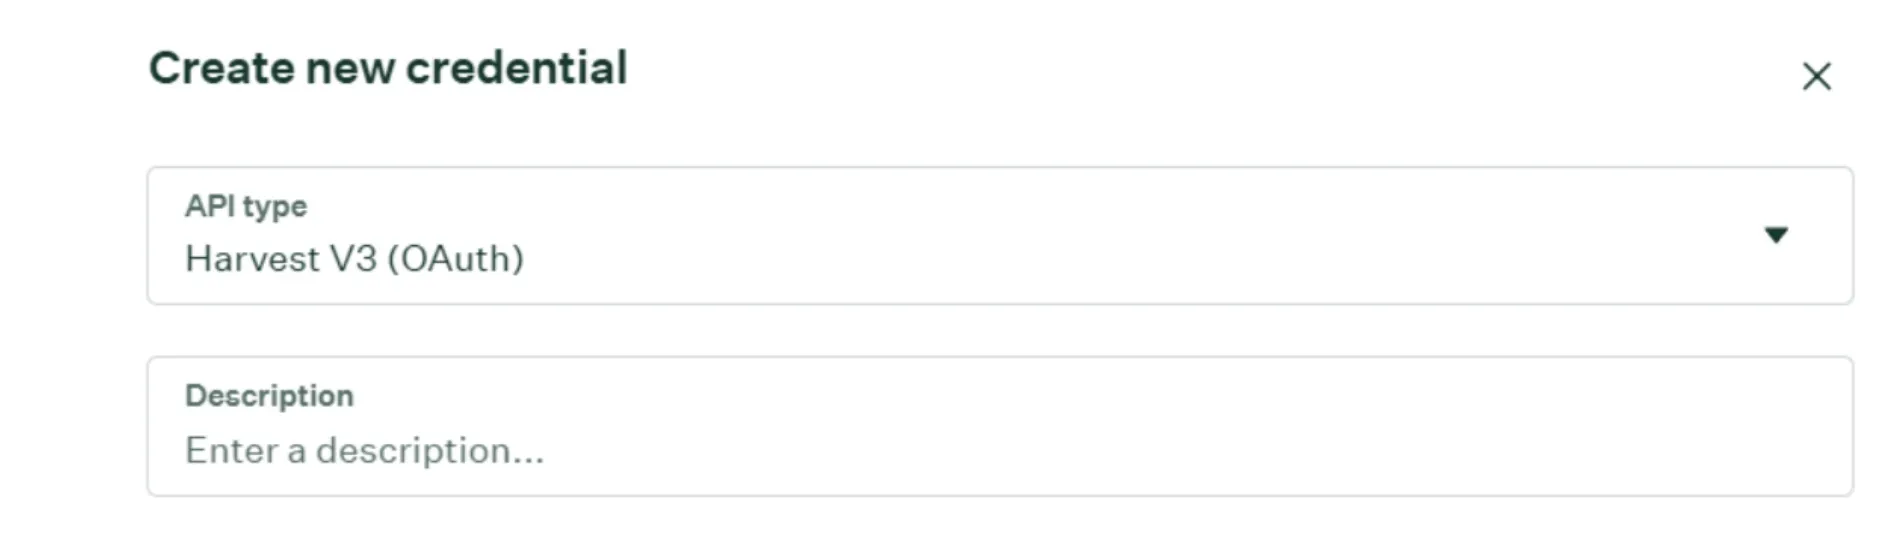
If you see a Partner field, select Custom integration.
- Click View and Store Credentials.
- Save your Client Key and Client Secret, and then click I have stored the client credentials.
Greenhouse shows the Client Secret only once. If you click past this screen without copying it, you need to rotate the credential to generate a new one. The Client ID remains visible afterward, but the secret does not. Copy both values to a secure location.
- Proceed to the permissions/scopes screen.
Set the required scopes
Select read scopes on all objects. This grants "list" access, meaning Ashby can list data for each object.
Click the dropdown next to Select All, then go through each option and select anything with ‘List’ in the name.
For example, you may see items such as:
- harvest:candidates:list
- harvest:applications:list
- harvest:notes:list
- harvest:application_stages:list
Once all List Scopes have been selected, scroll to the bottom of the page and click Save.
Step two: Configure webhooks
You need to configure 15 webhooks for the API migration. This step ensures that Ashby and Greenhouse sync key events accurately.
For more on configuring webhooks, see Setting up Greenhouse WebhooksSetting up Greenhouse Webhooks.
Step three: Enter your API credentials in Ashby
You can find your Greenhouse integration configuration in your admin section by navigating to Admin > Integrations > Greenhouse. This is where you enter your API credentials and subdomain.
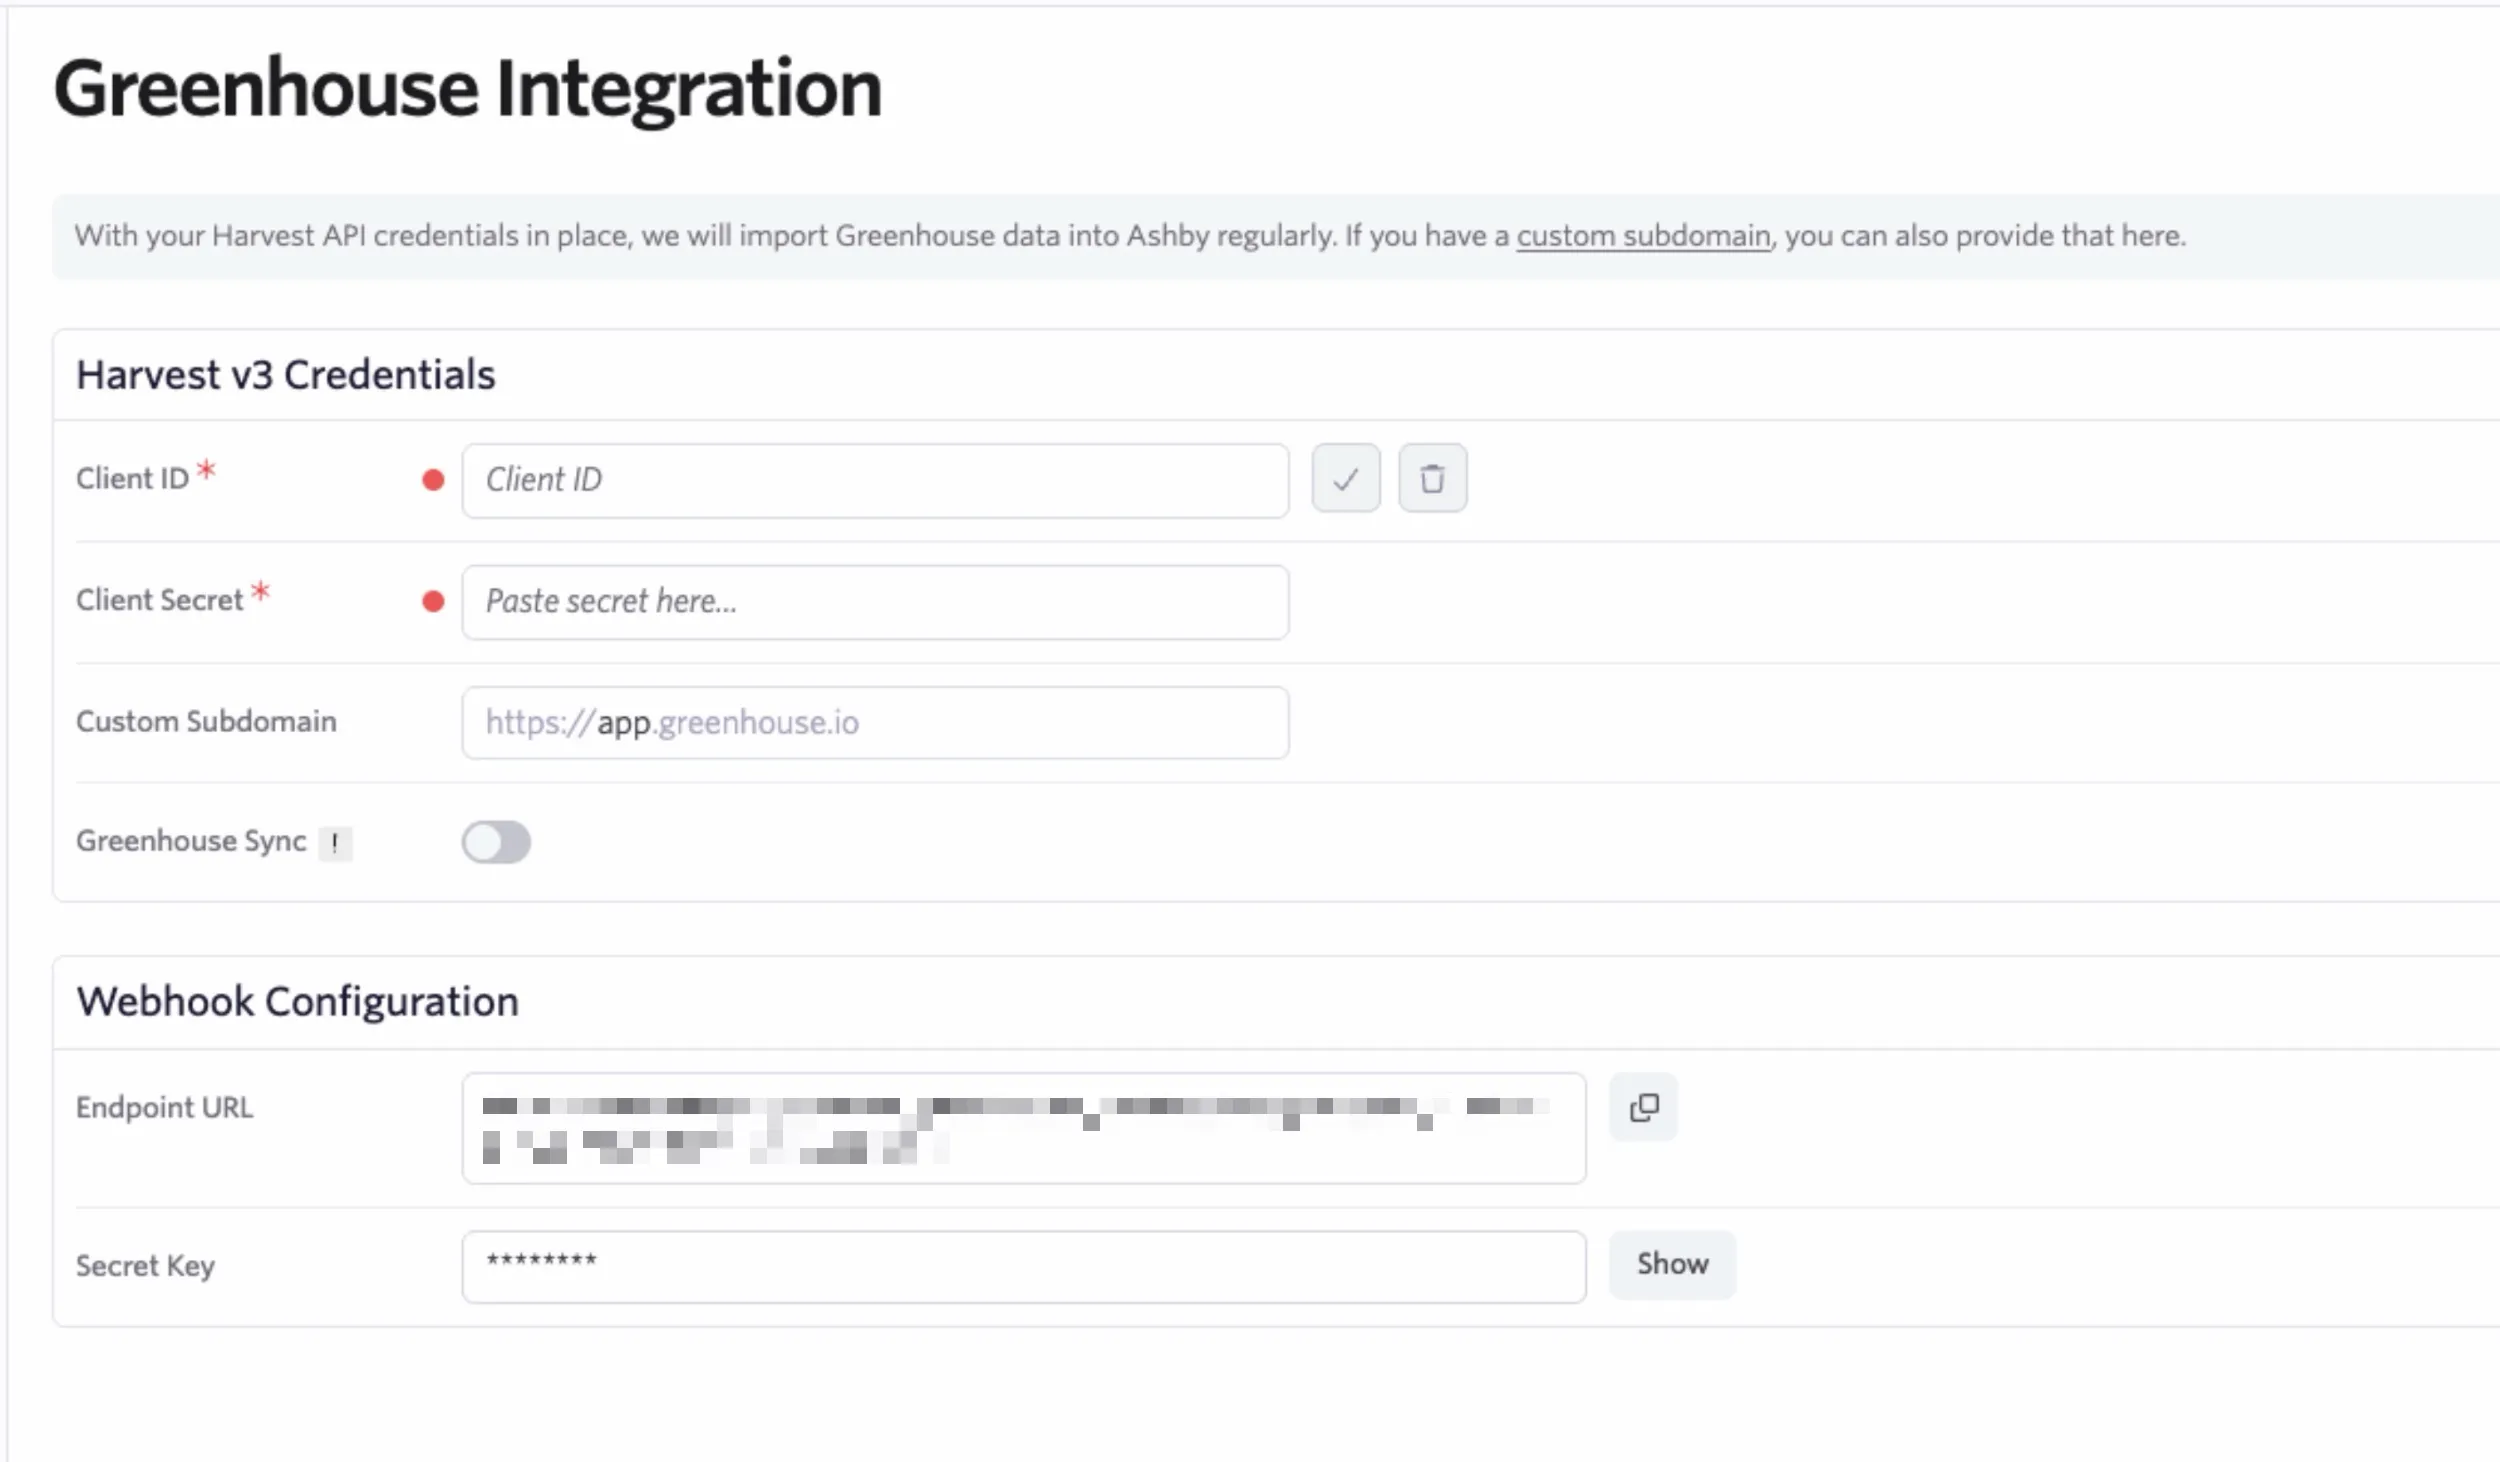
- Client ID: Enter your client ID (or client key).
- Client Secret: Enter your generated client secret.
- Custom Subdomain: Enter your custom subdomain to enable linking directly to candidate profiles from Ashby.
Adding the API credentials initiates your initial data sync. After your initial data sync completes, regular syncs continue once per hour to automatically ingest new data and updates. Ashby displays the last successful sync time in your Ashby user's timezone.
What information is migrated from Greenhouse?
The API migration pulls the following data from Greenhouse:
- Departments
- Offices
- Jobs
- Openings
- Job Stages
- Custom Fields
- Candidates (including candidate notes)
- The migration does not pull over candidate consent dates or data retention dates. You can import data retention dates via a CSV import to add this information to migrated candidates once the API migration is complete. For more information, see Data Privacy and ComplianceData Privacy and Compliance.
- Users (the migration explicitly does not map user permissions)
- Scorecards
- Sources
- Candidate Tags
- Job Posts
- Offers (the migration pulls over existing offers, offer data, and offer letters, which you can find within candidate profiles, but it does not pull over offer letter templates)
- Resumes
- Rejection Reasons
- Ashby syncs rejection reasons and rejection reason custom fields.
- Ashby syncs rejection reason fields in Greenhouse as custom fields for archive reasons in Ashby.
- Rejection Questions
- Scheduled Interviews
- Degrees
- Disciplines
- EEOC
- Email Templates
- Ashby migrates both organization and personal email templates.
- Ashby does not replace placeholder tokens, so you must update templates to include substitution tokens in Ashby.
- Close Reasons
- Demographic Questions (these come over as a Diversity Survey in Ashby)
- Application form submissions
Ashby can also sync and map emails upon request.
FAQs
Will something happen to feedback forms or other things we create in Ashby prior to the migration?
If you create an object in Ashby (e.g., a feedback form template), the migration leaves it unchanged. That said, the migration moves over the objects listed above, so we recommend completing the migration first to prevent duplicating effort.
Help! I updated a candidate profile, but it changed back overnight!
Letting your Customer Success Manager (CSM) know when they can disable the ATS sync is part of the migration process. Until that step is complete, any changes you make to migrated data may be overridden.
Do you migrate prospects from Greenhouse?
Ashby doesn't map any prospect-related data, so Ashby maps candidates who only have a prospect application as candidates with a Lead status. They do not have a job consideration attached to their profile.
Why can't I see the email templates migrated from Greenhouse in my account?
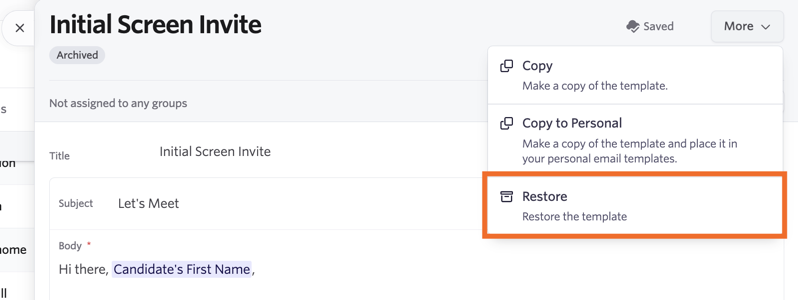
Because you need to replace the substitution tokens in your email templates with Ashby tokens, Ashby syncs email templates over as Archived templates. We recommend updating your email templates and then restoring them to use them moving forward.
To amend and restore your email templates, navigate to Admin > Organization Setup > Email Templates. Then use the Active dropdown to switch the view to see all email templates.

Click the email template in question and make the required updates, clicking the T icon in the email toolbar to access and add substitution tokens (for more information, see Substitution Tokens). Once you've updated your email template, click More, then Restore, to make it an active template.