SHL
5 min
This guide will walk you through integrating your SHL account with Ashby, allowing you to use SHL assessments in your interview plans and retrieve the results all from within the Ashby platform.
Prerequisites:
Customers should first engage with SHL to scope the integration and execute the required Statement of Work (SOW) before following the steps below. An implementation fee may apply depending on the engagement.
Client credentials (Client ID and Client Secret) are provisioned only after the SOW has been signed and the implementation project has commenced.
Setting up the integration
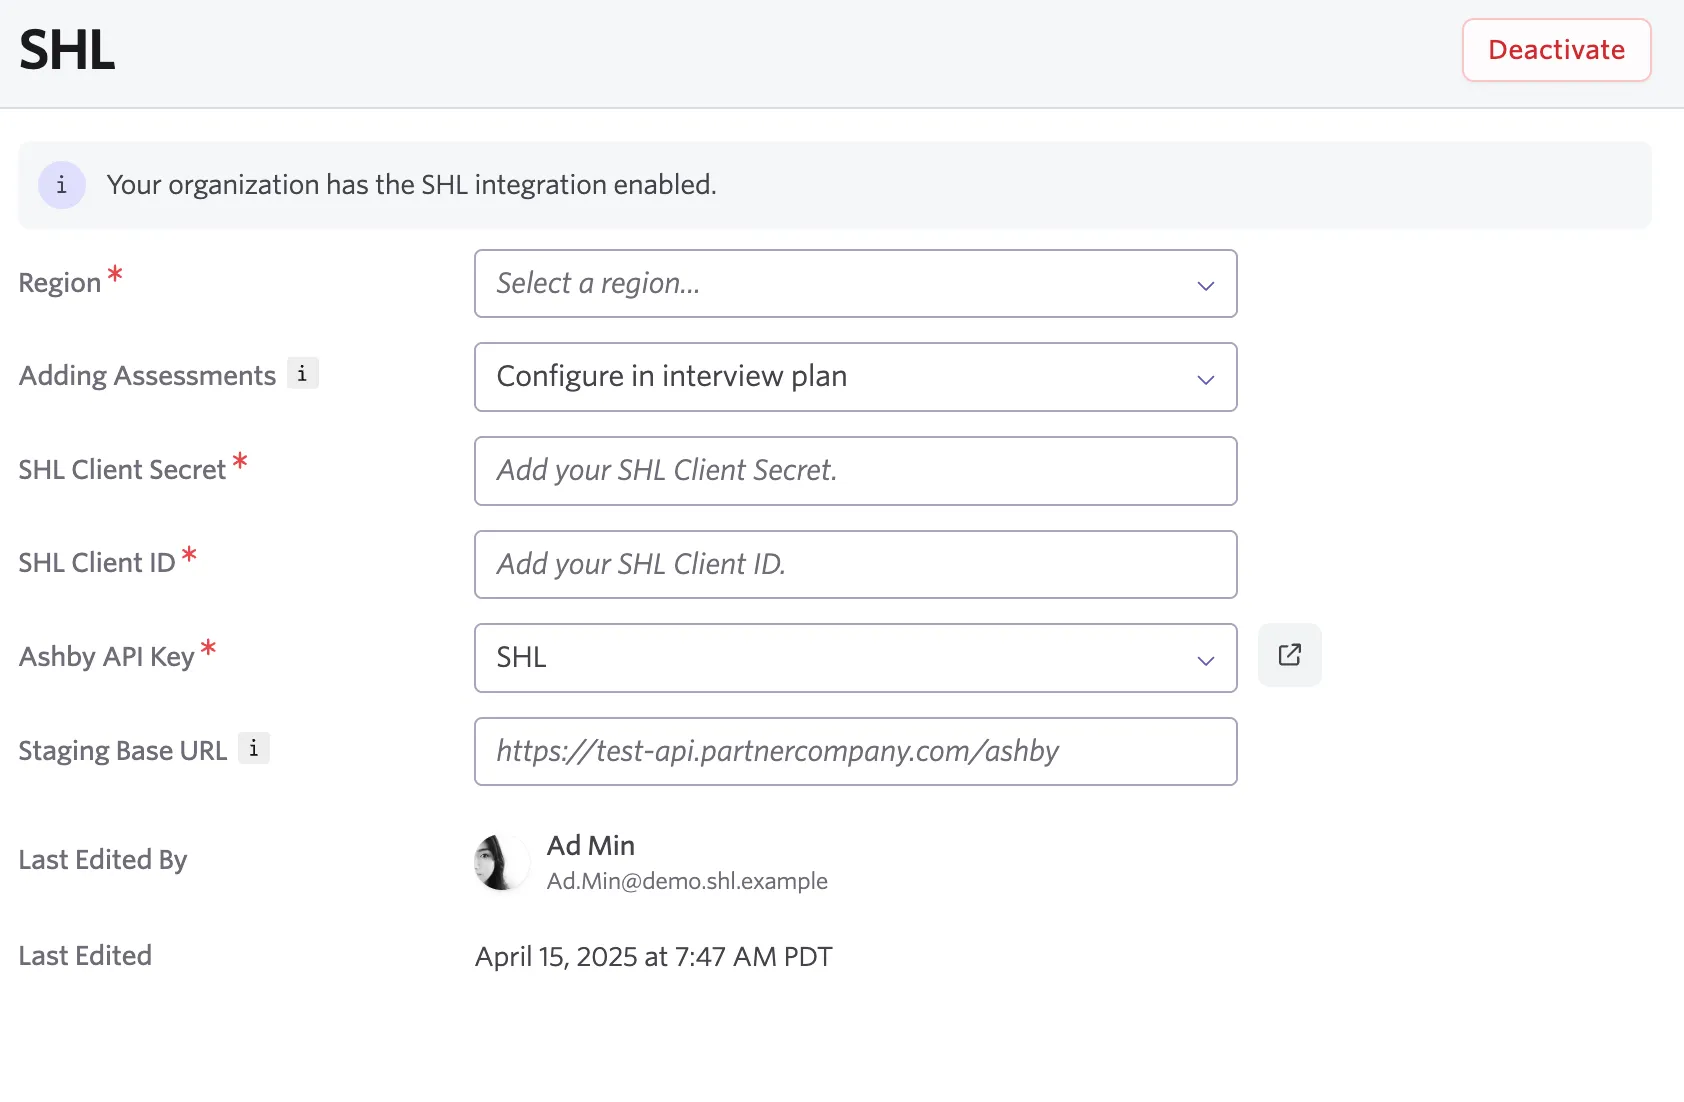
- Navigate to the SHL integration in Admin
- Select your account’s region
- Select the way you’d like to add assessments to candidate profiles (see Using the IntegrationUsing the Integration for more information)
- Input your SHL Client Secret and Client ID (you may need to get in touch with SHL for this)
- Generate an Ashby API Key (more on this at How do I generate an API key?)
- If you’re not an partner, please ignore the staging base URL field
Using the integration
There are three configuration options:
- Adding background check requests as a one-off
- From the candidate profile, click Add Activity to generate an SHL activity. Then, follow the steps on the activity that appears.
- Configuring them on the interview plan
- Visit the settings of a job and add the activity to the reference check stage of your interview plan. When a candidate enters the stage the activity will appear you can manually complete the steps to send the request, or when the card
- Automatically adding the assessment to offer or hired stages
- Choose the stage you’d like to include the activity on while configuring the integration. When a candidate enters the designated stage, the corresponding activity will appear.
Viewing the results
- When the package has been completed, the activity's status will be updated. The hiring team will receive notifications as the status changes.
- There will be a link to the results on the activity upon completion.