E-Signature Documents
The e-signature documents feature works similarly to Ashby E-Signature OffersE-Signature Offers, and can be used for documents like non-disclosure agreements (NDAs). It allows your team to request and store signed copies of any document that requires a signature.
Access & permissions
You can configure non-offer e-signature documents on the Legacy Plus, Plus, and Enterprise plans.
Foundations | Legacy Plus | Plus | Enterprise |
|---|---|---|---|
❌ | ✅ | ✅ | ✅ |
Automated send settings are available on the Plus and Enterprise plans.
Foundations | Legacy Plus | Plus | Enterprise |
|---|---|---|---|
❌ | ❌ | ✅ | ✅ |
Prerequisites and permissions
- You must be an Organization Admin to configure e-signature document templates.
Configuring e-signature documents
Add replacement tokens to your document
To create a valid e-signature document, you need to add e-signature tokens to your document along with any default tokens to add candidate and job consideration information as needed. To add replacement tokens:
- Navigate to Admin > Integrations > E-Signature Documents.
- On the E-Signature Document Tokens tab, click the token you want to add to your document to copy it.
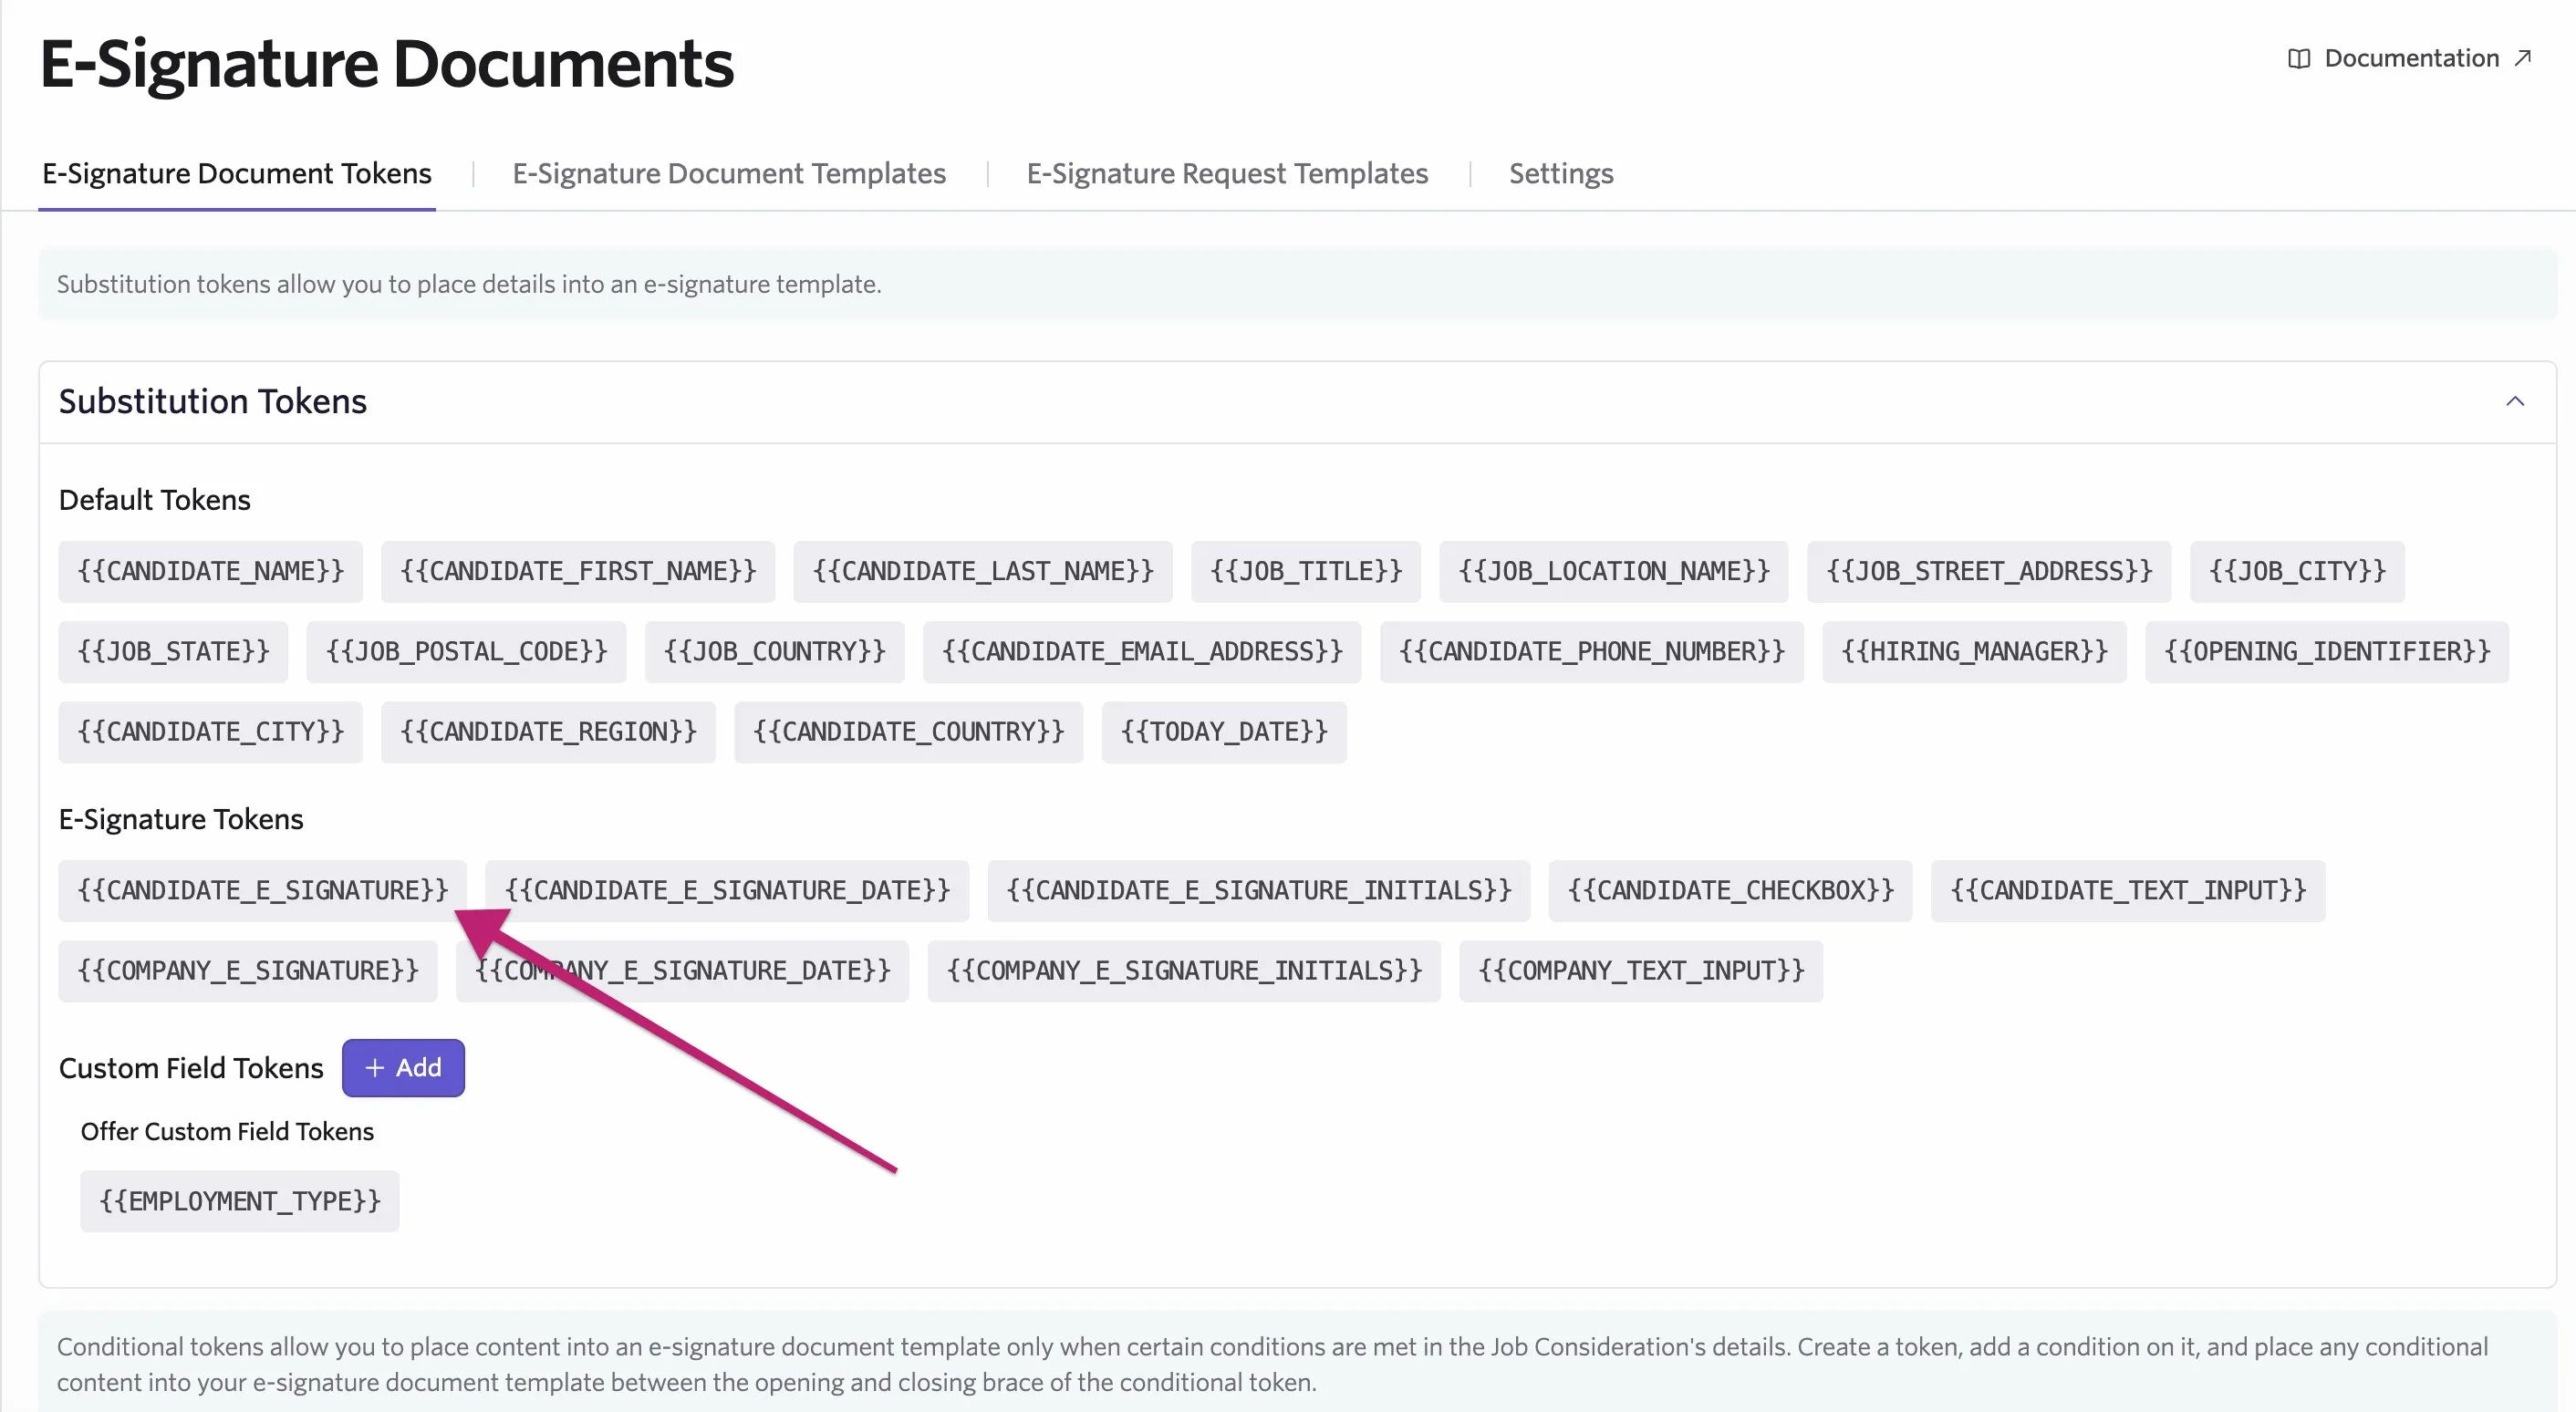
- Paste the token into your document.
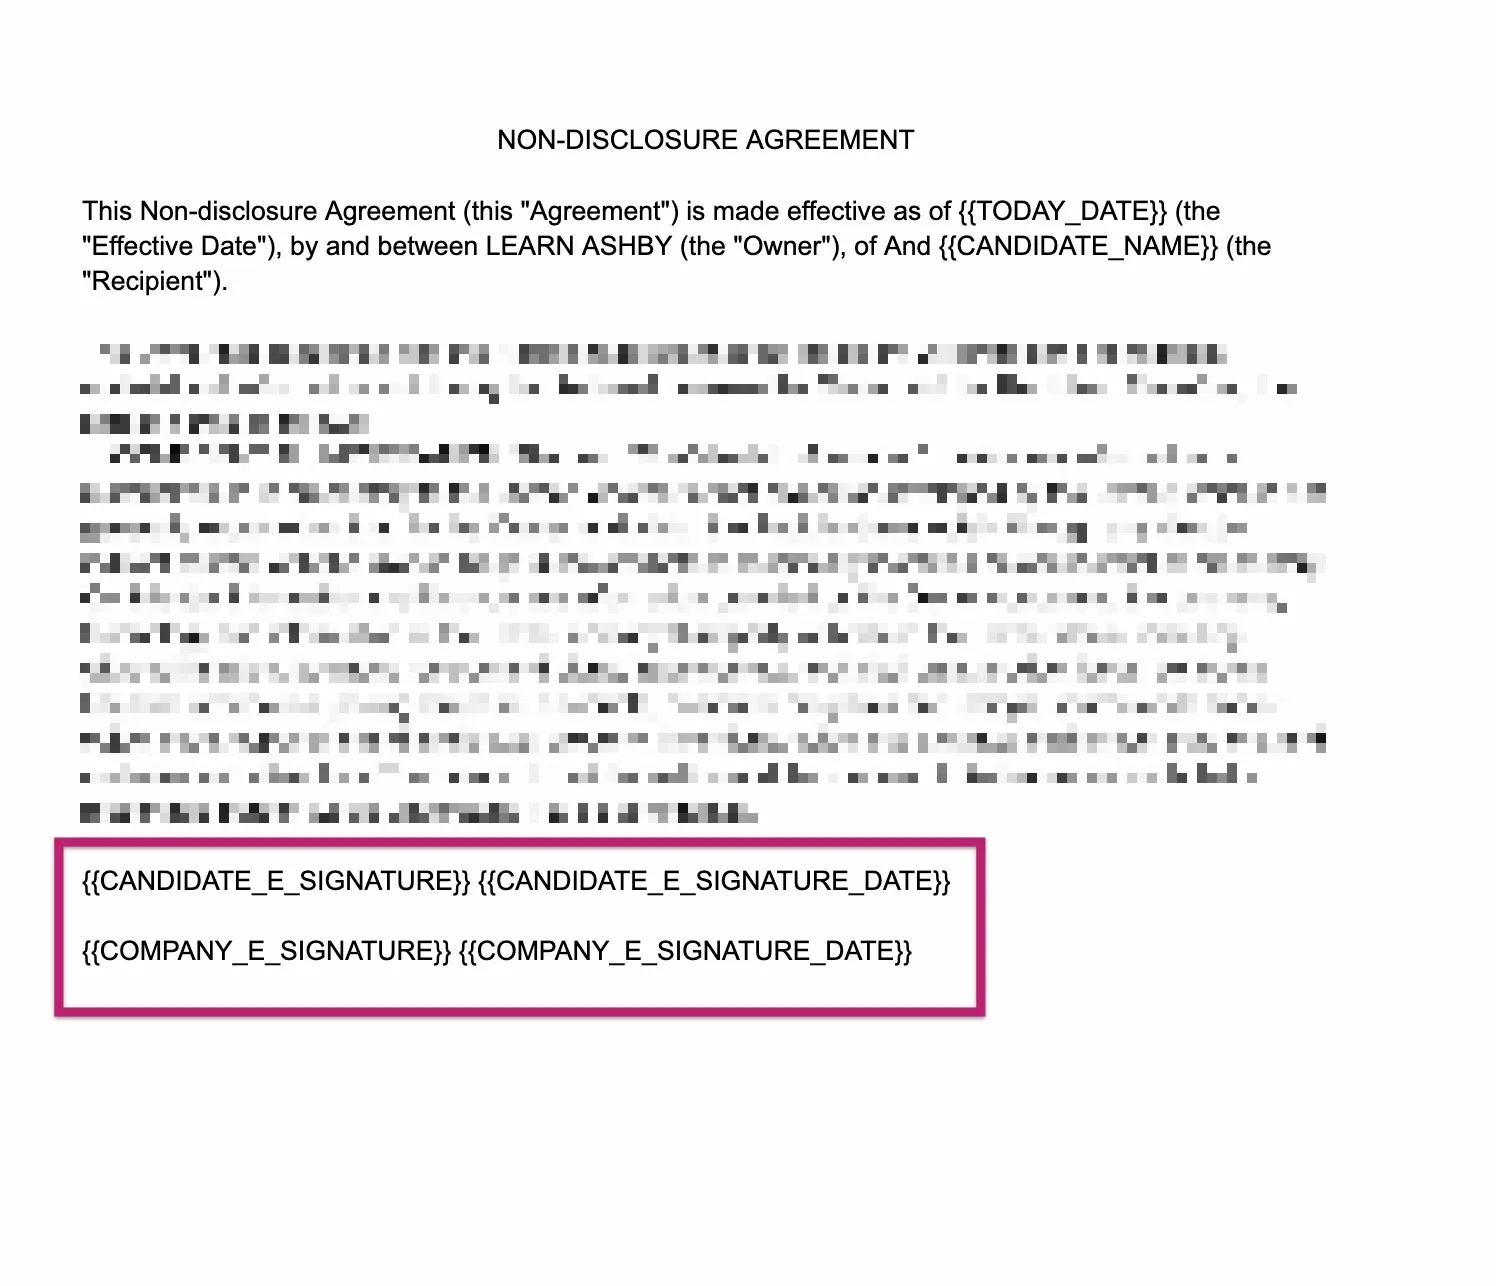
When you add e-signature tokens to your document (CANDIDATE_E_SIGNATURE and/or COMPANY_E_SIGNATURE), also add the corresponding signature date.
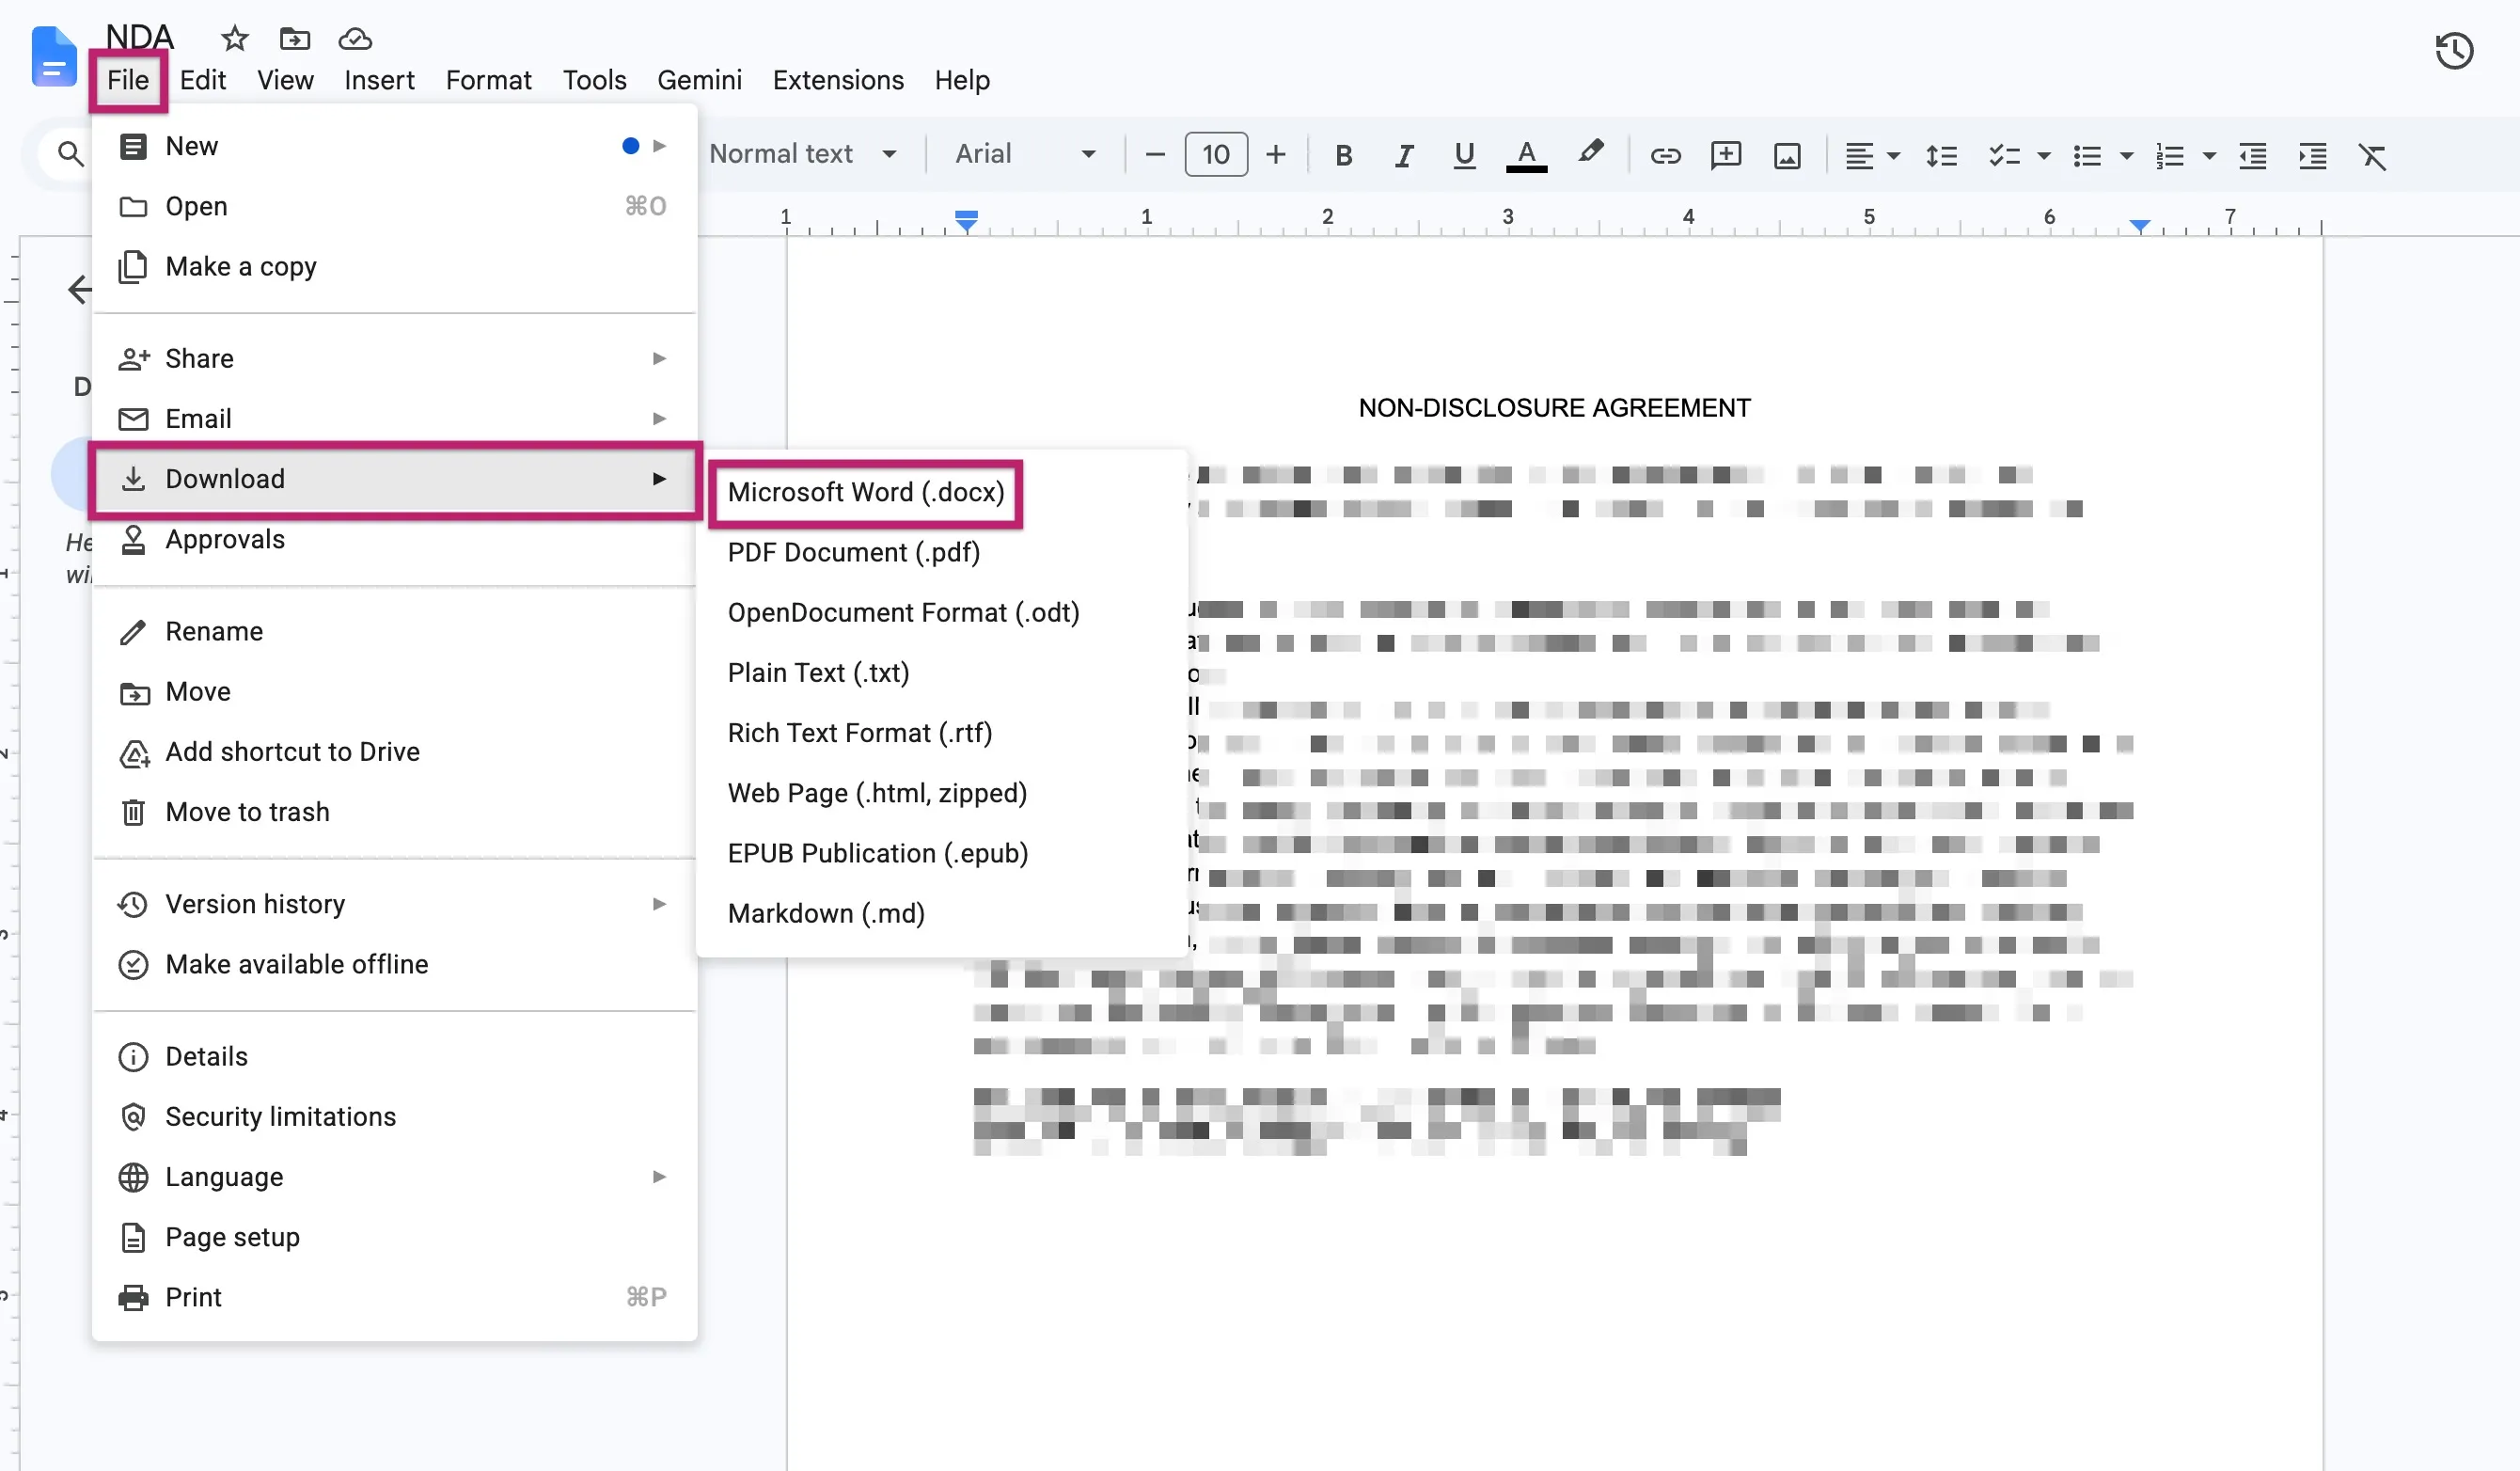
Export your document in .docx format
Ashby requires document templates to be in .docx format. Export your completed template to this format before uploading it to Ashby.
Upload and validate your document in Ashby
Once the document is ready, navigate to the E-Signature Document Templates tab, then take the following steps:
- Click + New on the right side of the page.
- Give the document a title and click Create.
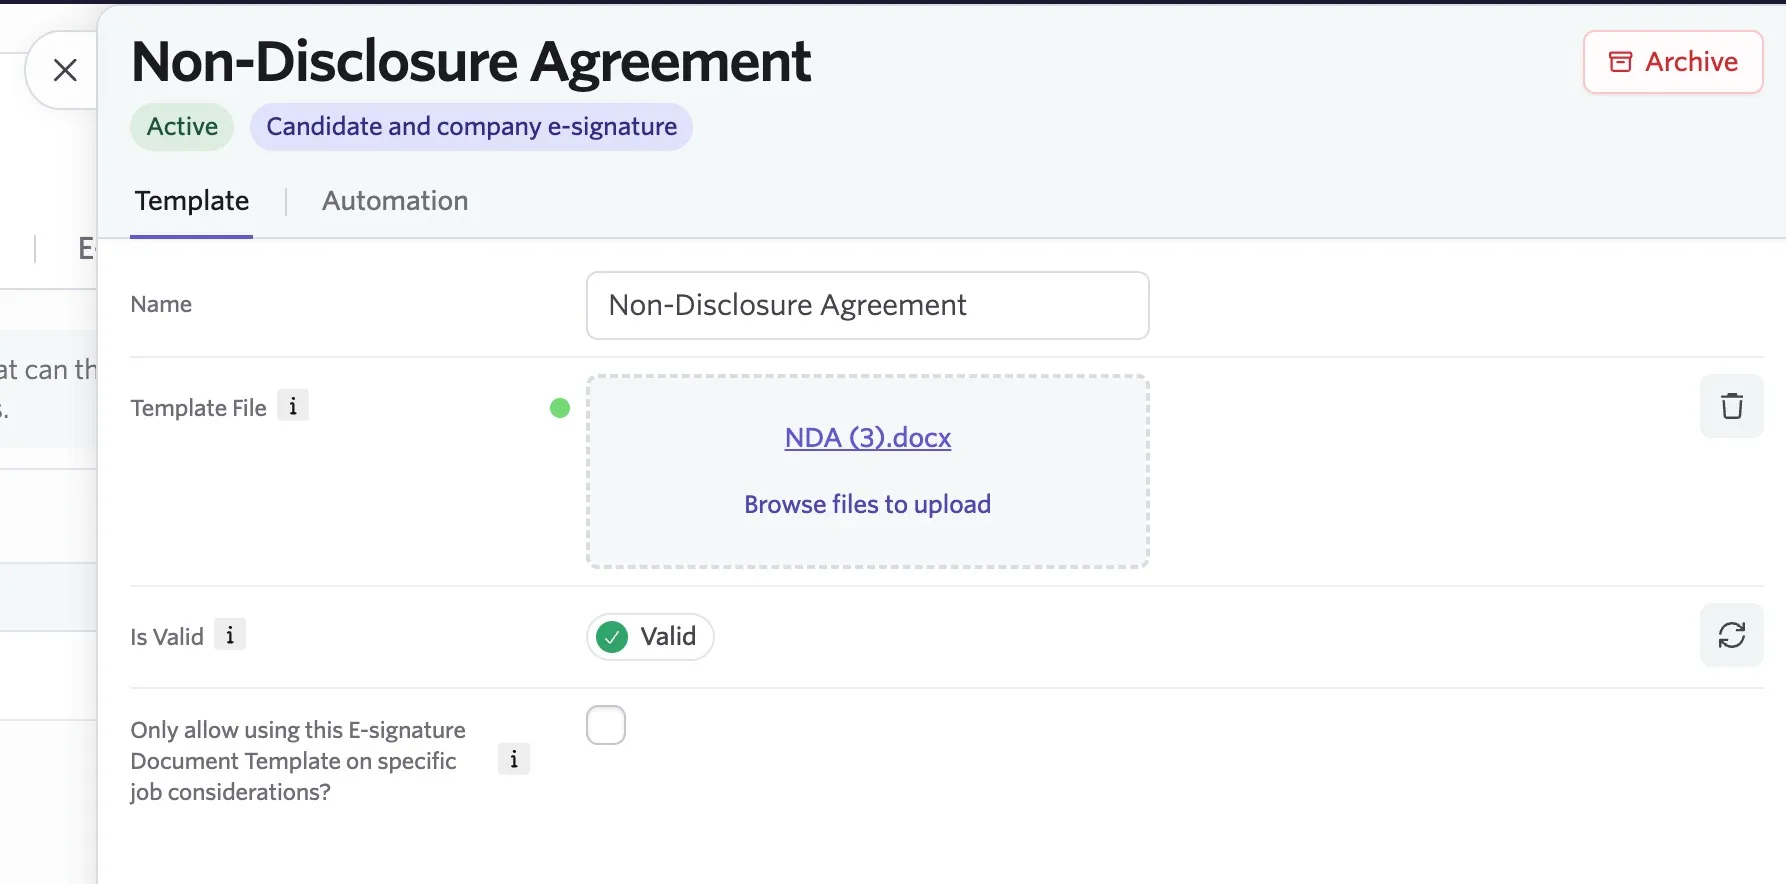
- Drag and drop the file, or click Browse files to find it, and upload it. Ashby then validates the file:
- If it's valid, the indicator turns green.
- If it's invalid, the indicator remains red, and you receive an error message with instructions on how to update the file.
Set filters for your e-signature document (optional)
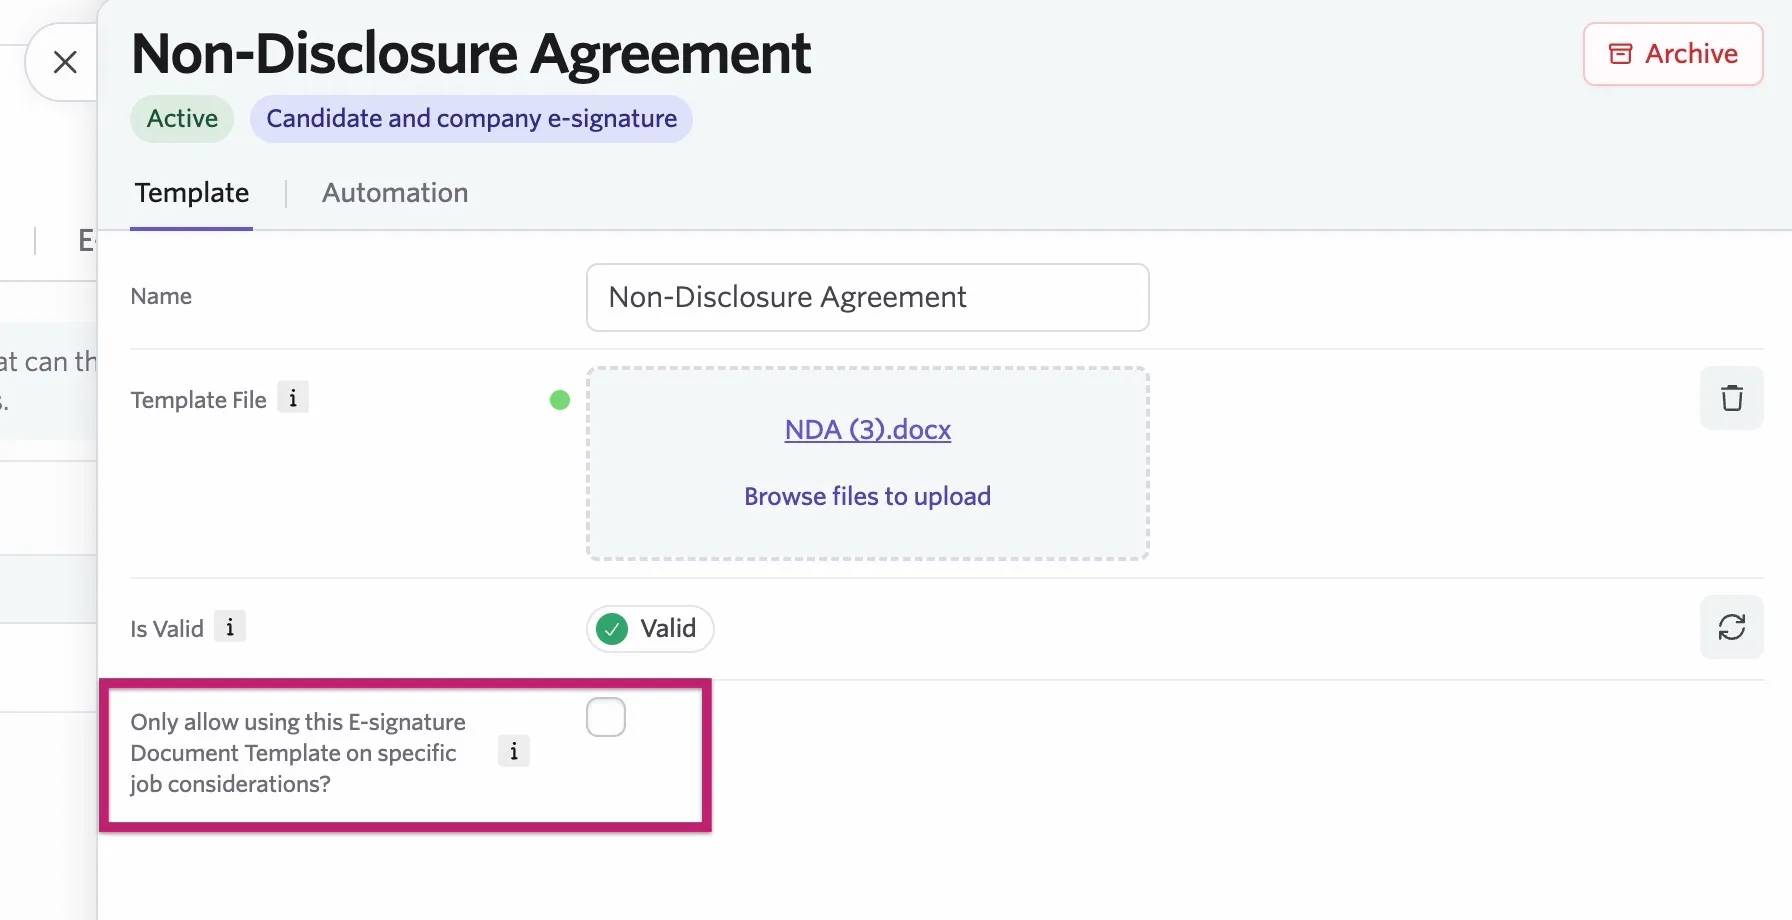
When you upload and validate your e-signature document template, you see the option Only allow using this E-signature Document Template on specific job considerations?. Check this checkbox if you want the e-signature document to only be an option that's available for specific job considerations.
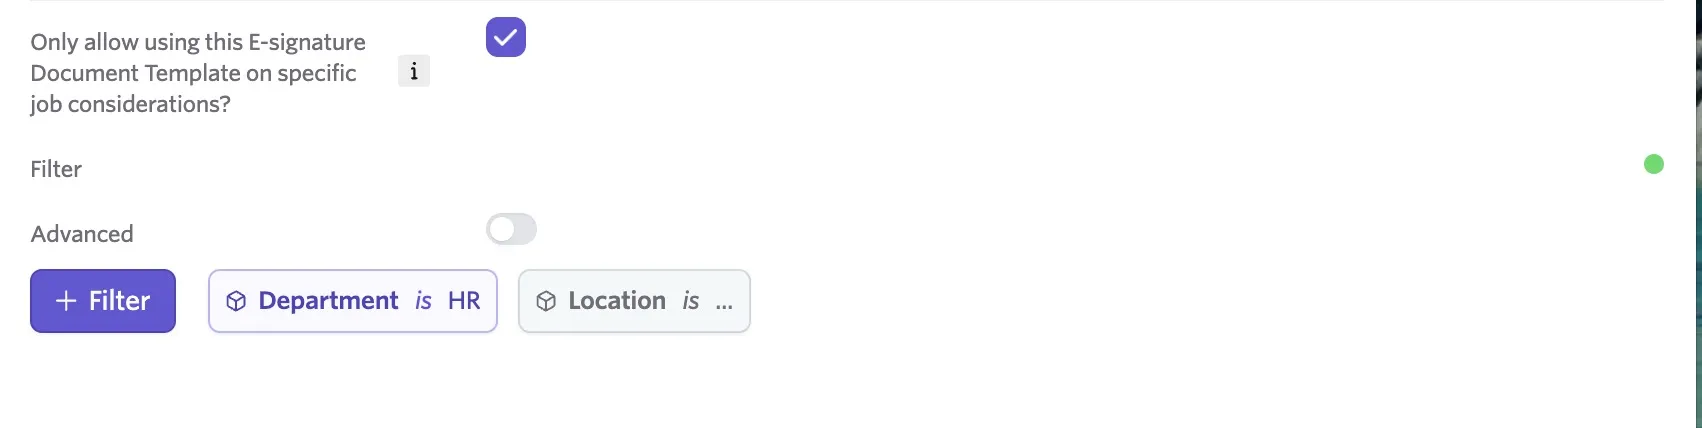
Once you check this checkbox, configure a rule by clicking + Filter and adding filters connected to the job consideration, like the job's location, the candidate's interview stage, the job's department, and more. Any job consideration that meets this criteria lists this e-signature template as an option when generating an e-signature request.
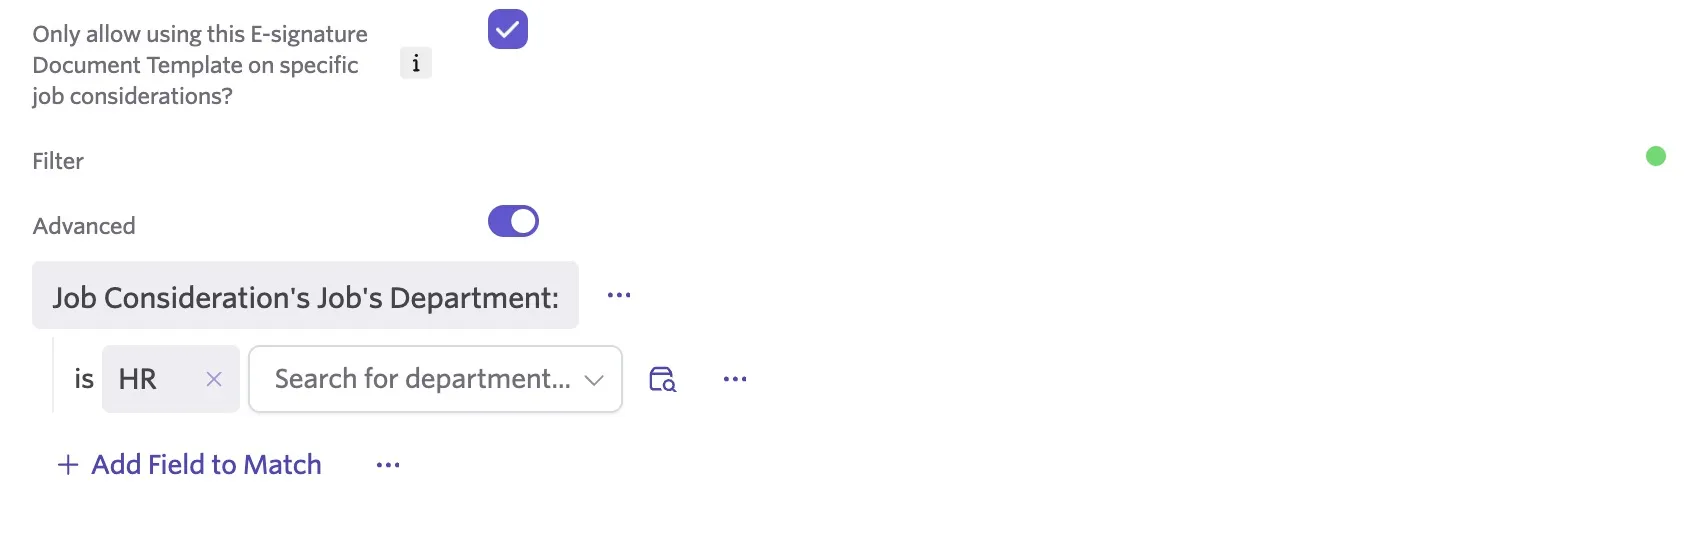
If you have the Advanced toggle switched on for filtering, click + Add Field to Match to specify your fields for filtering.
Archiving and restoring your e-signature document templates
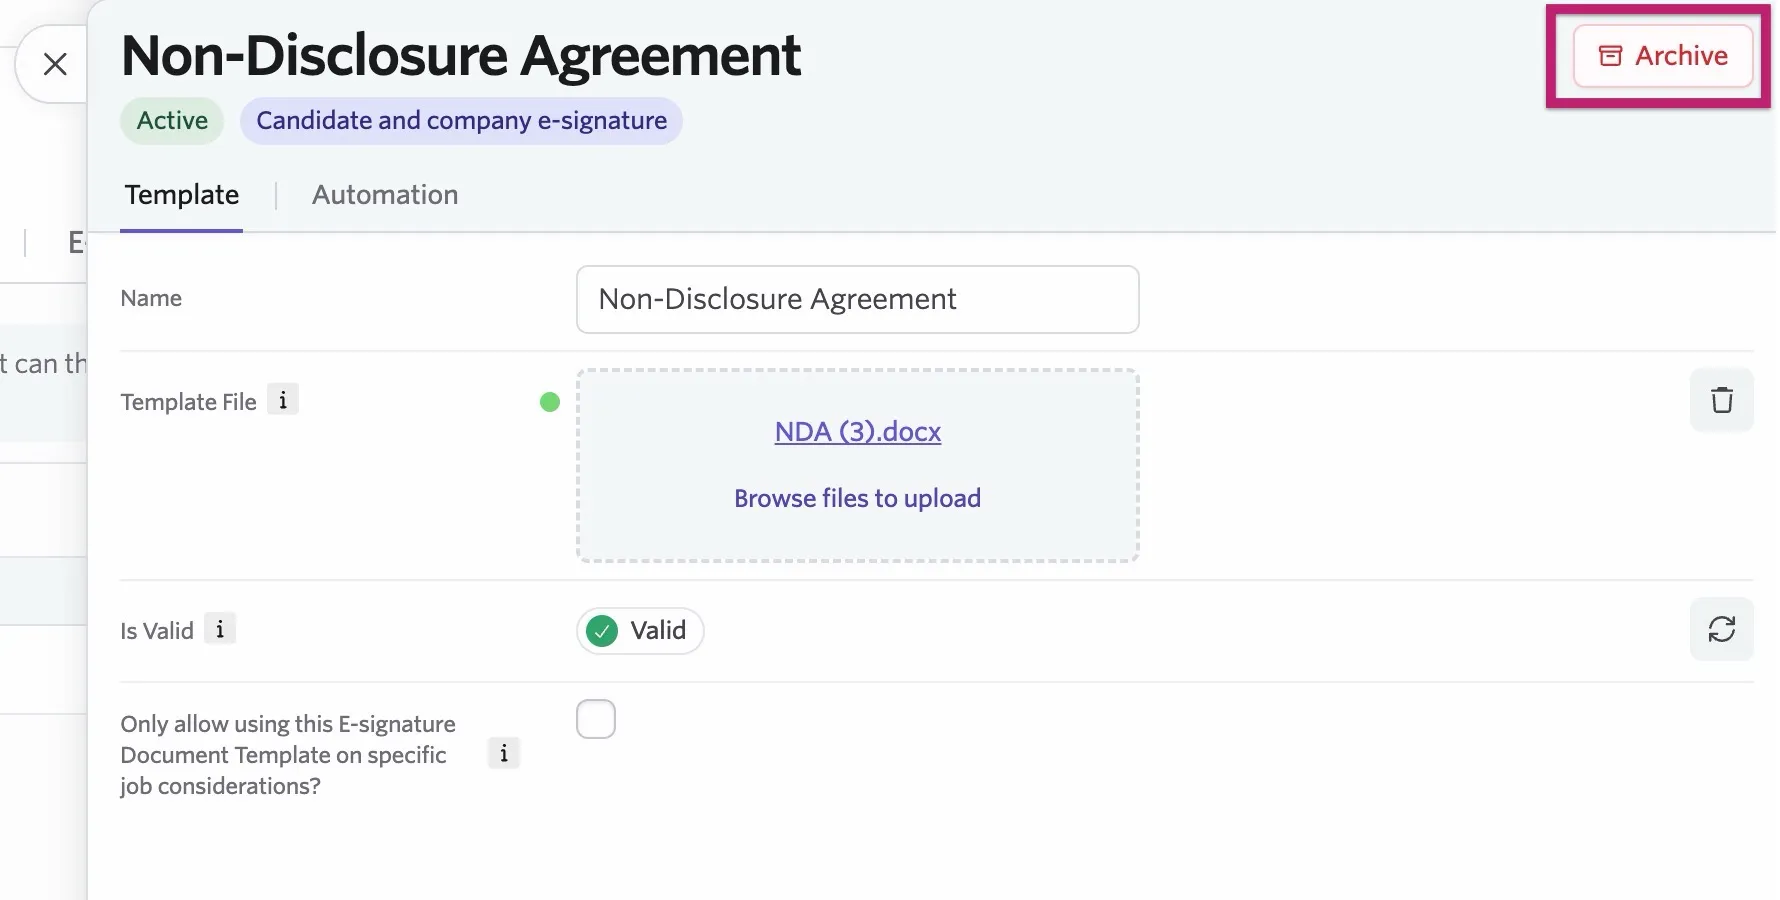
If you want to archive a document, visit it and click the red Archive button in the top-right corner of the e-signature document template details.
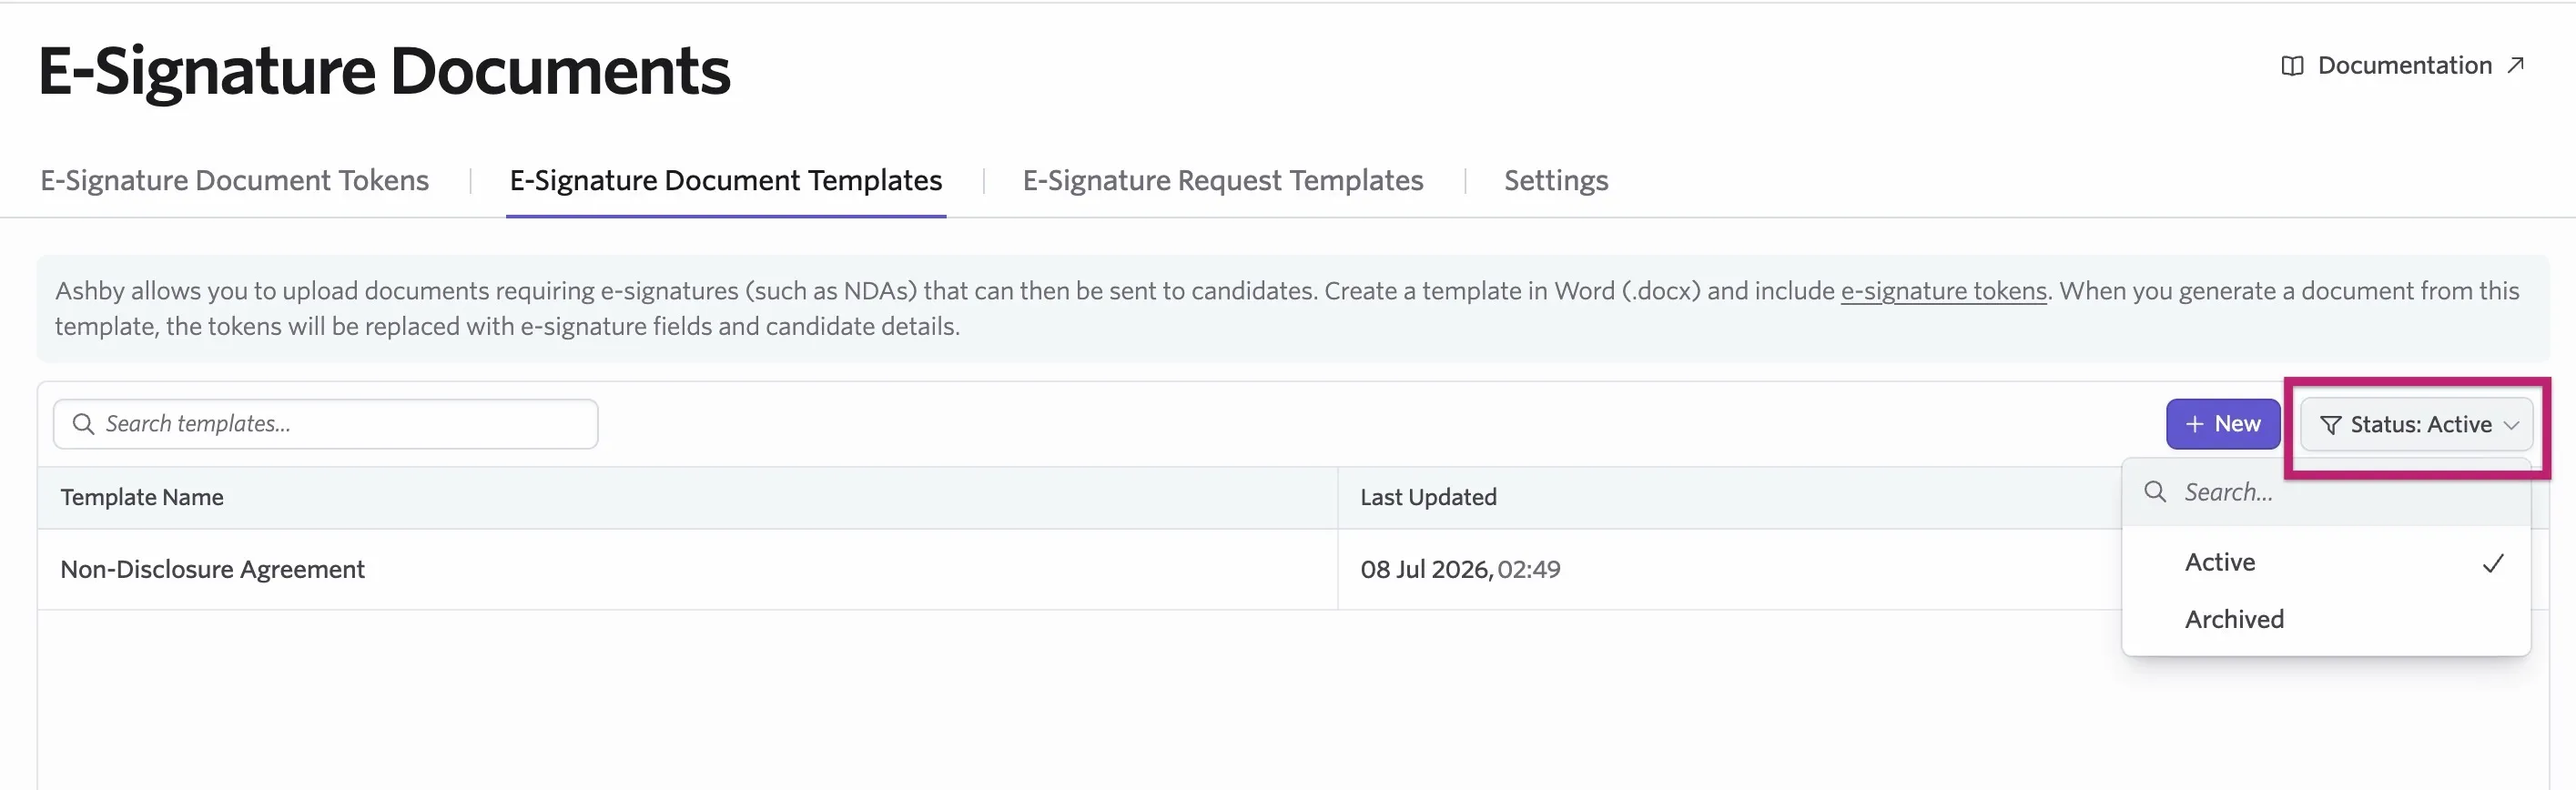
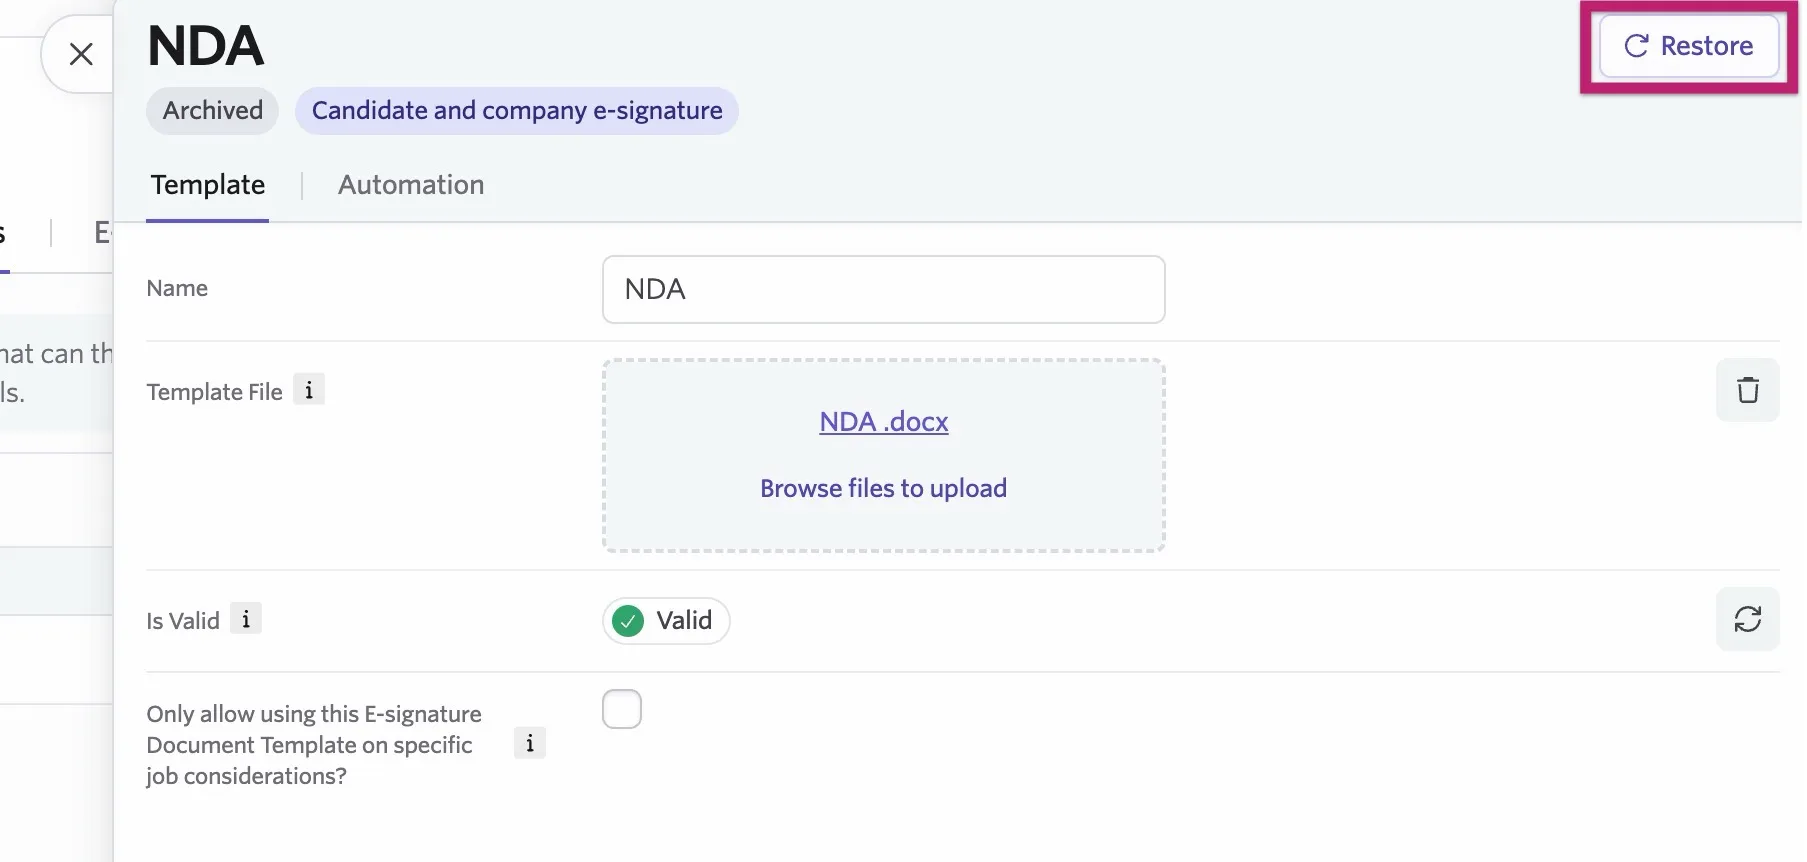
You can visit and reactivate archived e-signature document templates by changing the status filter from Active to Archived. Click the archived e-signature template to open the template details.
Click Restore to reactivate the e-signature document template.
Sending e-signature document requests
You can send e-signature document requests in a few different ways:
- Configure automation rules as part of your e-signature document templates so e-signature request activities are generated for sending manually, or sent automatically, when a candidate meets certain criteria.
- Add activities to your interview plan stages to either generate an activity to send an e-signature request for a document manually, or automatically send an e-signature request template.
- Generate and send e-signature document requests manually from the candidate's profile.
E-signature request templates are required to automatically send e-signature document requests to candidates. More on these at Creating and Managing E-Signature Request TemplatesConfiguring E-Signature Request Templates.
Configure automation for e-signature document templates
You set up automation rules on the Automation tab of your e-signature document templates. Use these to trigger activities across all of your jobs when you want every candidate that meets specific criteria to receive the e-signature request.
Like other automation rules in Ashby, e-signature document automation rules trigger based on a condition that you set using filters. The most common include:
- Current interview stage or stage group (e.g., send if the candidate is currently in the Intro Call stage).
- Job consideration outcome (e.g., send if the candidate is marked as Hired).
Once you set the condition, click Save & Publish to enable the rule. The next time a candidate meets this condition, the rule triggers.
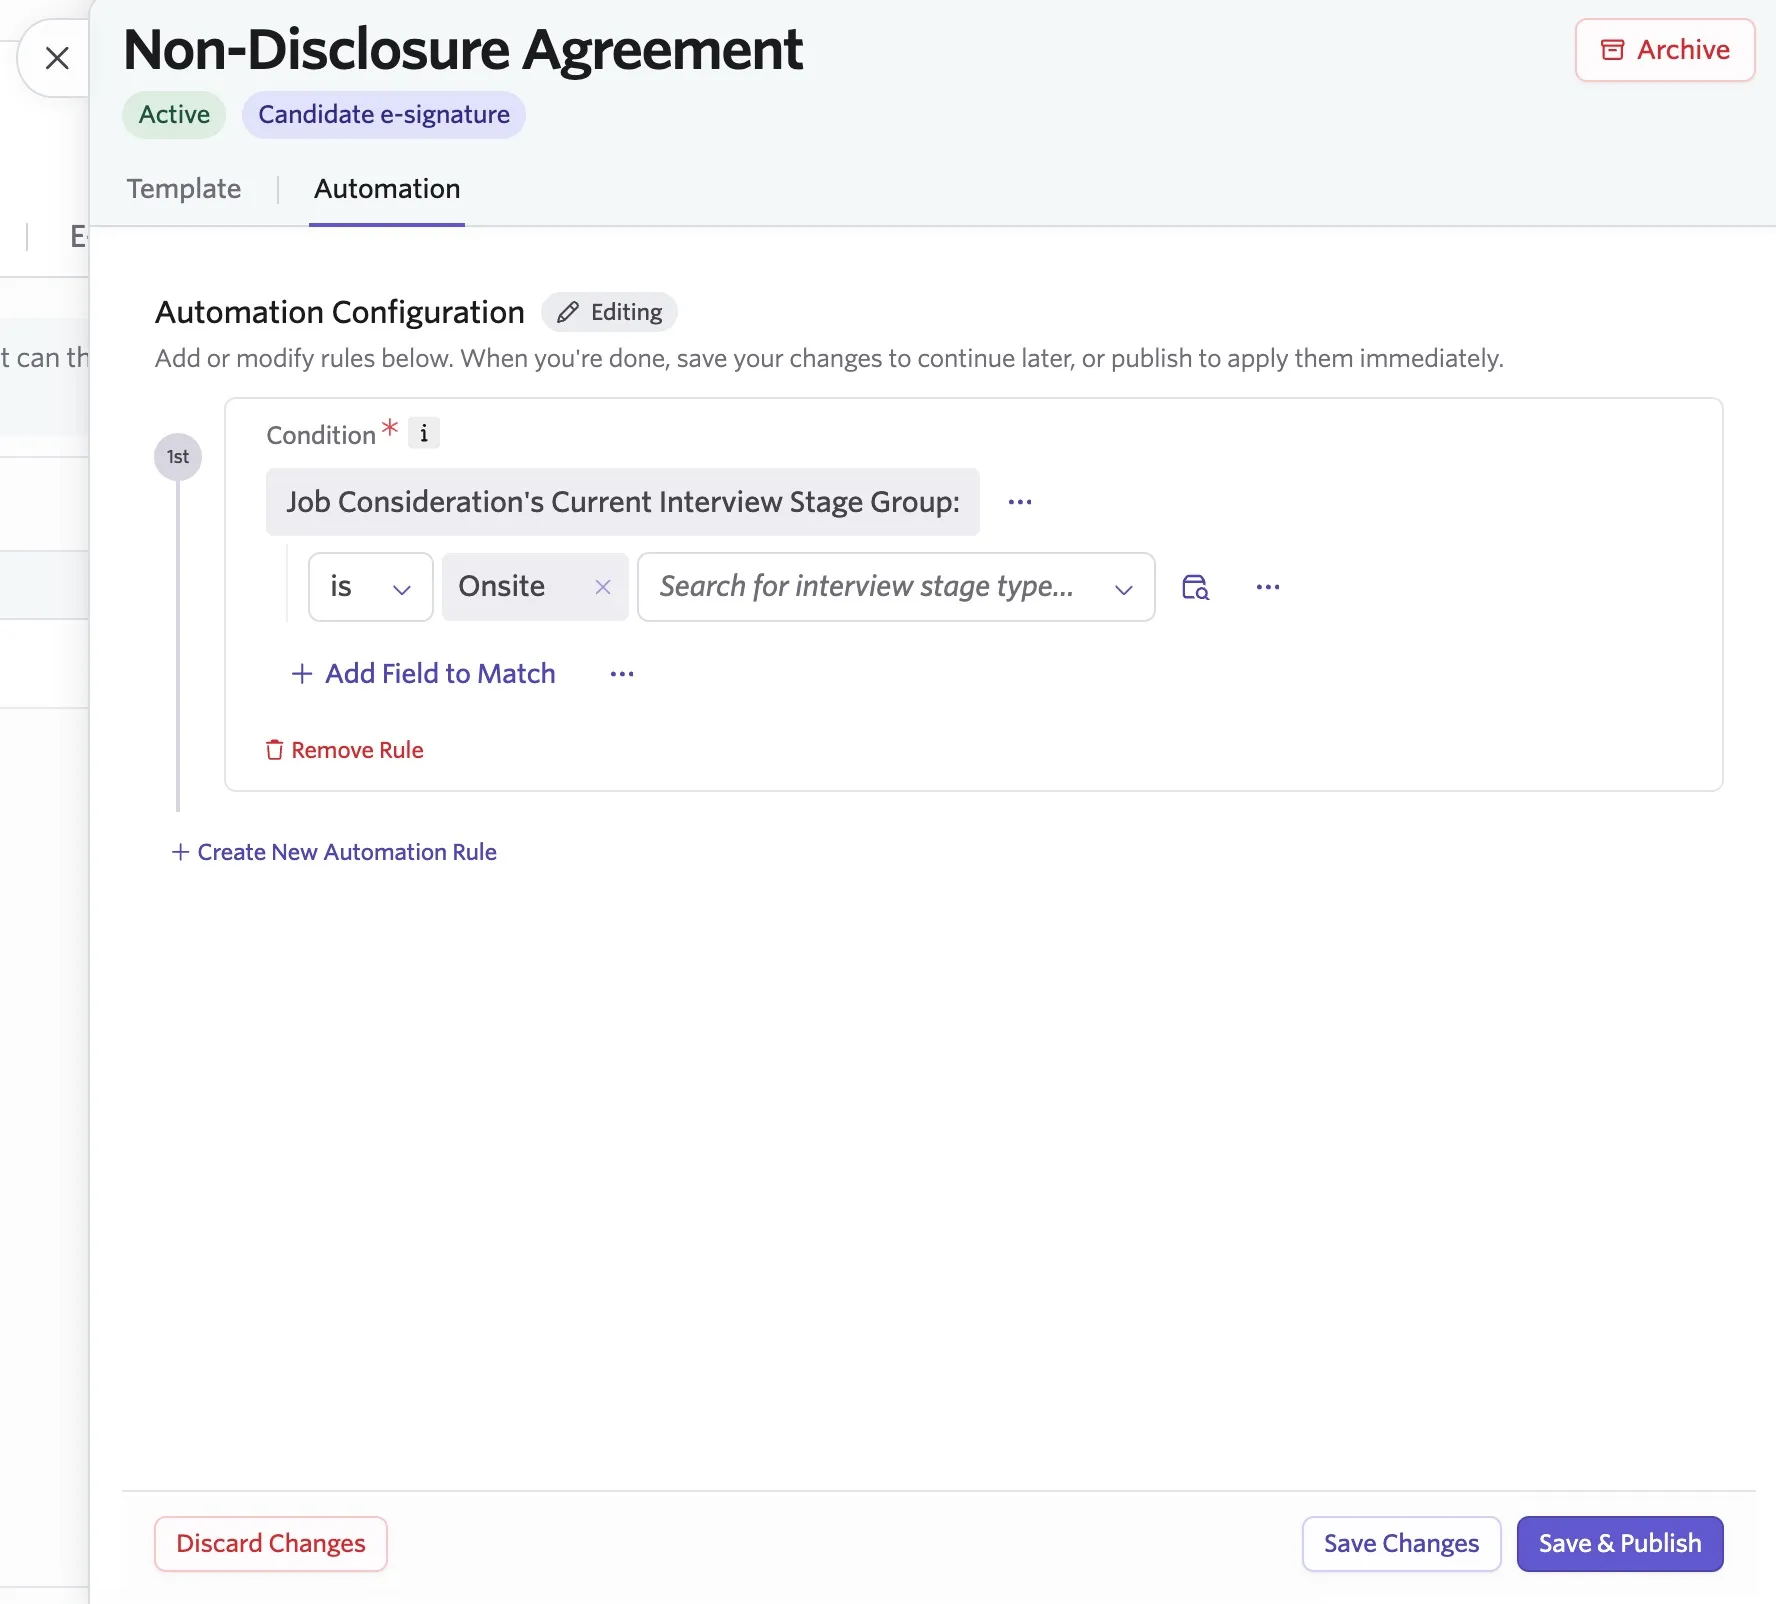
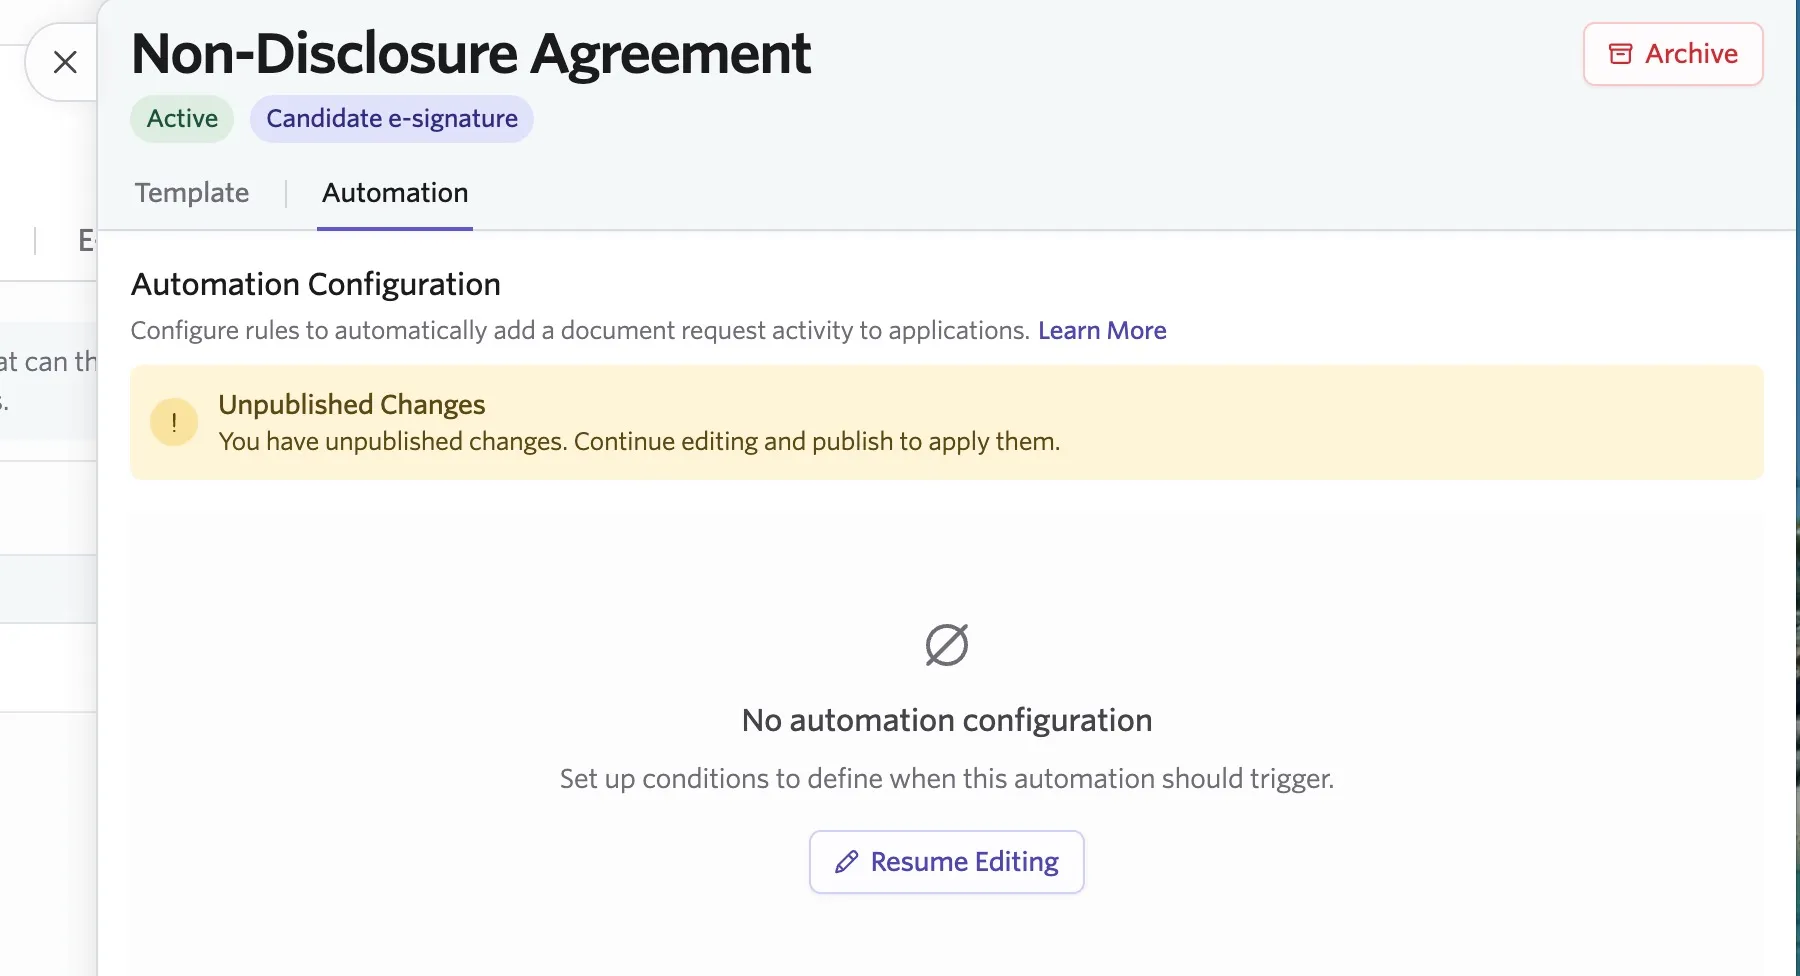
Not quite ready to publish the rule? Click Save Changes to save your edits without enabling the rule. When you return to the automation setup, click Resume Editing to continue with your rule amendments.
Ashby evaluates the automation conditions each time a candidate moves stage. If the candidate meets the criteria after moving to the new stage, the flow triggers. For example, if your criteria specify that the automation runs once the candidate's job consideration reaches the Hiring Manager Interview stage, the automation runs when the candidate moves into that stage.
Automation send settings
Once you save your automation rules for your e-signature document template, you can choose to send the e-signature document request automatically using automation send settings. These appear directly under the automation configuration for your e-signature document template on the Automation tab.
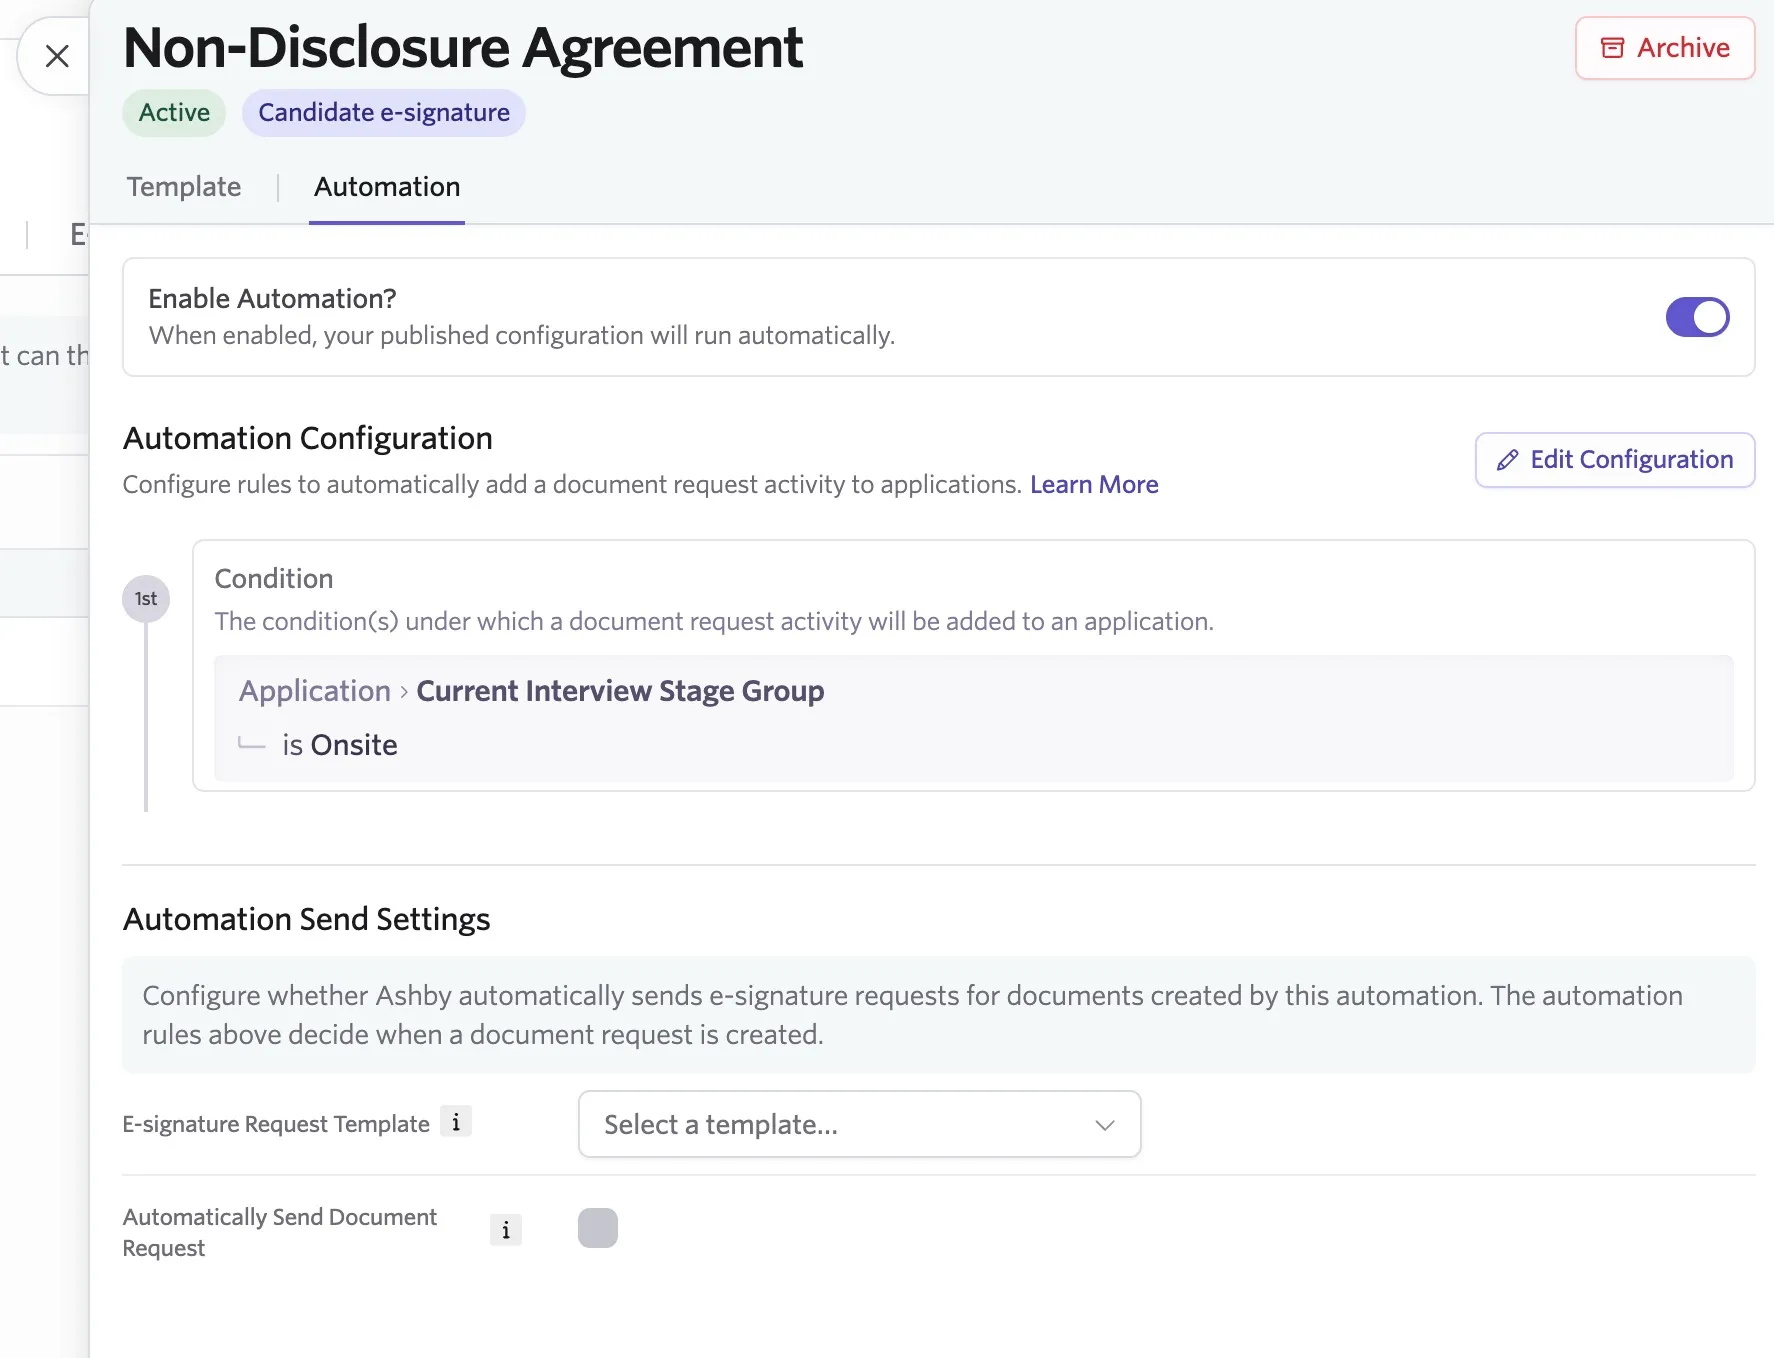
To configure automation send settings, you first need to configure an e-signature request template. More on this at Creating and Managing E-Signature Request TemplatesConfiguring E-Signature Request Templates.
Select your e-signature request template from the E-Signature Request Template dropdown, then check the Automatically Send Document Request checkbox to enable automatic sending.
Add an e-signature document request as an activity
You add Activitiesactivities to the interview plan for a specific job. Use this option if you want every candidate in a specific job to have this request type appear on their profile when they move into the associated stage.
If you don't want to set up automation criteria, but you want an e-signature document sent automatically when a candidate moves to a specific stage, creating an activity and enabling automation is another route you can take.
You can add an e-signature document activity to your interview plan with the following steps:
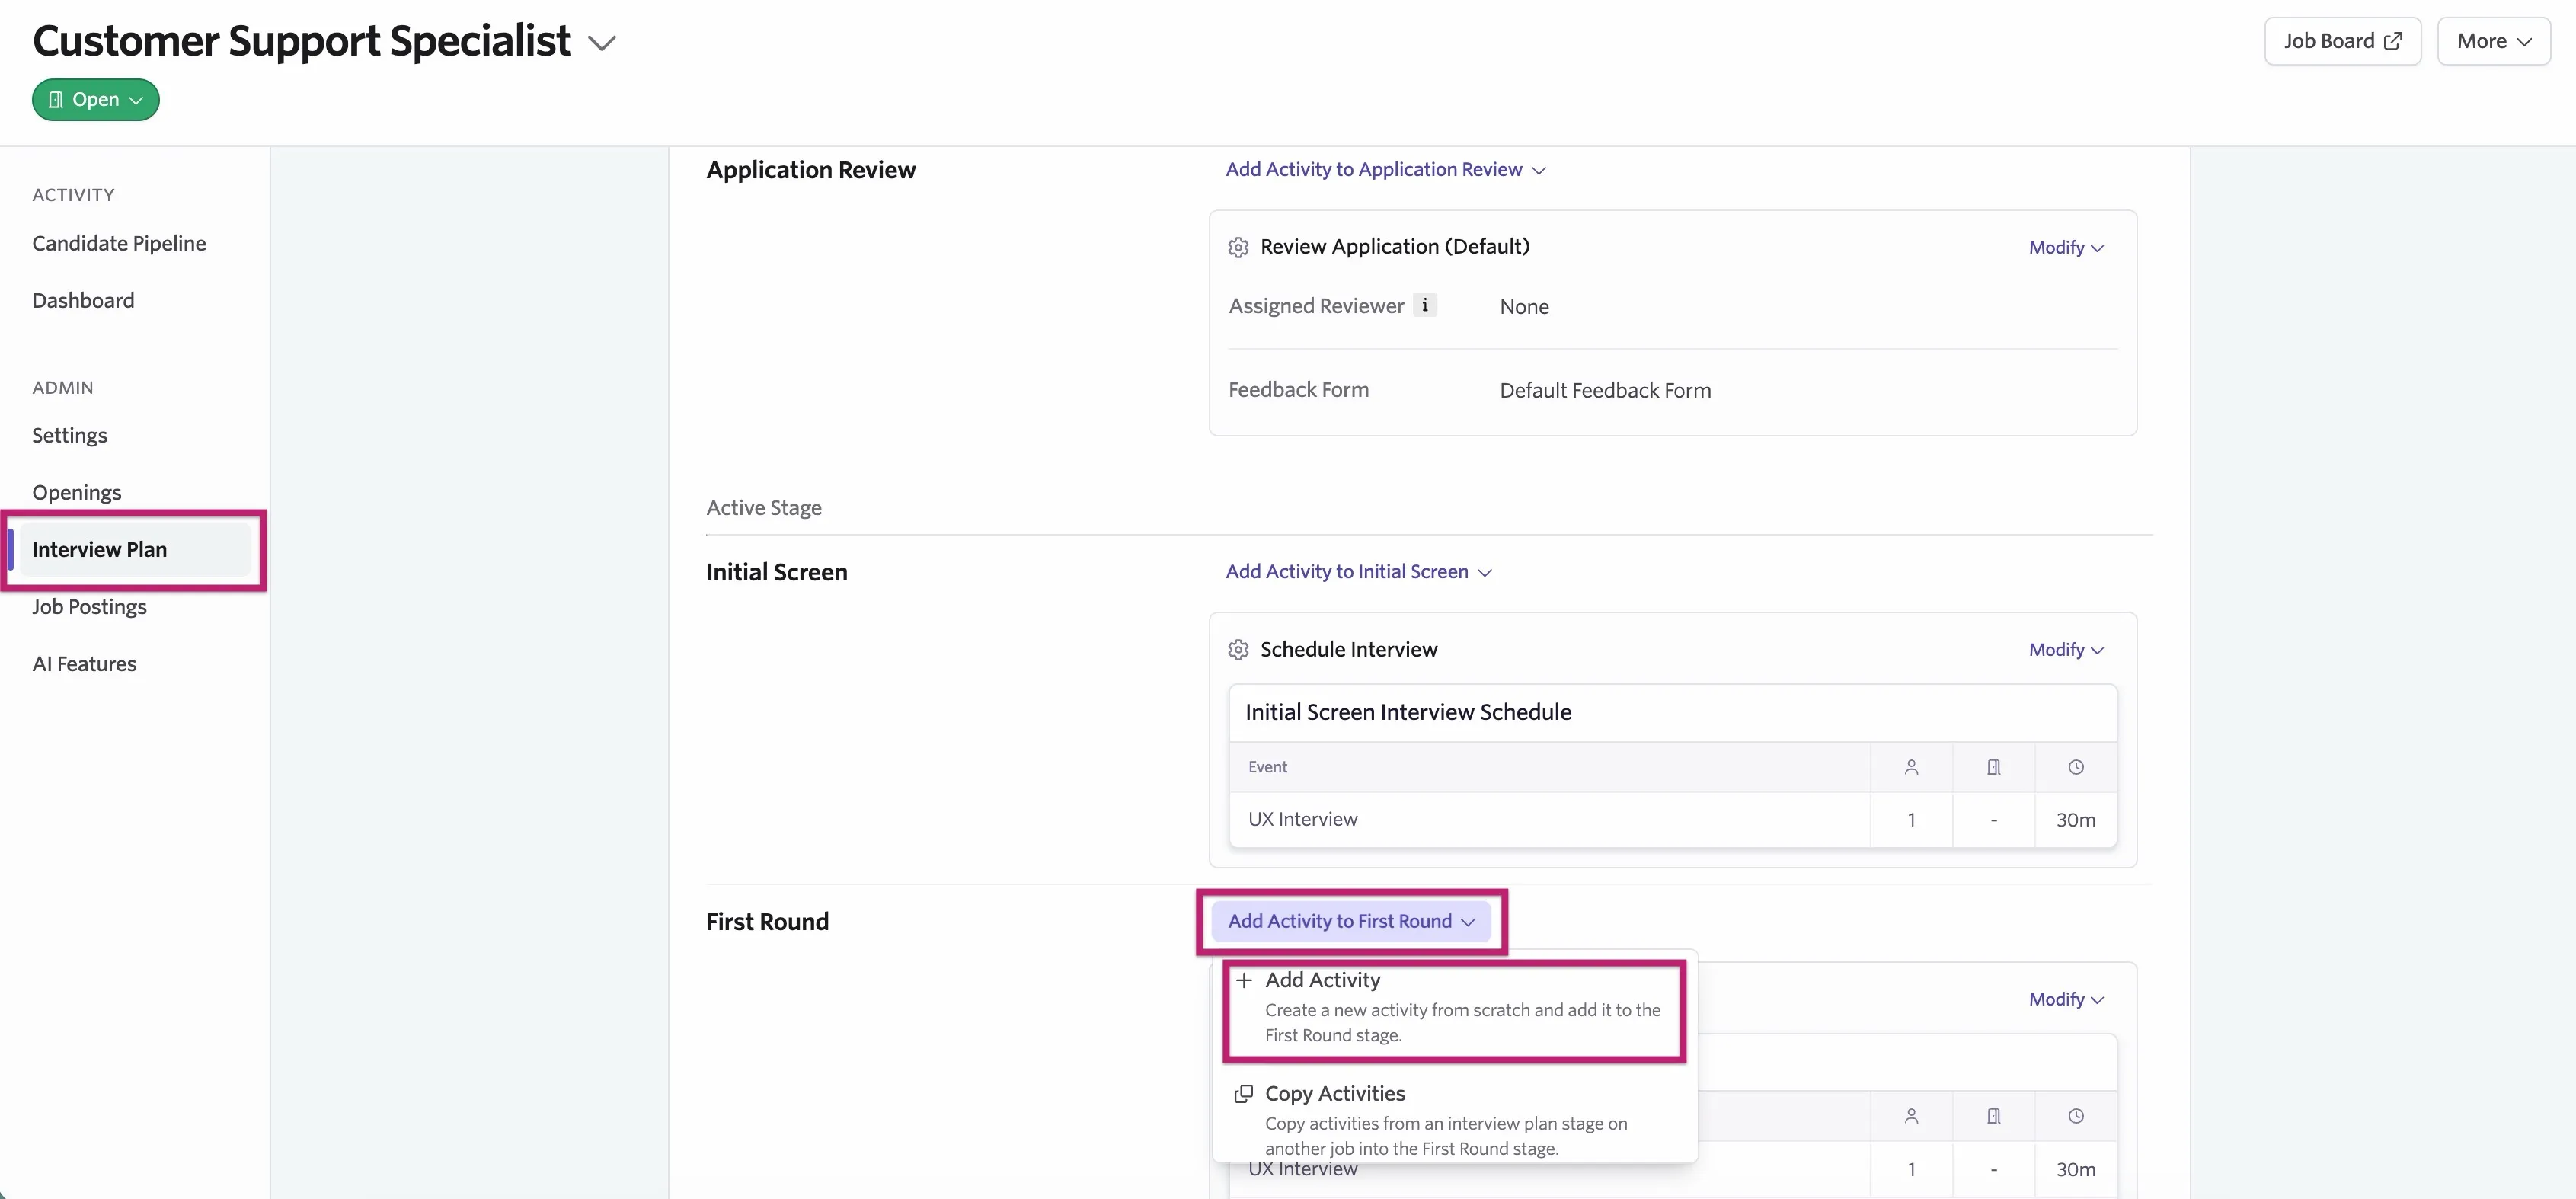
- Navigate to Jobs and select the job in question.
- Click the Interview Plan tab within the job.
- Scroll to the stage of the interview plan you want to add the activity to.
- Click + Add Activity To, then + Add Activity.
- Select E-Signature Document from the list and select the document template and the e-signature request template (optional).
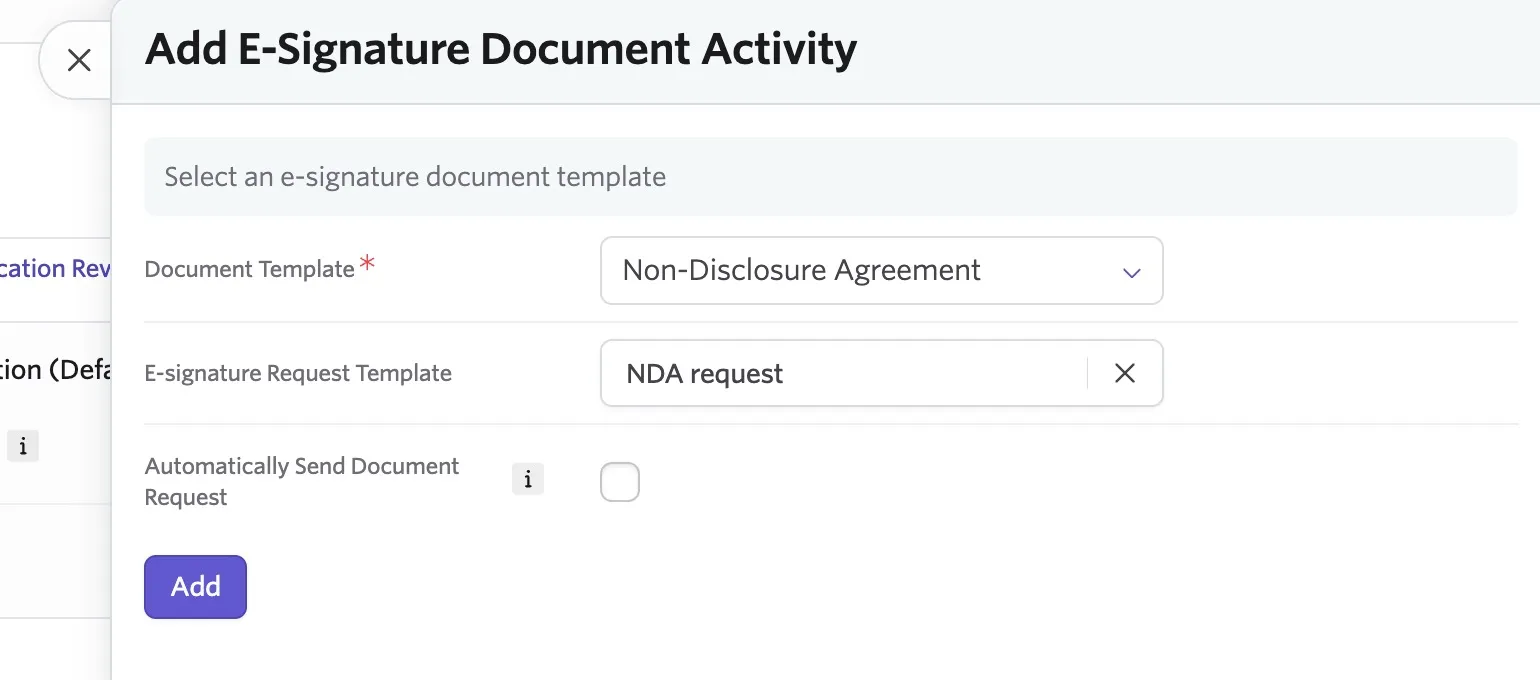
If you select a document template and an e-signature request template, you can check the Automatically Send Document Request checkbox to send the e-signature request automatically when the candidate moves to the stage the activity is in.
- Click Add to confirm.
Generate a one-off request for an e-signature document
You can generate one-off requests on a candidate profile. Use this option for individual candidates that need a request generated outside of the normal workflow.
Pending drafts do not update automatically: If you change an E-signature document template after creating a draft request on a candidate's profile, the draft retains the document configuration that was in place when it was created. To use the latest template settings, discard the existing draft and start the request again from scratch.
- To generate a one-off request, visit More > Send E-Signature Document on a candidate's profile.
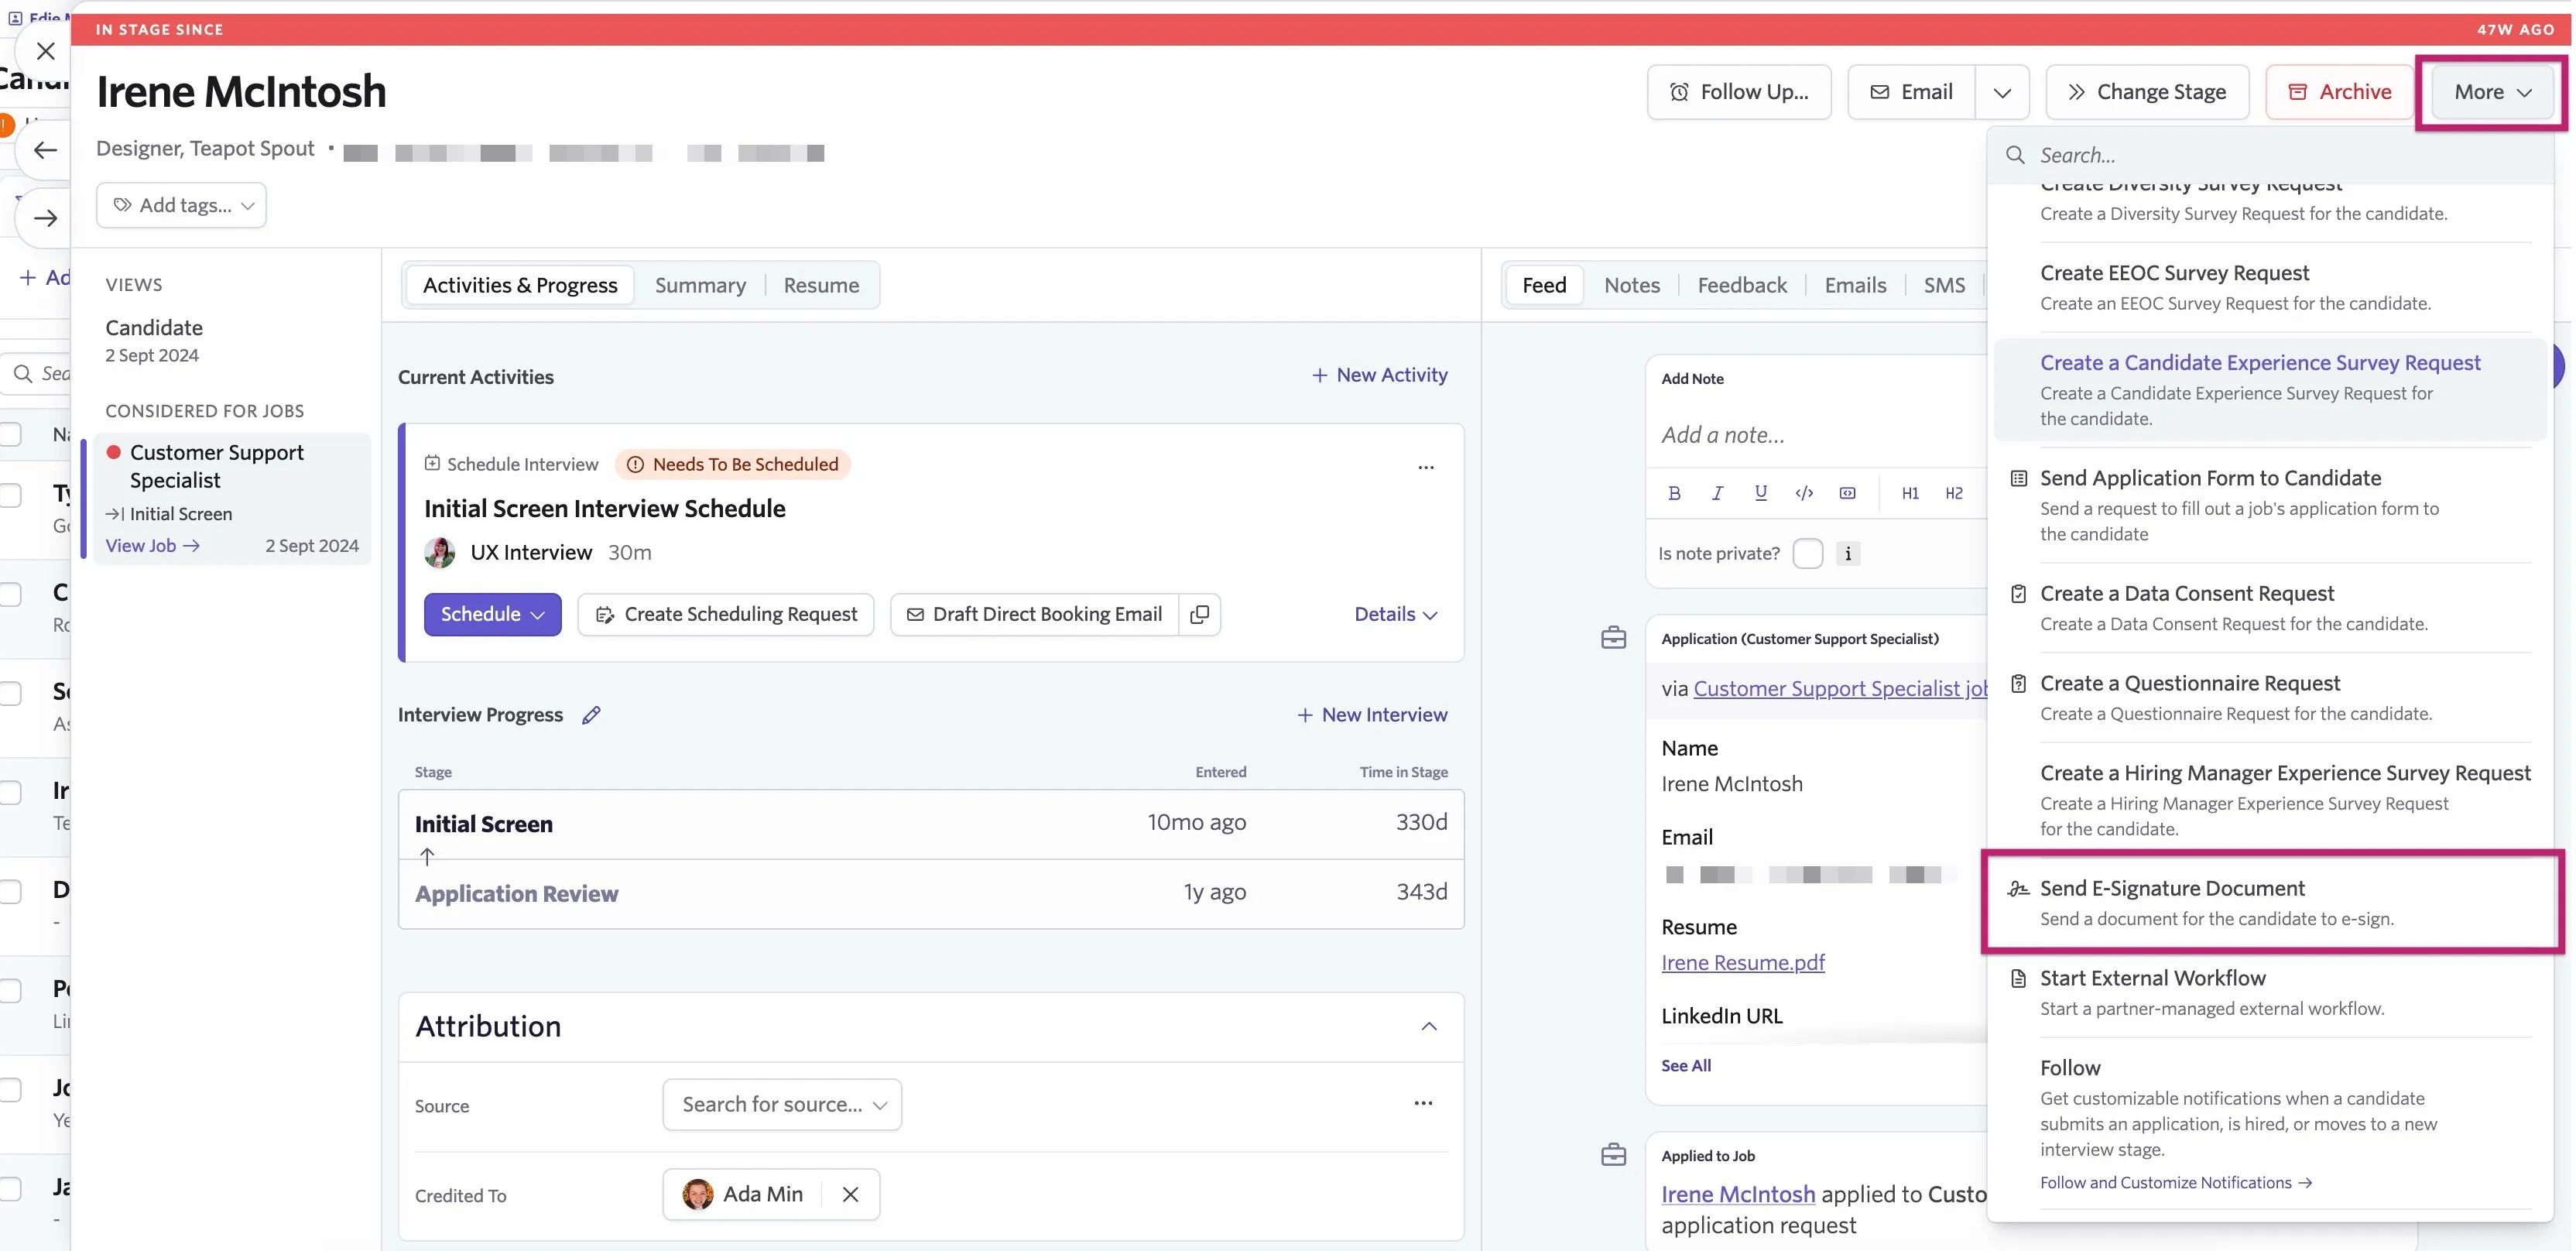
- Select the document you want to send from the dropdown menu.
- Determine the number, currency, and date formatting.
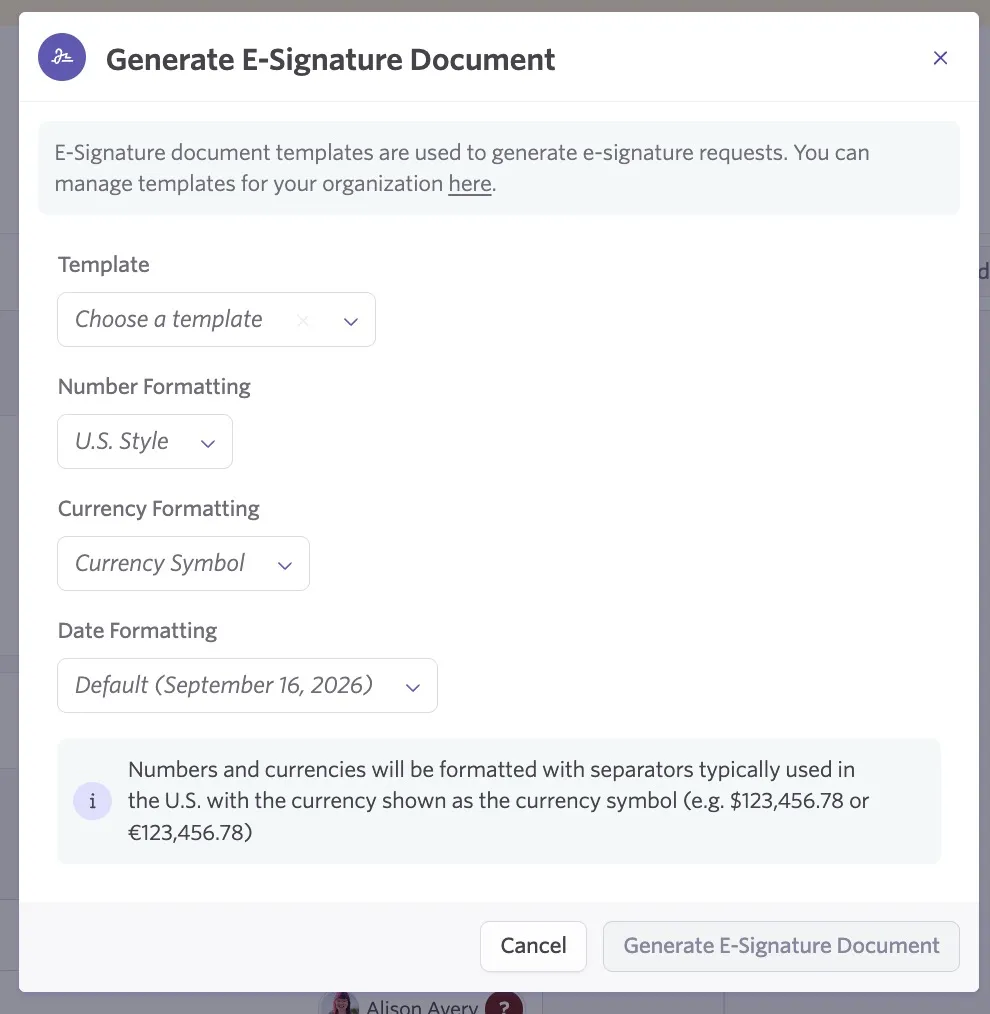
- Click Generate E-Signature Document.
- Once generated, fill out the e-signature request details.
Filling in e-signature request details
When you send an e-signature request, you must provide additional details beforehand, regardless of how the request reaches the candidate. You can either fill in the request details manually, or apply a pre-created e-signature request template that automatically fills in the request fields.
See Creating and Managing E-Signature Request TemplatesCreating and Managing E-Signature Request Templates for more information on creating e-signature request templates.
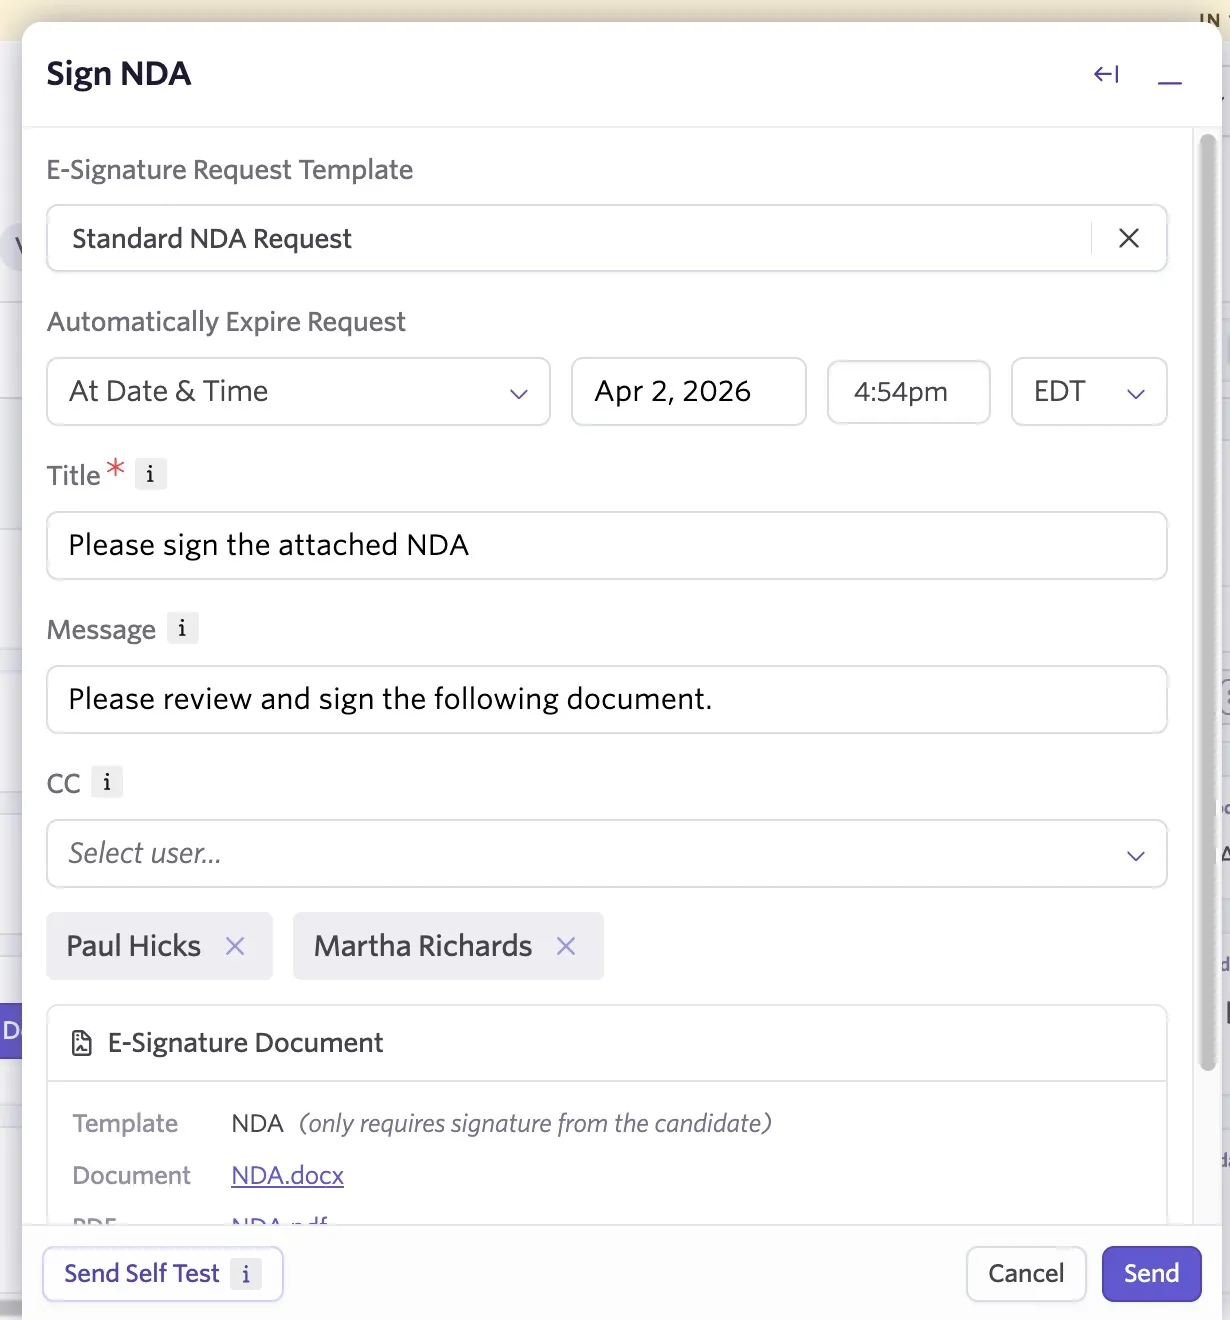
Fill in the following fields:
- Title: Becomes the subject of the email to the candidate.
- Message: Appears in the body text of the email sent by the e-signature provider and is visible to all recipients, including the candidate, any internal signers, and anyone CC'd on the request. Once the offer is sent, the message is not viewable on the candidate profile or elsewhere in the Ashby UI.
- Company signatory: The internal team member required to sign.
- Signing order: The order in which signers must sign, either a specific sequence or anyone can sign at any time.
- Expiration: The date the request expires. Choose a specific date, or set the request to never expire.
- CC: Any additional individuals you want to receive the email.
Signed e-signature documents
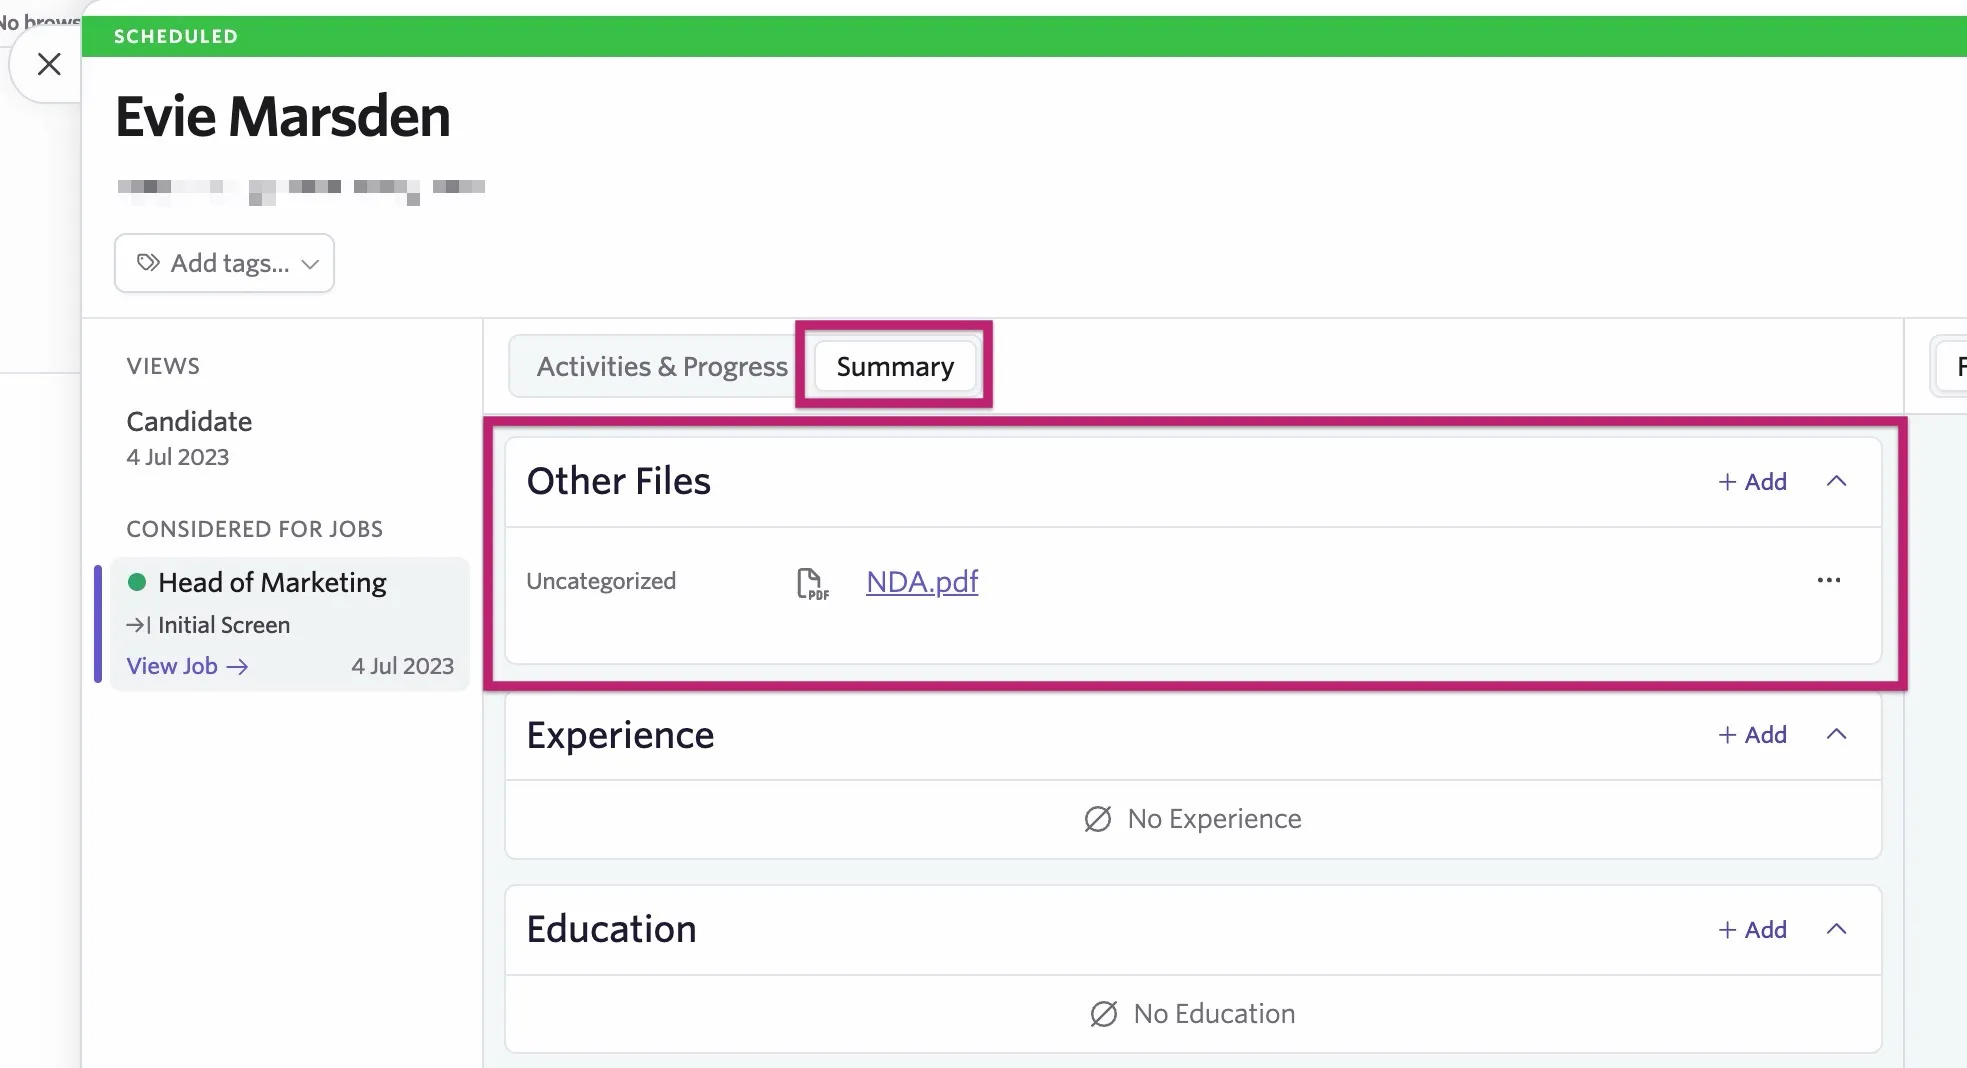
Once all parties sign a request, Ashby stores a copy of the file in the Other Files section of the Summary tab on the candidate's profile.
FAQs
Does Ashby have an NDA template we can use?
As an NDA is a legal document, we recommend reaching out to your legal counsel for appropriate NDA language.
Can I add multiple documents to one e-signature activity?
Adding multiple distinct documents to one e-signature document activity isn't currently supported (unlike for e-signature offers). Instead, we recommend either compiling all appropriate documents into one file or adding multiple activities.
Can I set an e-signature request to automatically expire?
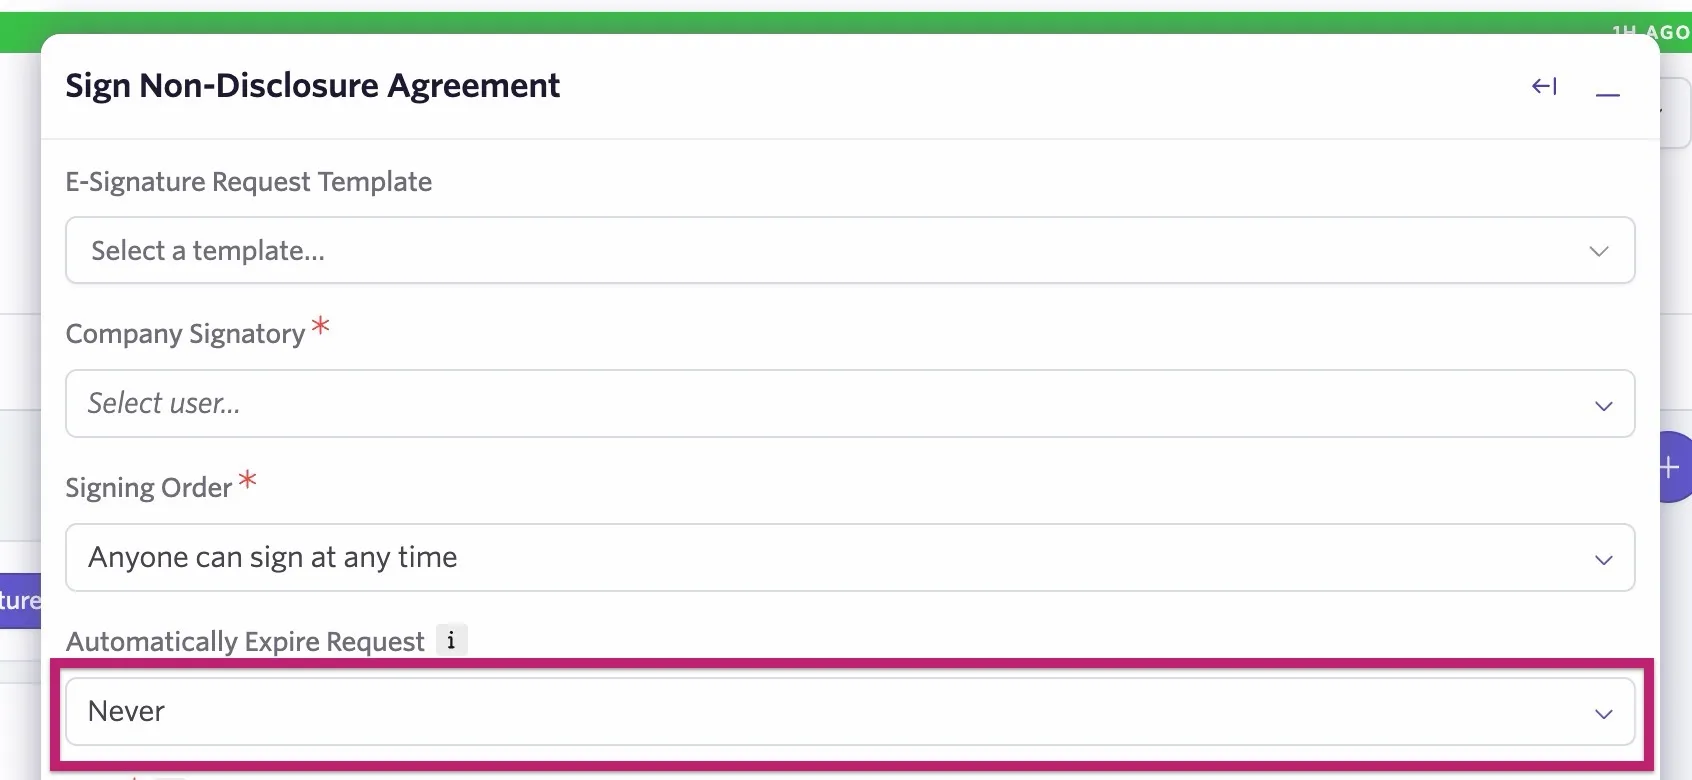
You can. Set this when you send the e-signature document to the candidate. Click Send E-Signature Request on the document activity on the candidate's profile. On the following screen, use the Automatically Expire Request dropdown to set an expiry date and time.
How do custom fields work with e-signature document tokens?
You can generate tokens to pull data from custom fields into your e-signature documents or offer letters. If you have multiple-choice custom fields in place, you can also customize the text substituted into your e-signature document based on the value chosen. For more on this, check out Custom FieldsCustom Fields.
What happens if an automated send fails for an e-signature document?
If you have configured automatic sending for an e-signature request and it fails, it can be for the following reasons:
- Missing fields
- Missing e-signature parameters
- Invalid template syntax
Ashby will fall back to creating the activity for manual sending in these cases. Click on the activity to open it and view further information about the send failure.
Can I add text input fields to e-signature documents?
E-Signature text input tokens can be used for e-signature documents generated via Dropbox Sign or Docusign.
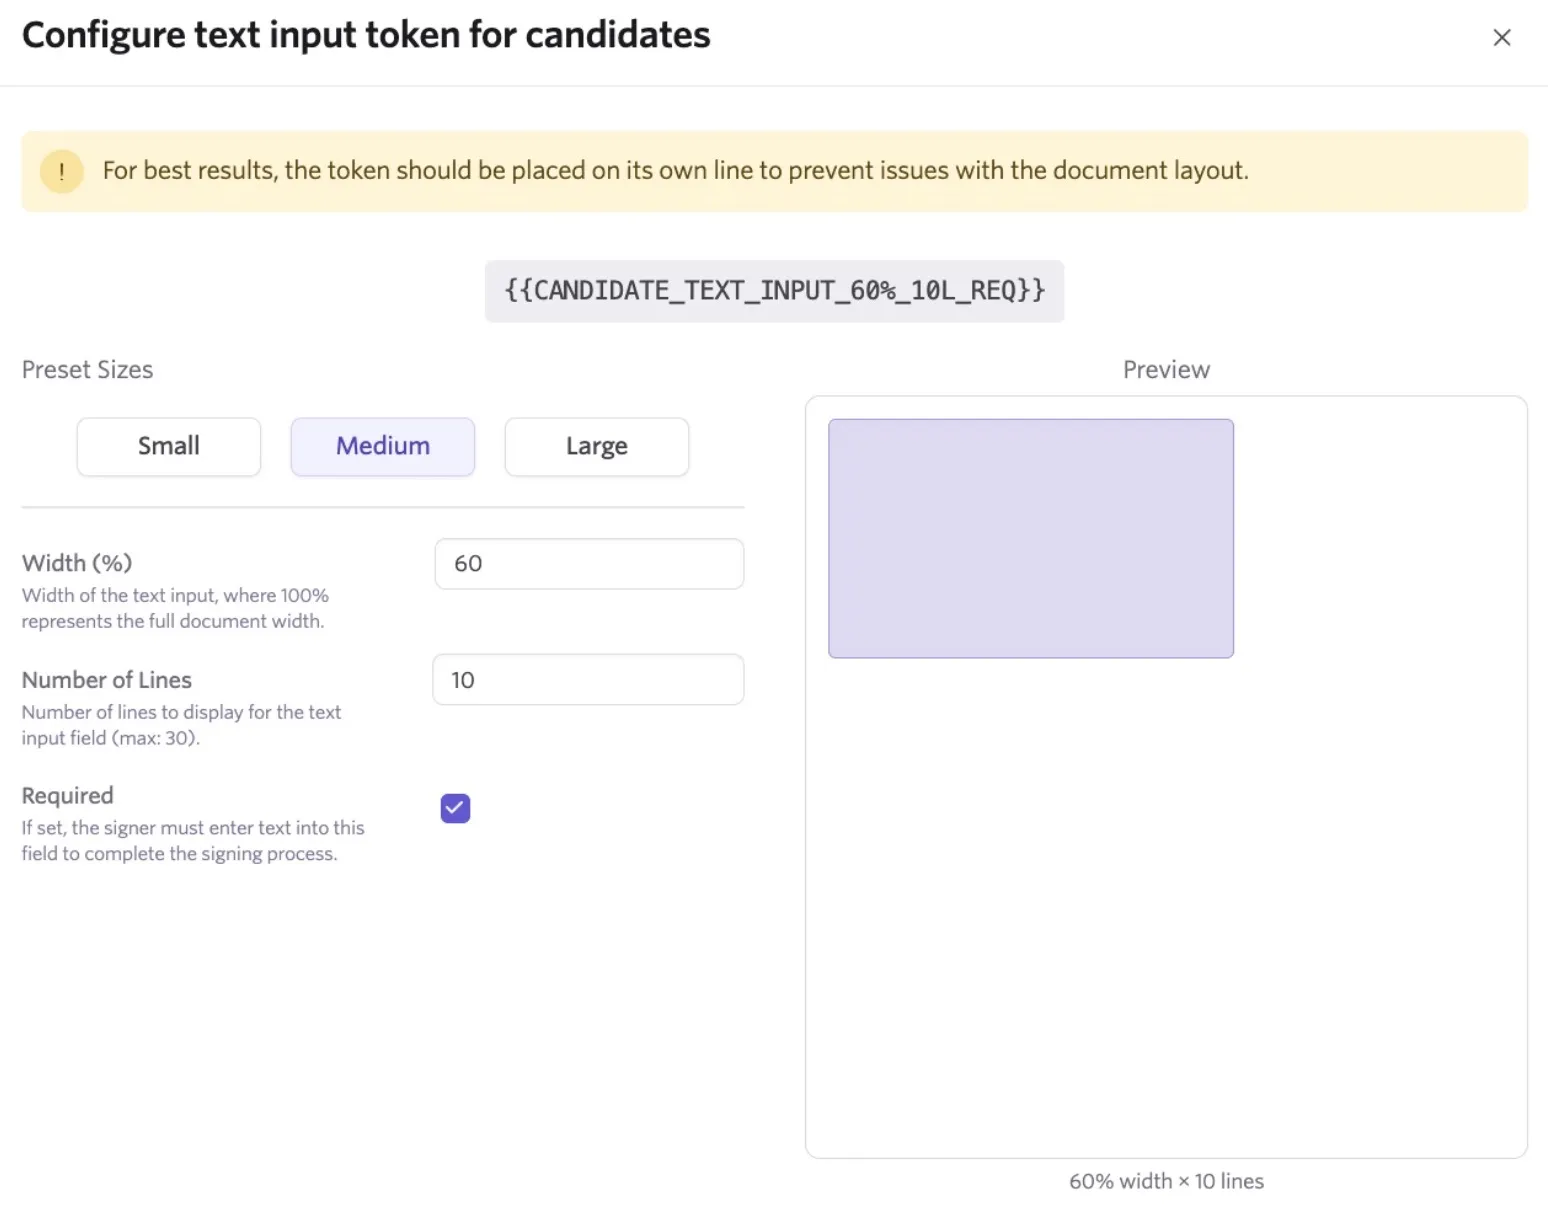
If you want to add text fields into your offer letters so the candidate or the company signatory can fill out additional information within the offer itself, copy and paste the following tokens into your template:
{{CANDIDATE_TEXT_INPUT}} This text input field provides the candidate a field to add additional text.
{{COMPANY_TEXT_INPUT}} This text input field provides the company signatory a field to add additional text.
When you click the token on the E-Signature Document Tokens tab, select the field size, either from a preset size or by setting the width and number of lines. You can also check the Required checkbox to require the signer to complete the field as part of the signing process.
Can I adjust the formatting of numbers, dates, and currencies on my offer letters and e-signature documents?
You can choose between US-style formatting and European-style formatting for numbers, and specify currency formatting for offer letters, e-signature offers, and documents. Navigate to Admin > Offers and click the Settings tab to determine your offer settings. Alternatively, head to Admin > Integrations > E-Signature Documents and click the Settings tab to configure your e-signature document settings.
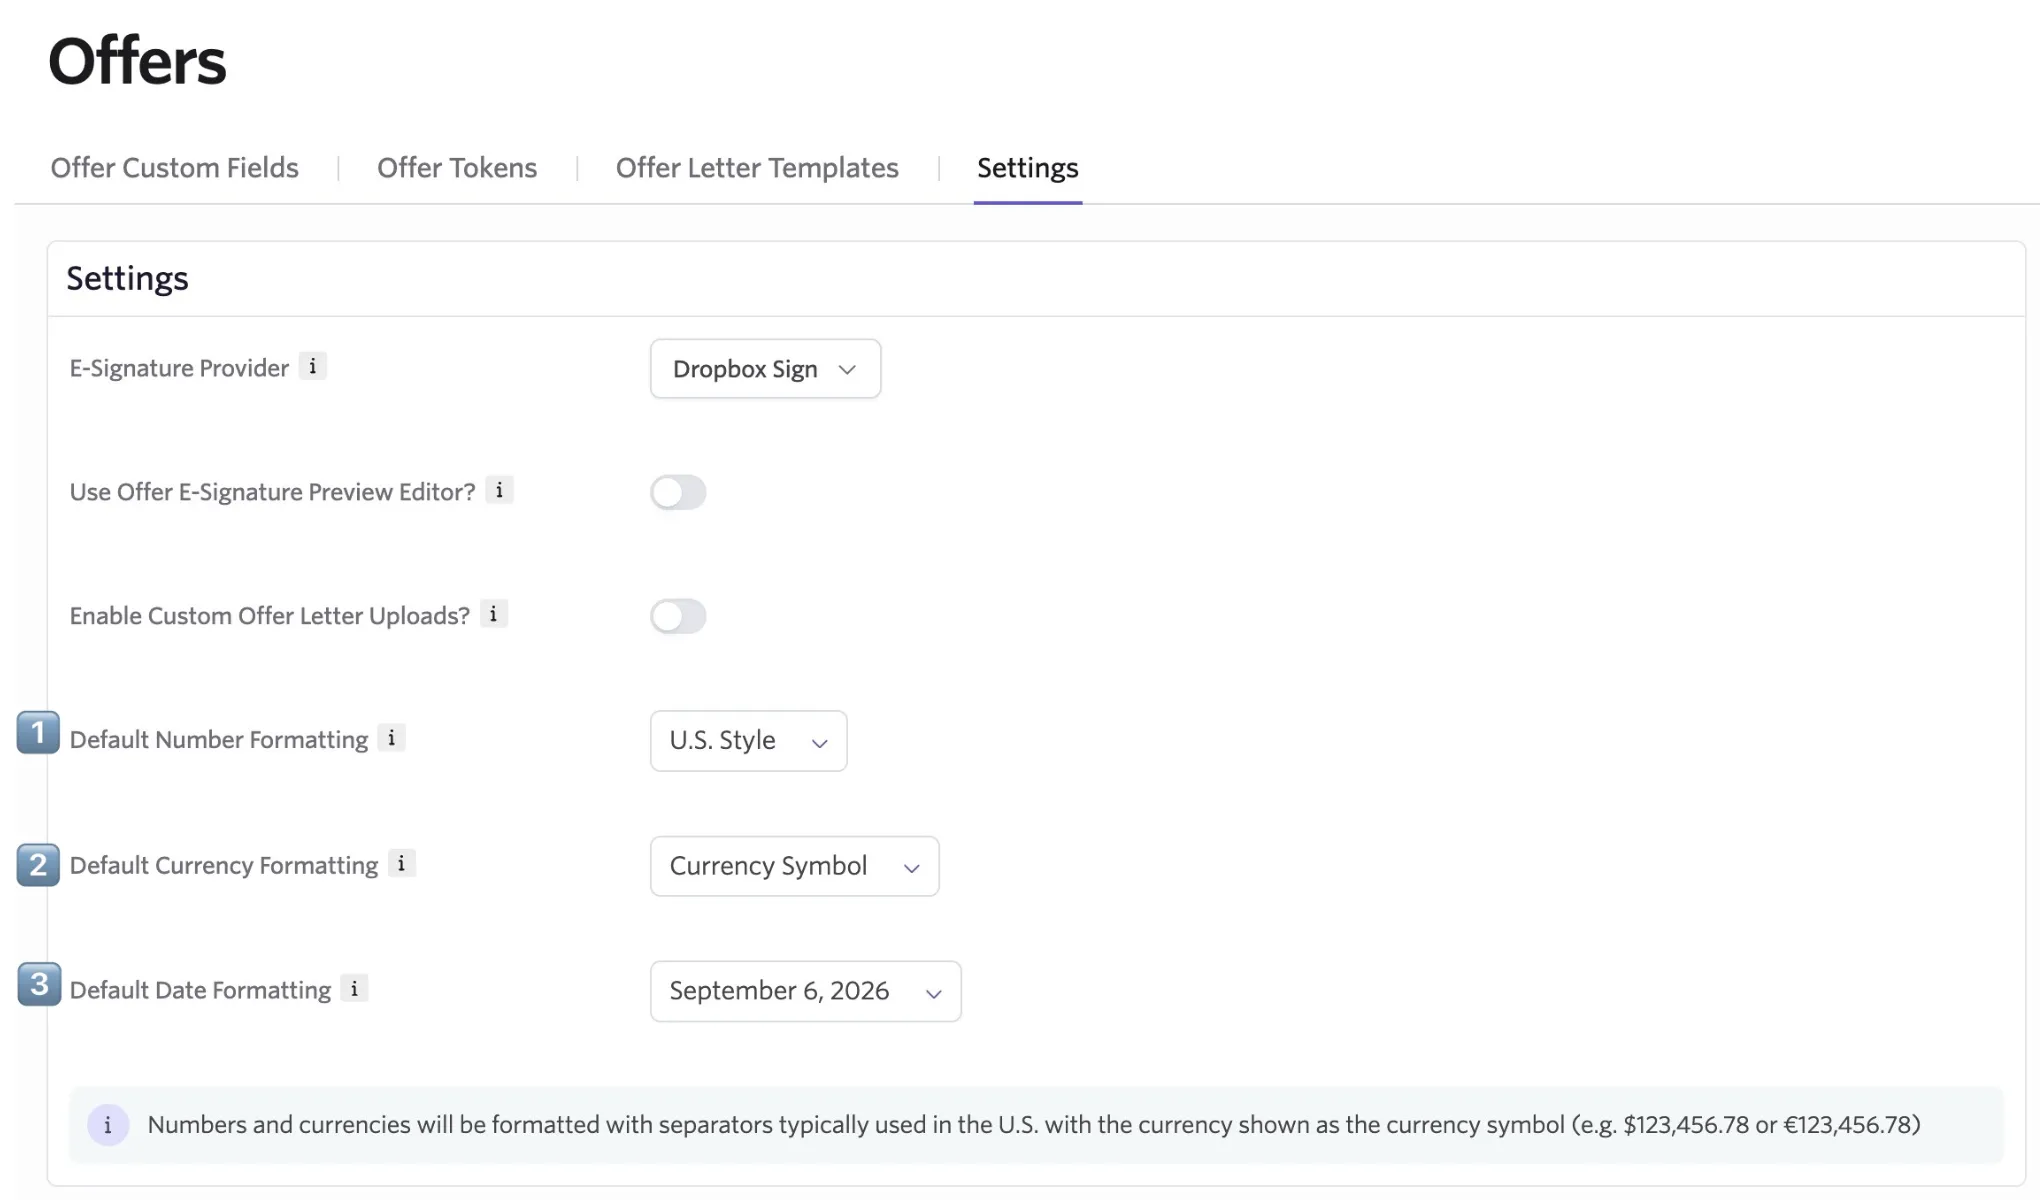
- Default number formatting: Choose whether numbers display in European or US style.
- Default currency formatting: Choose whether currency displays as a symbol ($) or a country code (USD).
- Default date formatting: Select your preferred date display format from the dropdown list.
You can also override the default number, currency, and date settings when generating offer letters.
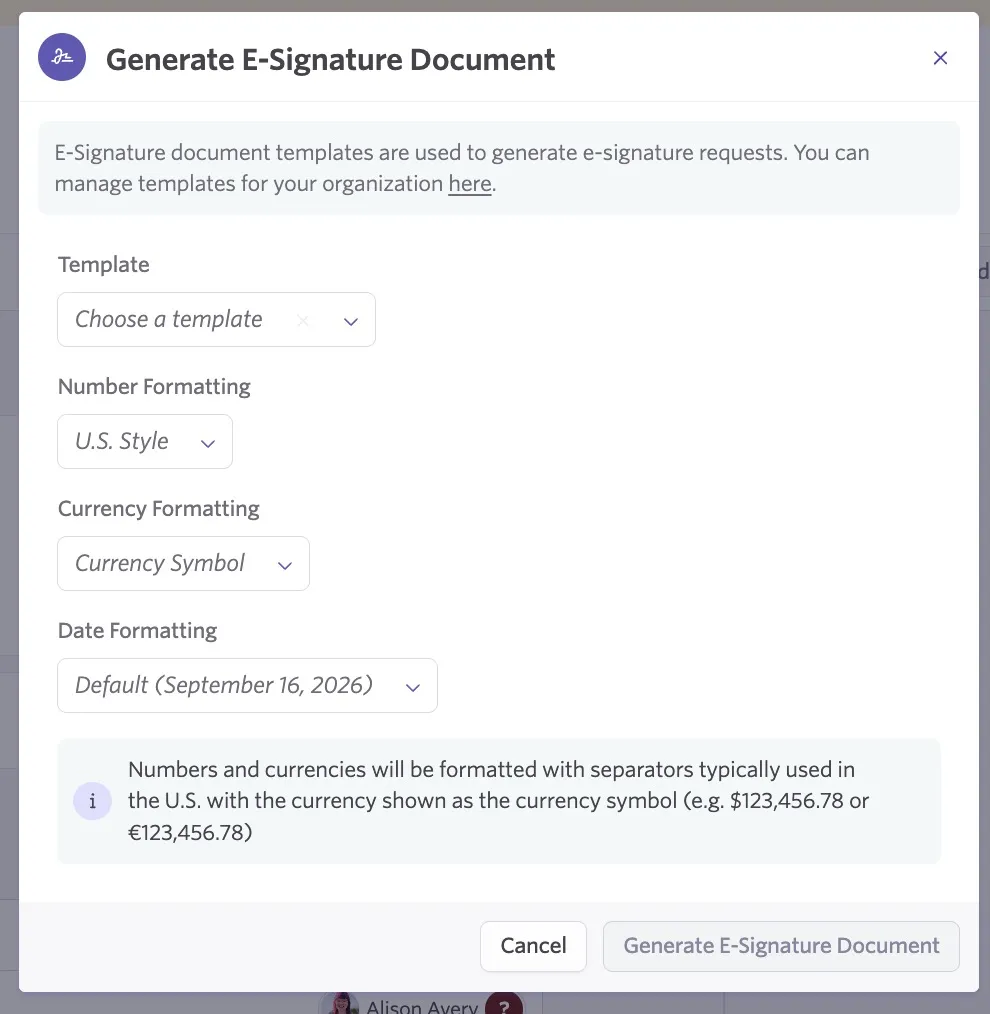
If you override the number or currency settings when creating an offer, other e-signature documents added to the same packet inherit the same setting. If you don't override the default setting, the global default applies to e-signature documents.